As we learned using 3d vegetations and trees components in Sketchup could bring great results, but slow down the rendering process and overall workflow quite a bit. Often times we need a good result in a reasonable time frame. Here the Sketchup faceme components are ideal to use for trees. The genereal idea is to use a cutout tree image that is mapped on a plane which can be placed in your scenery like a billboard. Why “faceme component”? Because you can define that this plane should always face the camera! This is great because now you do not have to make sure that all the trees you use are aligned to the active camera!
In this tutorial we are going to learn how to use 2d vegetation images as faceme components in sketchup – a must for everybody who is interested in architecture visualization in Sketchup.
2D tree Sketchup components
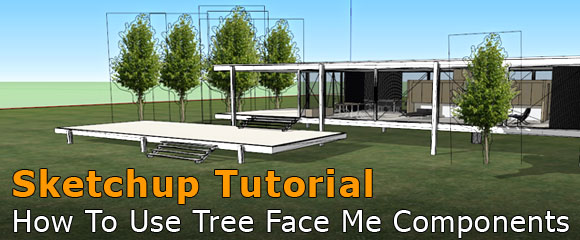
You can use plugins to create 3d vegetations in Sketchup like in this example:
On the other hand 2D vegetation allows us to create beautiful scenes with less RAM consumption. But notice that this only works for 3D Renderings. Animations with 2D vegetation seem like a sin for most designers, as the effect of working with plane 2D image is really obvious when you are rotating the camera view while you move.
In 3D renderings we face another story. 2D vegetation can also reinforce that kind of “instant” effect that we may want for our renderings, as if we took a shot from a distant point of the scene itself, and also tend to not drag as much attention as high detailed 3D models (this of course if the 2D vegetation files are properly used), and also can be used to create unrealistic render-styles; often commonly used in Site Planning renders or even for concept idea renders as they take only 1/10 percent of the time 3D vegetation takes to render.
Choose high quality cutout trees for faceme component
About 70% of the final result of the image, in the case of 2D vegetation, is how well we manage to use the tree textures and how to place them, in order to not feel affected if we want to rotate the camera for taking another angle still shot of the scene.
First of all, 2D vegetation MUST be a high-quality cutout version of a tree/plant for applying it to our scene. Why? The answer can be a one-worded one: Shadows.
When working with 2D vegetation, shadows are an issue. If the model is not detailed enough, then it will lack of the realistic feel of grass leaves casting shadow over the floor and reflecting at the glass planes of our project. Of course if you are not working with photorealistic scenes that is not an issue, quite the contraire.
For scenes where you only want to transmit the idea of how to live that “space”, making a high detailed render can be a huge mistake. Detail level in photorealistic renderings can only drag the user attention form the concept of the project to the graphic results of the project made, and that can really damage the project if we fail to crate photorealistic graphics, as it will end up looking as something we didn’t care enough about in order to present such results.
On the other hand, when the scene almost resembles a toon with some detailed areas, it drags the user attention to the focused points, as an invitation with the efficiency of infographics to learn more about the project rather than to disagree in a first place with the project purposed.
How and where to find 2D cutout trees for Sketchup?
Now that you decided you want to work with 2D trees you may ask yourself: “okay, where do I find them?” There are several places, but please take into notice this things first:
- Cutout trees must be PNG images
They need to have transparency, otherwise they will render with white background around and that is completely the opposite to realistic - Reduce the cutout tree image size to your special needs
If you use several files at the same archive it will only increase the file size and may create problems at rendering like crashing out of RAM - Try to look for good quality 2D trees
Good quality of leaves, of overall detail. Mostly if the trees are going to be a good part of your project
If you need some free high quality cutout tree or plant images to test just grab our free Open ArchViz Pack, where you can find many cutout trees and plants for free. You are even allowed to use these trees and textures for architecture visualization for your commercial projects!

What are Sketchup face-me objects?
One smart way to work with 2D vegetation in Sketchup is via creating Face-Me Components. But what does that mean and how to achieve it?
Face-Me components are objects that we create via Components in Sketchup, and its more versatile attribute is that they move along with the camera, meaning that wherever we place the camera they are going to be facing us.
This property is extremely useful in renderings, because it tends to happen when we do a render that we ask ourselves: and what if I render the scene from the other side? If it weren’t for Face-Me components, the 2d vegetation would look as a line or a plane without any detail.
Now let’s start creating our Face-Me tree in Sketchup
How to create a free tree face-me Sketchup component?
First I am going to select a cutout vegetation file in order to use it as our Face-Me component
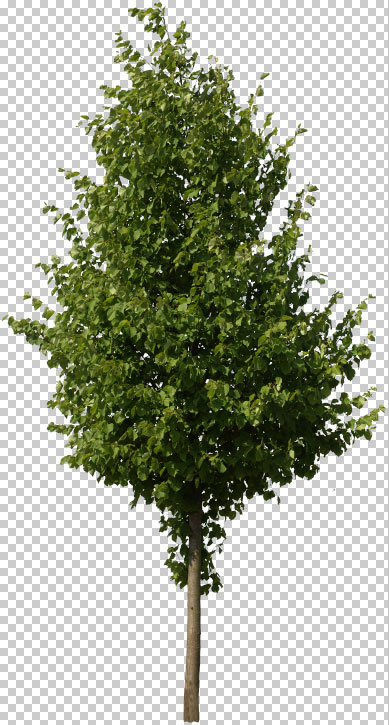
I will use the “CutoutTree_Vol.02_42.png” file from our free Open ArchViz package for this sketchup components tutorial which you can download for free!
Then, after choosing which file is going to be our Face-Me model, I can start working within Sketchup.
As this is going to be a render with 2D trees, I prefer to work with 2D grass, in order to avoid giving the trees that sort of “flat” look in comparison with 3D grass.
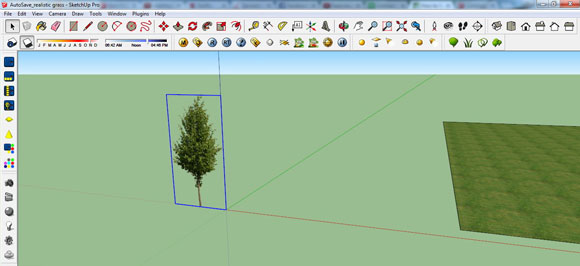
First import the cutout tree as an image. Adjust the scale of the tree and position it wherever you want in relation to the axis.
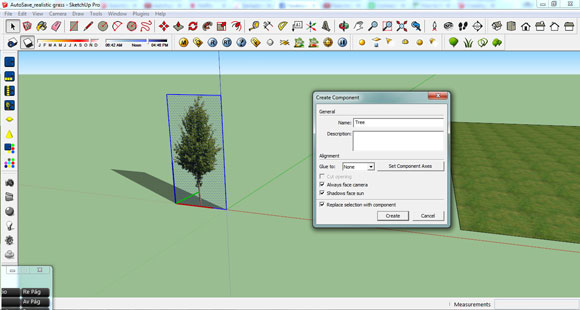
Then we right-click the object and apply the Explode option. This way we can then select it and create a new component from the image.
Select the image and create a component from it. Remember to tick the option “Always Face Camera”
How to create realistic shadow for 2d tree face-me components?
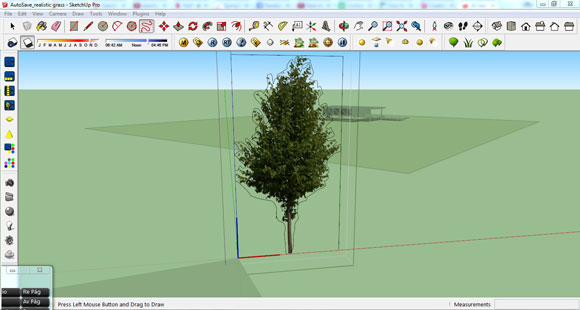
And… if you have the shadows visible you will notice a problem… the shadow itself.
Why is this? Well maybe the tree texture doesn’t have a proper alpha channel applied while it was saved and that is the reason why it casts like it. This also happens with JPEG images which doesn’t have any alpha channel. Either way, it can be fixed two ways:
- Right click. Edit Component
With the freehand draw tool, draw a figure around the tree and with right-click + erase, delete the unwanted areas. It may not be a perfect shadow figure but it works well - Open the image in Photoshop and ensure that only the background pixels of the image have transparency set (flatten the image, re-add an alpha layer and select then erase the background); open the Image flat in an empty model and use ImageTrimmer to make the cutout automatically.
For this tutorial, I am sticking with the first method. And this is the result
There is also a good video tutorial about creating shadows for faceme component in Sketchup:
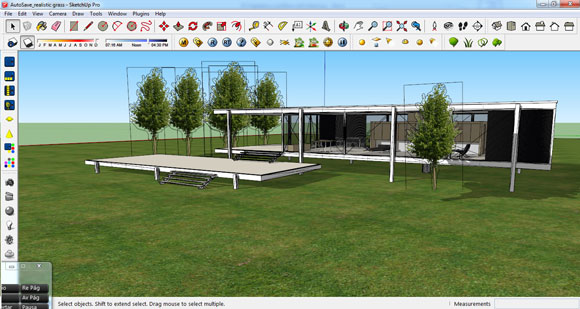
Now it’s time to place the tree and make copies of it in our scene.
Rendering architecture scenery with 2d cutout tree components
Now I placed the trees with my model and placed a camera view. One thing to notice prior rendering is that 2D trees may take a bit longer to load in the rendering engine in comparison with 3D trees, but while rendering they do the task faster. It can be an issue if you place several trees as Sketchup may go out of RAM trying to load all elements.
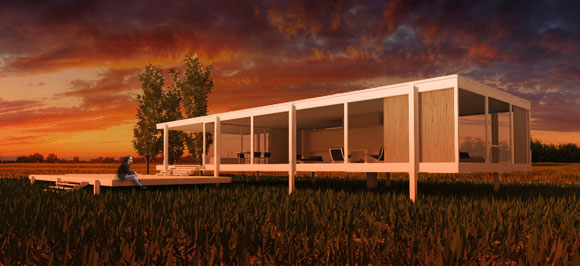
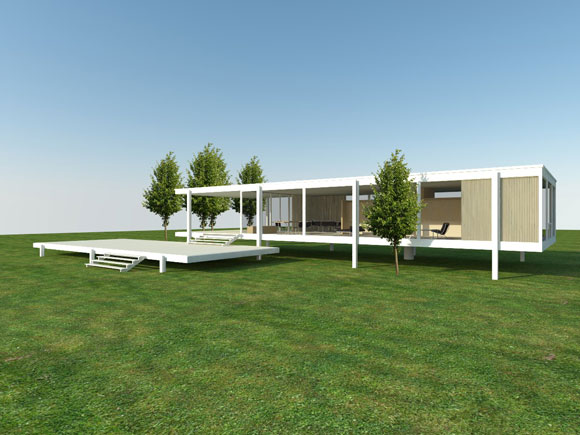
And this is what we get as a result after rendering
Pretty nice, huh?
If you don’t mind losing a bit of detail in the casted shadows, it’s a really good alternative to 3D models, as they render faster and the possibilities are infinite: just as long as you take the job to find a good image, make an alpha channel and do the steps I mentioned above, you can even have a bigger library than with 3D models.
Also keep in mind that you can make your own trees via hand draw and prepare them as cutout trees. If you scan the images, then maybe it is a bit harder to make the cutout, but after it’s made, you can then, for example, adjust the style of the scene to a sketchy-looking view and then add hand drawn trees in black and white. The result will be almost as if the render was handmade, which is always helpful as another way of showing our work.
If you liked this tutorial you might also check out our tutorial How to Create a Quick Architecture Section Drawing in Sketchup and Photoshop here!


Leave a Reply