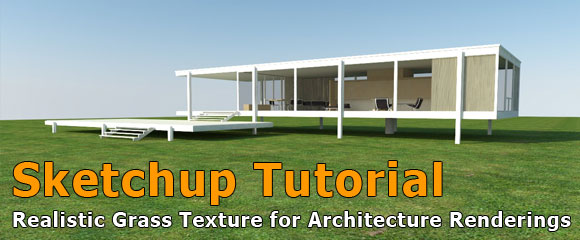
When talking about photorealistic architecture renderings, one of the key elements is the use of vegetation – simply to bring life your scenery… In this Sketchup tutorial I am going to show you how to create a quite realistic grass rendering in Sketchup with the help of a good texture. So I do not use fancy fur plugins or other rather complex solutions (that without a doubt create very good results) but rather follow on a quick and easy apporach here to not at least present a solution with reasonable overall project and rendering time.
Finding realistic grass texture for rendering
If you are wondering where to start, a good way is to check your material library in order to have the proper grass textures for the render works.
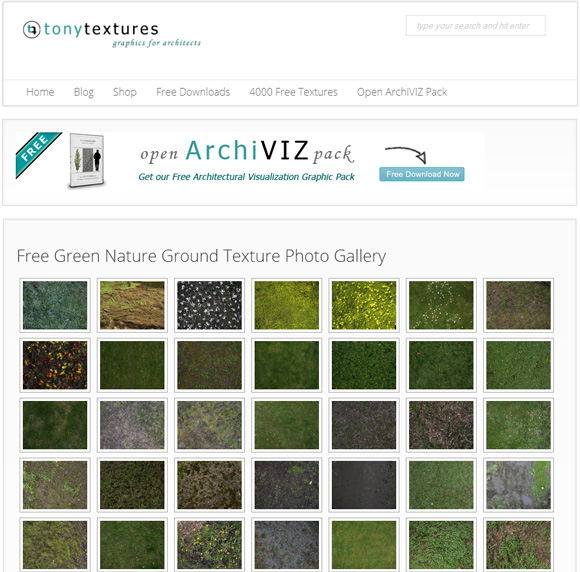
At our free tonytextures texture gallery you will find plenty of good grass textures for you to choose:
What you need to keep in mind is that textures don’t need to be as big as 2mb files. Just with a normal size texture (around 800 kb) is more than enough. Why? Because big size textures will only add more “weight” to your scene; and that can be annoying especially if you have too many polygons at your scene for rendering. Sometimes using a big size texture can only bring you a headache, and mostly because it will look out of scale and you will lose time in adjusting its scale for adapting the texture for your work. You simply do only need a large texture if your camera will be very (I mean very very) close to the textured material..
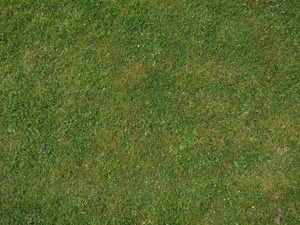
For the next steps of this tutorial I am going to work with this texture below found at tonytextures. It is quite even without too many different looks over the area, but looks realistic – all in all a very good texture to use for architecture renderings etc. By the way: You are free to use exactly this one also for your projects (even commercial) so make sure to check out our extensive photo texture libary.
As you can see, the file size of this grass texture we can use in Sketchup is 707 kb! Totally OK for our use!
Starting with our Sketchup Grass Scenery
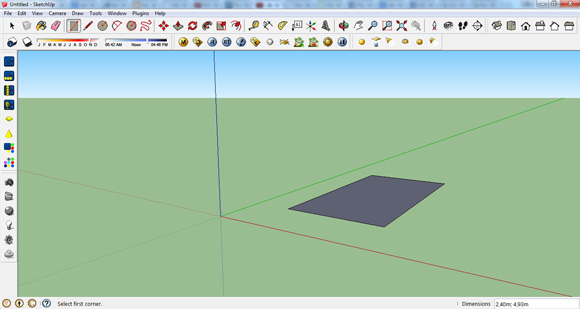
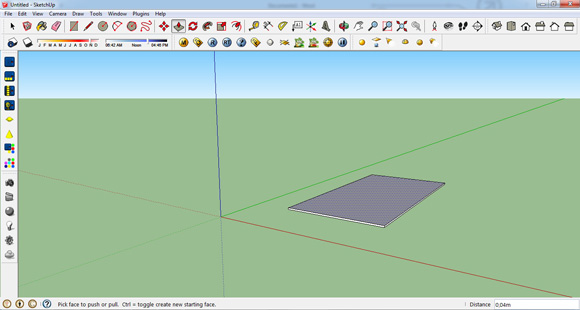
Let’s open Sketchup and create a plane for applying the texture. For this tutorial I am using Sketchup Pro 2013 + Vray 2.0
After creating the plane, let’s extrude it a little bit. This way, when the material is applied, it would look like as a grass-carpet.
Give the height you feel comfortable with. But notice it needs to be in proper proportions to the other geometry of your model, otherwise it won’t give that “real feeling”.
Assigning Realistic Grass Texture to the Ground Plane
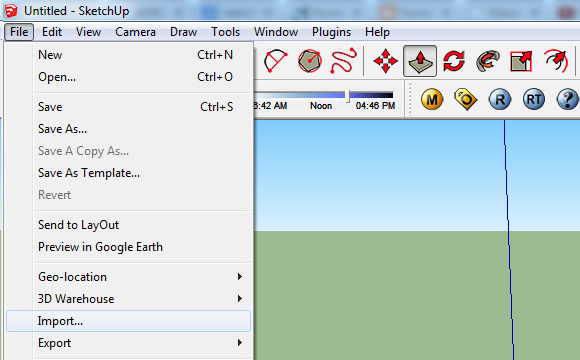
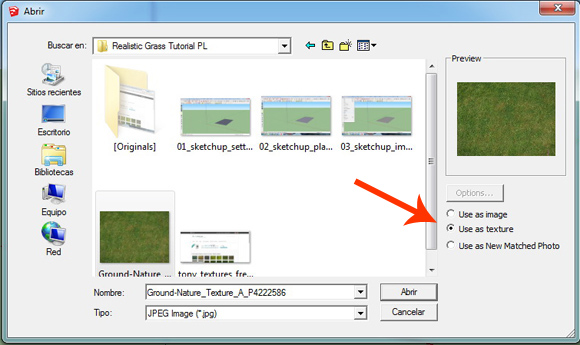
First we will open the texture for using it in our model. We go to File>Import and retrieve the location of the texture file. It is very important that you remember to tick the option “Use as a texture” before loading it into the scene.
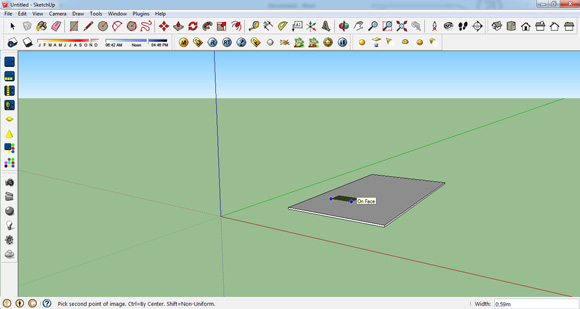
After selecting that option and loading the texture, you will notice that the texture will show up as an image in the viewport, allowing you to click wherever you want to apply it. But… surprise! After clicking the mouse is going to work into the scale mode for the texture; something that can be really important for tiled textures, which in this case is not something to worry about.
Give it a small scale as I show in the next image, and then click again. That will apply the texture to that very face.
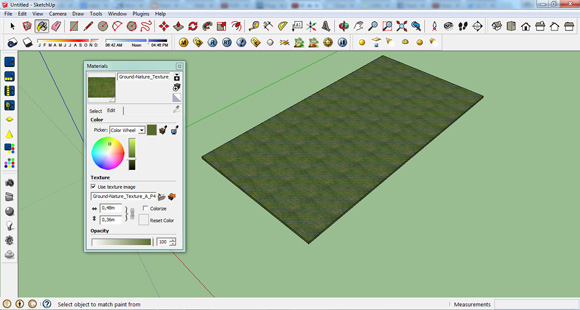
As you can see in the image below, I also applied the texture to the other faces of the extruded plane. You can retrieve the texture by using the native material editor of Sketchup (the paint bucket tool) and click the eyedrop tool for getting the material to the editor.
Also you can adjust the size of the texture. This is the trickiest part of the whole work! For me, a good way of looking if a texture is out of scale, mostly with grass textures, is zooming in and checking the size of the grass itself. If it looks too big for the plane, then reduce the size of the texture. In most cases, unfortunately you will realize your texture is either too small or too big while rendering (yeah, it sucks, but Sketchup viewport doesn’t always shows what the end result will be).
If you want, you can change the hue of the texture itself in this material editor, as well as the texture opacity. In this case it won’t be needed.
Use the Vray Material Editor for rendering grass
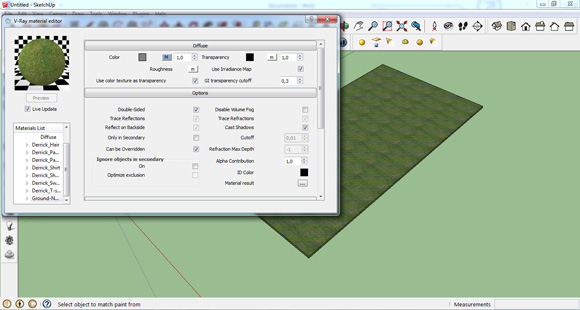
Next I will open the Vray Material Editor.
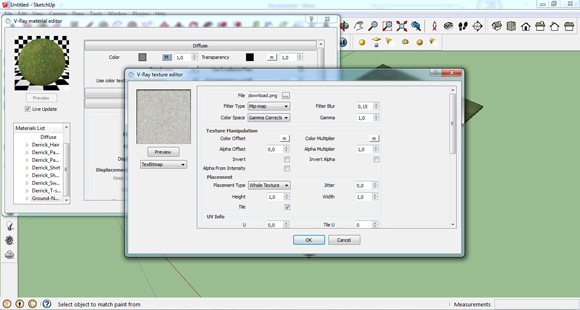
After selecting the material we are going to work with, I ticked both Preview and Live Update for looking the material appearance while making changes to it
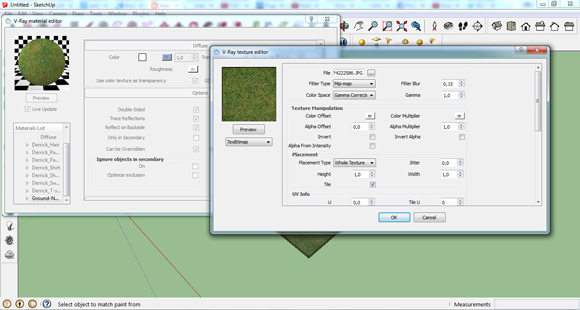
When clicking at the “M” next to the diffuse color slot it will show the options for the loaded texture. This is helpful if you don’t feel comfortable with the texture you chose, and you want to replace it, or if you want to alter the Blur or Gamma values of the texture. For this tutorial I won’t alter any of this default values.
The OPTIONS tab can be hidden by now for working more fluently. Now it’s time to add some Bump to the material we are creating.
Adding a Grass Bump Map
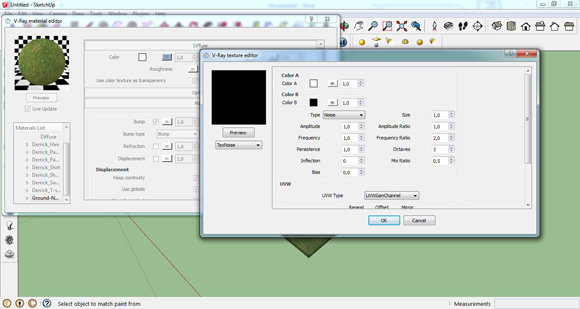
For the bump map I am going to create a blend map of noise.
The elements necessary for this blend map is:
- A Noise map
- A Bitmap texture of noise
The parameters for the noise map are the following
- Type: TexNoise (Noise for older versions of Vray)
- Amplitude: 6
- Size: 25
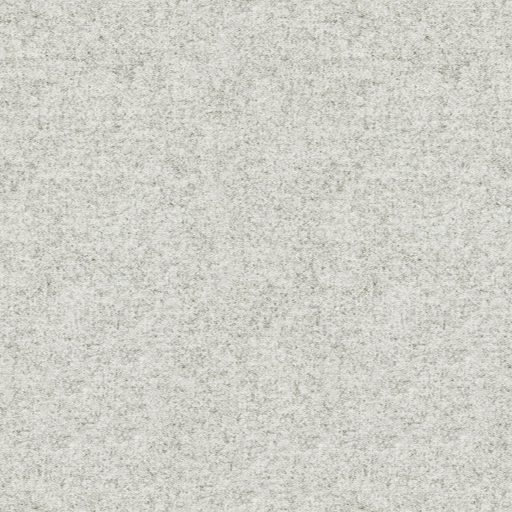
As for the bitmap is just using TexBitmap in the 2nd material slot of the Blend Material. In my case I will use this noise texture:
Add a grass displacement map
Next we need to add displacement for this material. A displacement map will deform the textured object based on the greyscale information of your displacement map. A good way to add a 3D touch to a flat object.
One important thing before following: If your PC is not a high-powered build then skip this step. Displacement can give a realistic feel but it REALLY increases rendering time. Given the size of your scene and the area where the texture with displacement is applied, you can notice differences of more than 5 minutes in common quality rendering time. Not to mention if you are using high quality settings or if there are already another or many other materials with displacement in their composition.
For the displacement, we are going to do the same as with the Bump map. A blend material, although this time we won’t use a texture, just the blend of two noise maps with different values.
First material in blend:
- TexNoise map
- Amplitude: 1
- Size: 25
Second material in blend:
- TexNoise map
- Amplitude: 1
- Size: 0,05
After creating this material it is time to adjust the values for both Bump and Displacement multipliers. This part is entirely up to you, I am going to give the Bump multiplier a value of 1,5 and the Displacement a value of 5,0.
Checking result of our grass rendering
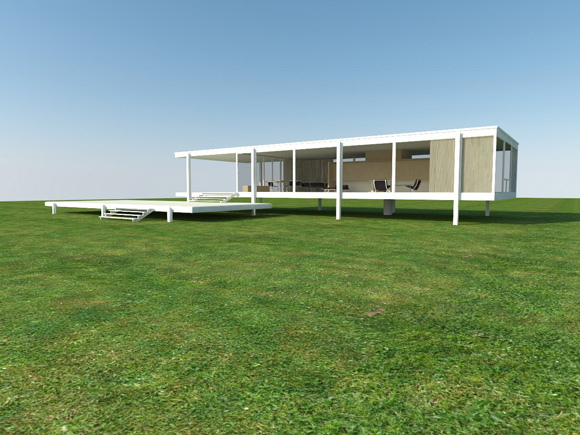
For ending up with this tutorial I decided to bring back an old model and fit it with the grass plane we created. And this is the result.
A common mistake with this kind of grass carpets is to show the tiles of the texture, which happens when the size of the texture is not that big and you want to give a sort of “aerial view” to your scene. If that is your case, there are two choices for fixing it:
- Change view point: Instead of an aerial view try for a people-horizon position of the camera
- Use a grass plugin generator instead of grass texture
For a common architectural scene where grass is only just environment stuff this is more than enough. Mostly if the PC we are working with is not that powerful or you simply do not have the time for complex stuff. If you want your grass to look more like tall grass, you should check some plugins as FUR for Sketchup; but always remember that when working with plenty amount of detail in your models, also adding some environment stuff such as trees, cars, streetlamps, etc. will load your scene with many elements to render. Tall grass in that case will be a headache as it will significantly multiply the rendering times in order to process all of those elements. You can also always add grass in Photoshop by using some masking techniques.
As for what matters to FUR, if you feel interested in testing the plugin, this is a good tutorial to check:
My advice is to only use FUR if you really have a powerful PC, otherwise Sketchup will crash trying to render your model.
Also try not to bring too much attention to the grass carpet at the scene. That will make the grass look as the main character instead of being the building you worked hours and hours in order to make it pretty and with a realistic fitting background.
Finally: Happy testing! 🙂
And if you need some cutout grass elements for your post processing in Photoshop you might check out our free elements of grass with transparent background (PNG) as well!
If you liked this Sketchup tutorial make sure to check out our tutorial how to use Sketchup Components of trees where we use the same model to bring life the architecture scenery with a 2d tree face me component!
Leave a Reply