In this beginner tutorial we want to give you an insight how to create quickly a architecture section drawing in Sketchup for your next and add some visual elements for e.g. a architecture presentation. We use a quite simple model here and go quickly through the steps to give you an idea about the general workflow. We also use and link to various of our free archi-viz graphics so do not miss to get through the steps and grow your own library of graphics for architecture visualization on the side 🙂 Enjoy!
2D Architecture Section Drawing – Enhancing the visual quality
The beauty of architecture lies in three-dimensionality. A plan may excite an architect but not always the client. Two-dimensional representations of architectural sectional drawings have a high chance to be misinterpreted. The greatest architectural firms on earth always emphasize on the simplicity and elegance of presentation drawings as the clients want the end product, not the raw ones. In student life, architects get much less time to create fabulous graphics. A calculative approach of time-budgeting and the knowledge of effective shortcuts is the only key to click the aesthetic-cravings of the judges. It’s beneficial for the practicing architects too, as sometimes, clients want very quick visualizations.
So here is my cheat-sheet of creating a quick yet artistic sectional drawing in a real short time.
THINGS YOU NEED TO PREPARE BEFOREHAND:
- An AutoCAD plan of your building
- Raw .png vector images of the objects (Human figures, trees cars, kites)
For this tutorial we also use the free textures from our Open ArchiVIZ Pack and other tonytextures ressources that are linked below. Grab the stuff for free for your next architecture visualization project or for this tutorial!
Import the AutoCAD Architectural drawing in Sketchup
First we need to import our 2d AutoCAD drawing to Sketchup. Follow these steps:
1) File<Import<(Select your file)<Open
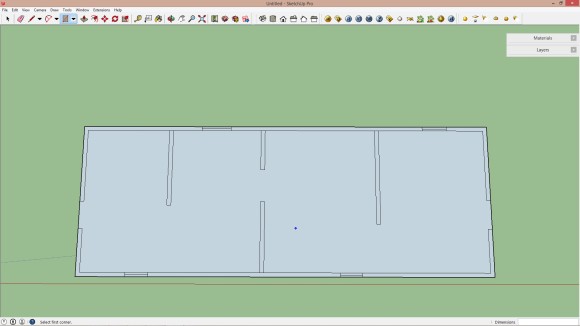
2) Now extrude it accordingly to create your model.
3) Always remember to GROUP the objects.
4) Always MAKE COMPONENT of the repetitive elements
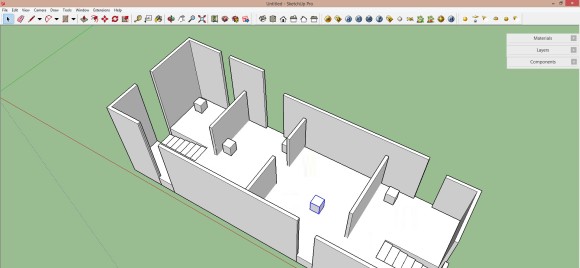
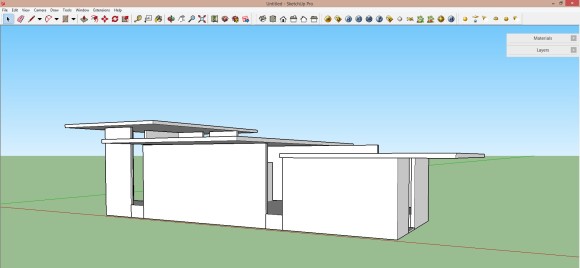
So, here is my model after these steps. It should be an art gallery – I know a quite simple model so far, but for this tutorial it is rather important to explain the simple steps and therefore this example will do the job…
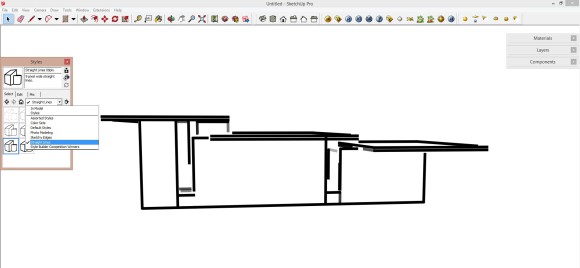
Use “Styles” in Sketchup to create the “Sketch Look”
- At first, unhide the hidden planes from Edit<Unhide<Unhide all
- Go to Window<Styles
- Select a style which contains simpler lines. I’ve used Straight Line 04 Px here, but you should explore a lot to get the one you love!
Define the Section in the 3D Model
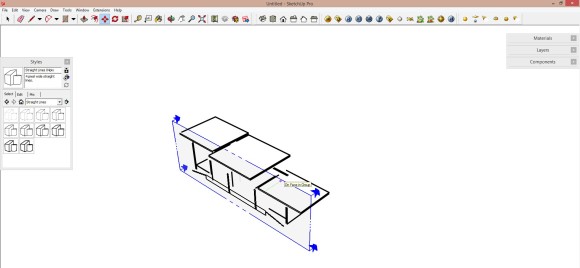
- Select Tools<Section Plane
- Place the plane on the surface of your desired section
- It will be initial cutout. However, you can move the plane by selecting it with Move tool to penetrate through a deeper section.
Create a Architecture Section View
- Click the Camera button and check Parallel Projection
- Click the view you want. (Front, rear, up or down; from where the generated section is visible.
- Select File<Export<2D Graphic
- Save it as a .jpeg
- Now you’ll get a shot of your section. Just keep in mind to zoom in for a maximum visualization.
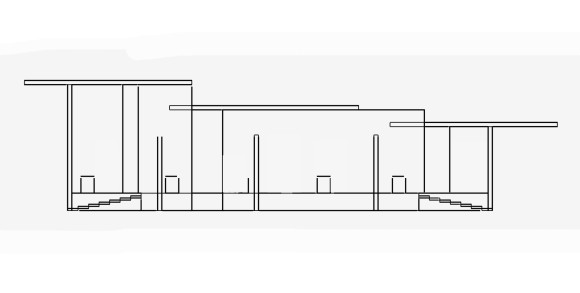
Here, we’ve actually got the basic section drawing to work on.
Our final image that we want to use in Photoshop looks like this now:
Let’s proceed with Adobe Photoshop to quickly add some graphics and a background image.
Import Sketchup Section Rendering in Photoshop
Now it’s time to give it a greater shot.
1) Open the previously saved jpeg file
2) Delete its background using Magic Eraser tool. Simply click on the white background with the eraser.
3) Save the prepared image in .png mode
Next we open our new workspace:
- Open your canvas from File<New
- Customize it as per your specifications. I’ve chosen an A4 paper from the international paper option and selected a resolution of 300 pixels/inch. Choose CMYK color setting if you want better printing.
- Now import the drawing on your awaiting canvas through File<Place Don’t resize it, the original one is a better fit for this high resolution.
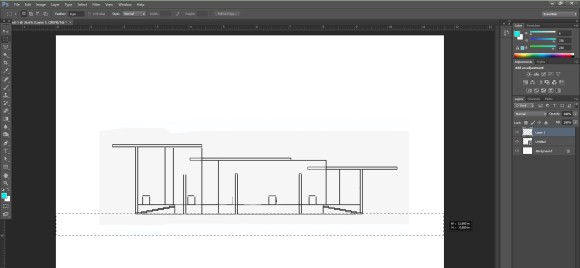
Next we want to select and fill some general areas like the ground.
- At first, you need to mark the chopped ground-line. Work with the Rectangular Marquee tool, select the area beneath your section.
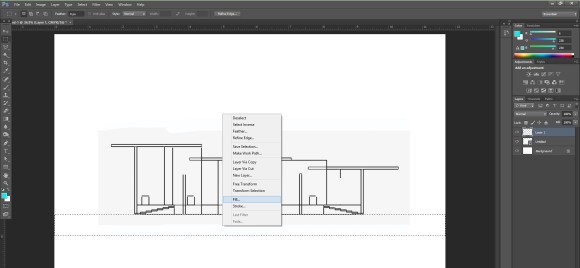
- Add a new layer. Rename it for your reference.
- Now right click on the selected area, select Fill and choose a color, preferably black (or if you want it to bleed out of the cut, simply choose red!!)
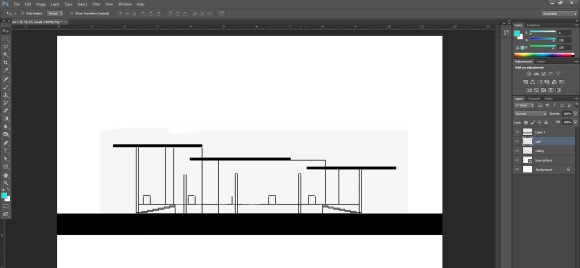
- Now fill out the rest of the cutout walls and floor planes. You have two alternatives.
- Select the basic sectional drawing layer, use the Magic Wand Tool on the cut area and see the magic. Repeat filling.
- Use the Rectangular Marquee Tool and draw the cuts, basically, repeat no. 3.
- Don’t forget to create a new layer for each fill. It leaves a flexibility to edit afterward without any major change in the drawing.
- Select the repetitive layers all together and convert to smart object. You can copy it as a singular object from now on.
Select the ground, stairs, the walls and the ceiling and fill it with e.g. black:
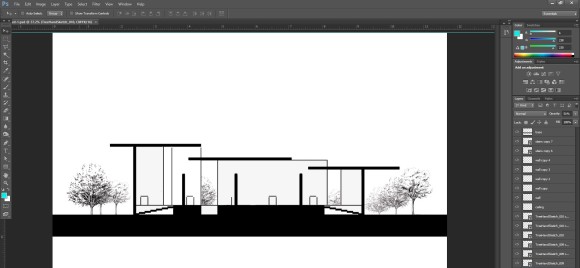
Adding Cutout Trees to the Architecture Section
Next I want to add some 2D trees in my section view. I often like to use hand-drawn trees as they have a special look. You can find some hand-drawn PNG trees without background in our Open ArchiVIZ Pack. The pack is absolutely free and can be used for private AND commercial!
- Import the hand drawn .png trees in Photoshop
- For the trees to be seen from the windows, place it over the window punch.
- Go to the basic section layer and select the punch area through Magic Wand
- Right click and select inverse.
- Now go back to the tree layer and erase the unexpected twigs and trunks. Simple!
- Add trees to the surrounding too.
- Work on the opacity and sizes. The trees in the front are sharper and bigger while those overcrowding the background tend to be shorter, less visible. Many trees with varied opacity create three-dimensional visual pleasure.
Add Translucent Texture
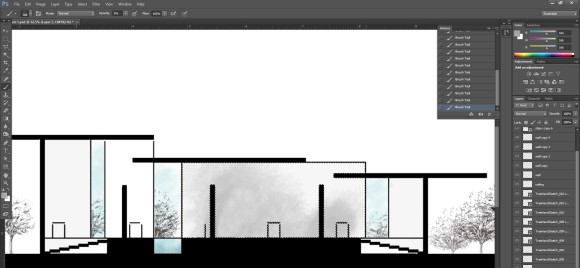
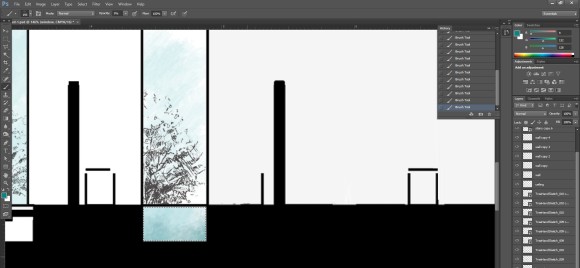
- Select a window from the basic section drawing layer by Magic Wand. Then create a new layer. Name it “window 1“.
- Select Brush tool, choose a brush. I prefer brush no. 100 in a size of 133 px.
- Select the color. For colored section, I like any lighter shade of cyan.
- Customize the opacity of the brush as 9-10%
- Now, sketch the texture. It will be a lot easier if you work in a graphic pad but trust me, even a little bit of practice makes your mouse-hand perfect, too.
- Do the waters in the same Just add strokes of other colors to give a greater depth.
- Precaution: don’t overdo the strokes for the glass. Keep it simple.
Adding a Background Sky Image to Architecture Drawing
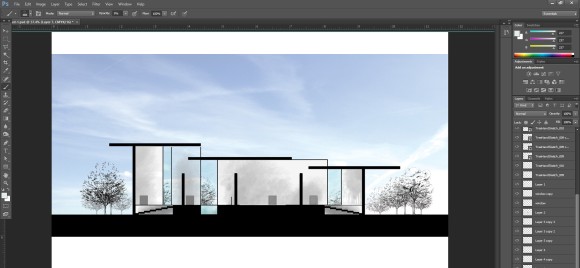
(Architecture) sky images that can be merged with your architectural rendering are important. I need them quite often and nearly always add them in Photoshop in the post processing. You can fairly easy test different sky types (clouds, sunset etc.) and also more important change the saturation and brightness on the fly. Always remember that the sky image is a quite prominent part of your architectural illustration at the end and stands for emotions. For this example I use an abstract sky background from the Open ArchiVIZ Pack:
I really like this one because it comes along with different looks in its super wide format of 5000 px. And the clouds are not that dominant so it is really perfect for architecture visualization. To merge it with your scenery do the following steps:
- Create a new layer. Keep it under all the layers.
- Open the sky background image.
- Play around with the scaling and location – so which part of the image is visible in your canvas.
- I reduced saturation and increased brightness a bit.
Adding Shadows in Photoshop
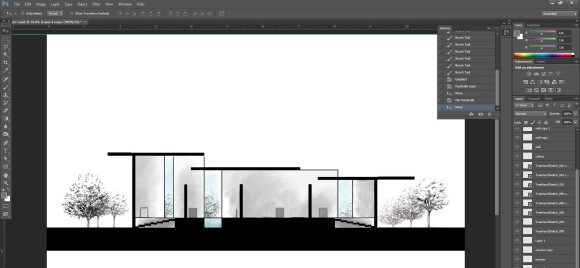
- Select the interior rooms one by one. (You know how!)
- Add new layer.
- Sketch the shadows using the brush tool. Keep the areas near the openings light and stroke down the darker ones. Work in multiple shades of gray.
- Keep each room in each layer. It will help a lot in future.
Adding Persons Silhouettes to the Section
- Add human beings. Scale them down – Where do you get these for free? Yes you might already have an idea: Open ArchiVIZ Pack or download our small set of Photoshop People Silhouettes here!
- Add birds to the sky – I used our free flying birds PNG with transparent background graphic pack download for this
- Create hierarchy. Play with the opacity and sizes. Usually, total opaque human figures break the attention over unnecessary details. Keep the opacity medium to low in order to focus on the designed spaces.
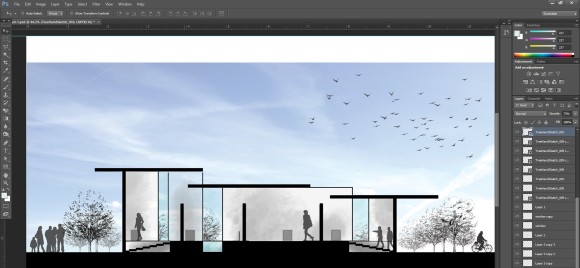
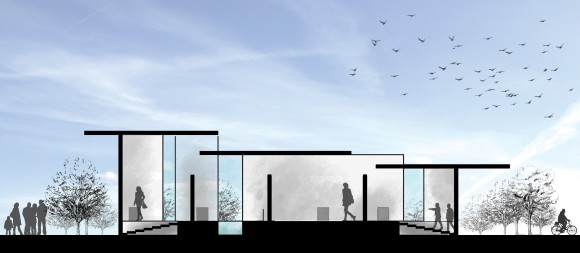
Final Architecture Section Drawing – Pimped!
Now, your sectional drawing it totally ready to convince everyone!
Does it look like a tedious line drawing? Surely not! The more you practice; the quality of your brushstrokes will improve and take a lot less time. As mentioned we used a quite simple design here to go with you through the steps but we hope that you can use the workflow ideas to create an awsesome architectural section drawings with a simple Sketchup Model in your next project within a limited time frame as well!
If you liked this Sketchup tutorial make sure to check out our tutorial how to use Sketchup Tree Components to bring life to your architecture scenery with ease as well!
So from now on you don’t produce building sections, create artworks!
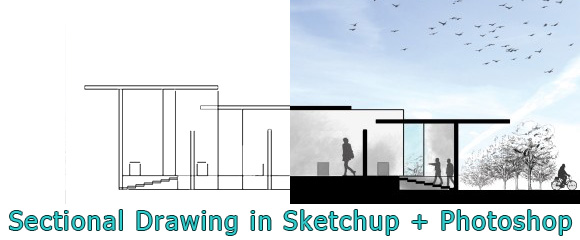







[…] you liked this tutorial you might also check out our tutorial How to Create a Quick Architecture Section Drawing in Sketchup and Photoshop […]