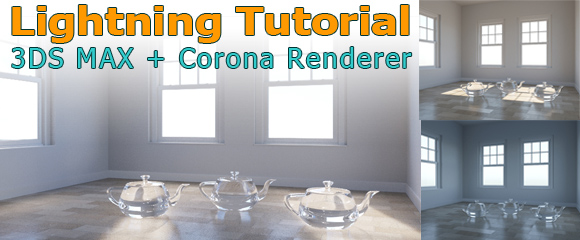
Corona Rendering Engine for 3DS MAX
Corona renderer is a photorealistic ray tracer, used by computer graphic artists for the final frame production rendering mainly for architectural and product visualizations. Corona has a free version, and also a commercial release. The last couple of years they attracted thousands of users, and a lot of attention in the architectural visualization industry. So that is the reason why we want to take a closer look and spot some light on the capabilities and the workflow when it comes to rendering architecture visualizations with 3DS MAX and the Corona render engine.
Main advantages of Corona are simplicity and usability, namely how easy is the software to use in practice and how this fact increases artists’ satisfaction and performance. Maybe Corona is not the fastest, most physical, or most feature-complete renderer on the market, but clearly is one of the simplest one to work with – which is pretty important for a lot of architects and designer who need to apply new technologies quickly to their workflow.
In this tutorial we will walk you through the steps of setting up the natural light in an architectural scene and prove how easy and fast the Corona renderer is.
Render Lightning Settings
Although, default Corona settings perform well in most situations – usually there is no need to change them – there are some general guidelines that should be followed which help in most common cases when “problems” appear. By the term “problems” we refer to noise effects which is the most frequent issue.
- For interiors and scenes where global illumination is dominant we must use UHD Cache as secondary GI solver (Render setup->Performance->Global Illumination->Secondary Solver)
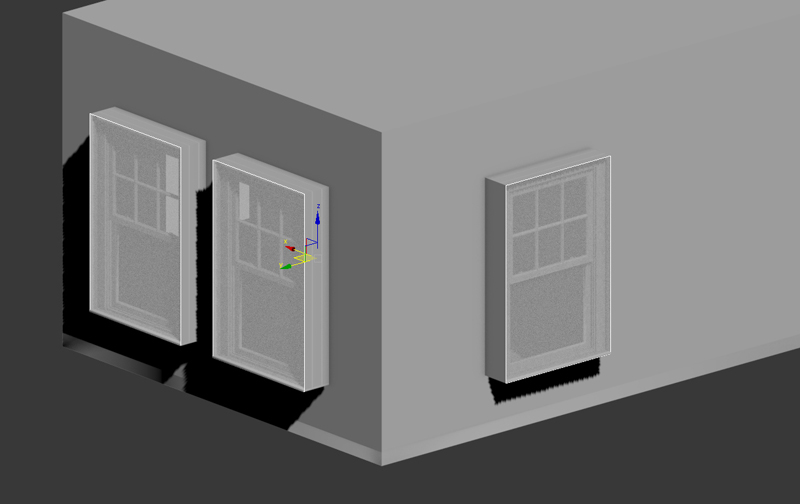
- If the scene has small window holes or openings, we must always use Corona Portals. CoronaPortalMtl is a material applied on a plane (no thickness!) which is placed in front of every opening capping perfectly the window hole from the outside. We must cover every opening with a light portal, not only those which are visible within the current view. Direction of normals does not matter for portals in Corona, they are not light sources so they will not change the final appearance of our scene in any way. They are just invisible elements that distribute and sample light more efficiently inside the room. In some scenarios, light portals may greatly speed up the rendering.
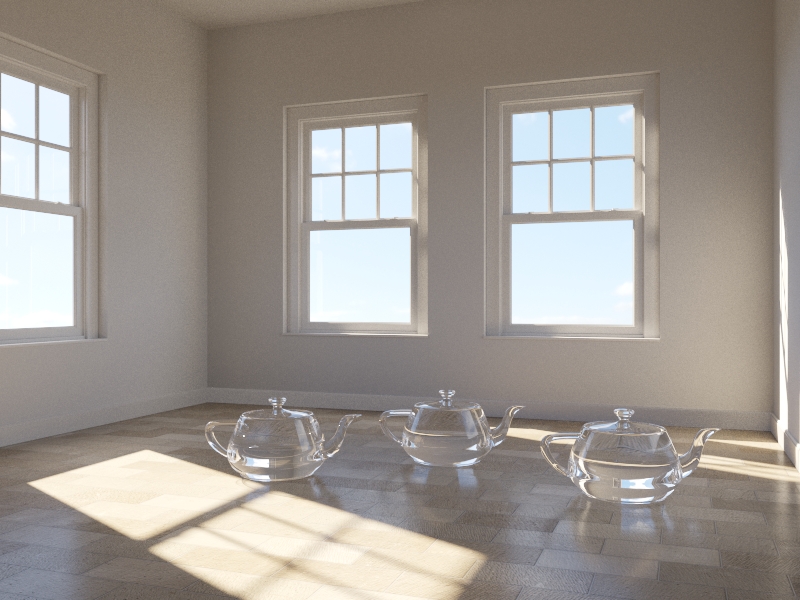
See how I applied the “light planes” on each window to define the light source.
The first test rendering will look already like this:
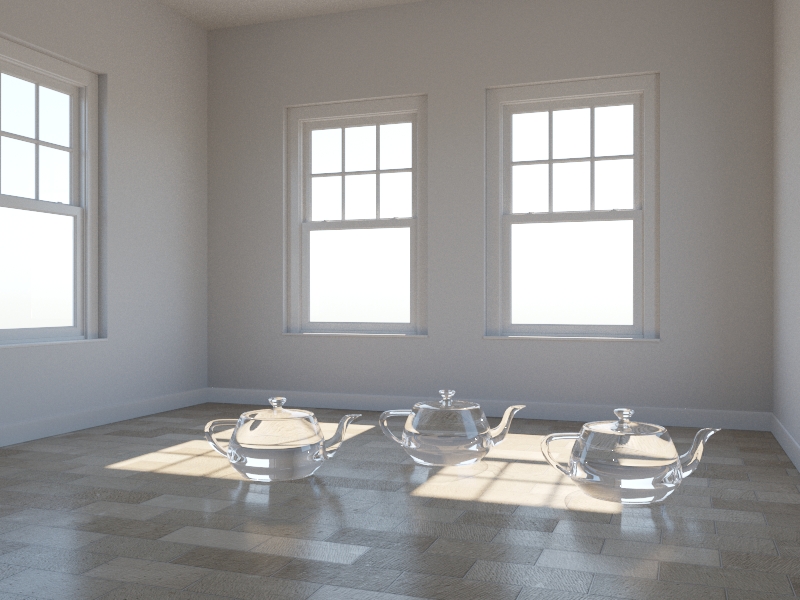
You see I used a pretty simple scene here, but if you like the stone floor texture you can grab it for free! It comes along with out “OpenArchiVIZpack” – if you have not yet downloaded it take a closer look at the free collection of 60 graphics for architecture visualization and grow your own library for your next project!

Corona Materials: Rendering Glass
In these kind of renderings we must be very careful about the glass material we are using in architectural elements like windows, glass frames and every transparent surface light could be passed through, as this can affect drastically the speed of our rendering process.
There are two refraction modes in Corona materials:
- Thick – it generates refraction and should be used for solid objects. We can enable or disable refractive caustics in this mode. More often examples could be vases, glass objects, transparent models with absorption color, liquids etc.
- Thin – it has no refraction and should be used for very thin or “hollow” objects. It does not generate refractive caustics and it renders very fast. For example: glass planes in windows, soap bubbles, light bulbs etc.
How to Reduce Noise in the Corona Rendering
If Light portals can’t help us to get rid of the strong noise, we must try to find out what is the source of the problem.
- If we have noise visible on glossy or reflective surfaces, we must increase GI vs. AA balance values
- If noise is caused by direct light, we must increase
Light samples multiplier values. - If we are dealing with strong noise caused by indirect light (GI) we must increase GI vs. AA balance values
- If noise appears in scenes with depth of field (DoF) we must decrease GI vs. AA balance values down to 6 or 4
And finally if we are dealing with bright spots visible in refractive objects, we must decrease GI vs. AA balance values.
Download our 3DS MAX Test Scene
In our case scenario we first set Corona as default renderer, from Rendering tab->Render Setup->Common->Assign Renderer, we set Corona renderer as Production and we click the button below Save as Defaults. Finally we setup Gamma/LUT Correction and System Units as we described in our past tutorial.
To help you understanding the settings and motivate you to start testing on your own we share with you our test scene we share with you our test scene we created in 3DS MAX. You can download it here:
In addition we used the free high quality HDRI sky images you can download here:
And finally we used in the test scene a high quality stone texture with bump texture from our “OpenArchiVIZpack” which can be downloaded here for free as well. Look out for the “Wall_033_color.jpg” and “Wall_033_bump.jpg” texture – it looks like this:

You have everything in place – cool! Then let´s go!
Sun and Sky Setup
From Command Panel->Create->Lights->Corona we pick CoronaSun and create a sun everywhere we want. Below there is button Add CoronaSky environment.
If we click it a CoronaSky map is applied as background environment map in the Rendering->Environment-> Background-> Environment Map slot. From now on CoronaSky will be linked to CoronaSun so if we change CoronaSun’s position, the sky will change accordingly or if we like we can disable sun and keep only the diffuse light of CoronaSky. And that’s it! Super fast, super easy, natural and realistic lighting!
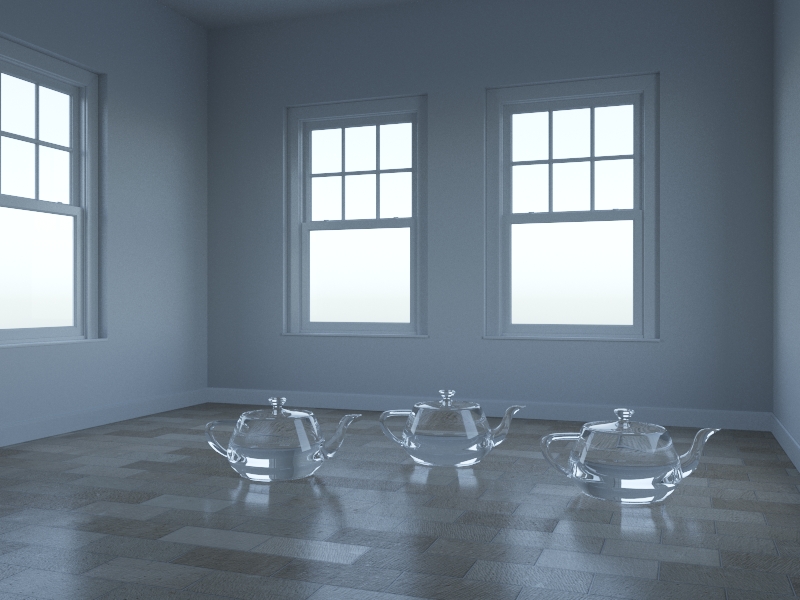
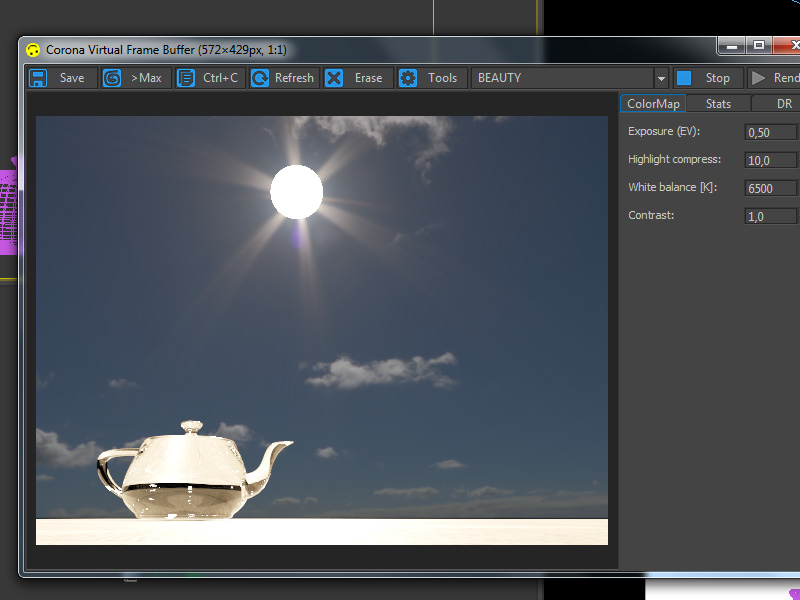
Avoid burnout areas in the rendering
If we render the scene – Corona virtual frame buffer (VFB) will pop up – and since our light source is very bright, our image will probably be burnout. We can easily adjust the exposure inside the Corona VFB while our image is being rendered by clicking the ColorMap tab, and lower the Exposure value decreasing the overall brightness, or we can also increase Highlight compression to reduce over bright areas and ugly highlights.
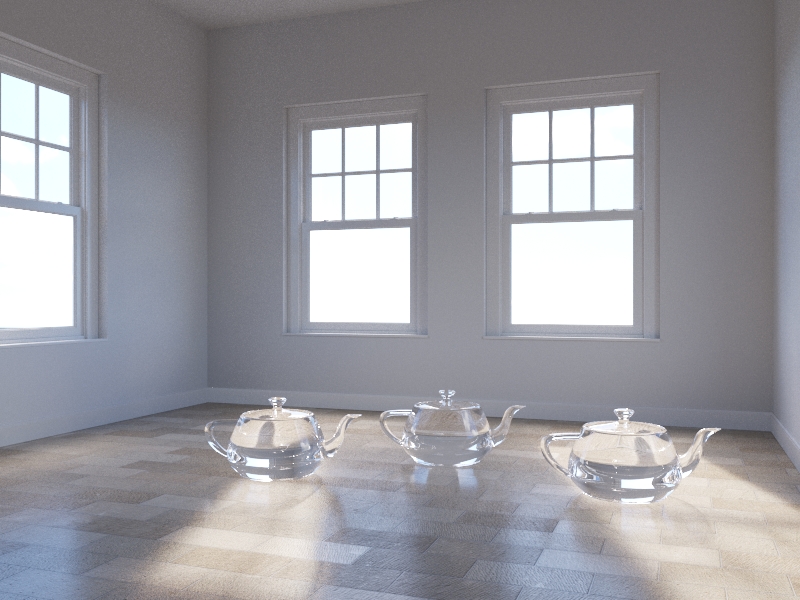
Defining the overall color mood of the rendering
Finally, the white balance setup helps us adjusting color values. For most of conditions, a value ranging from 4500 to 6500 should give nice and realistic results, but the final look always depends on the mood we are trying to achieve.
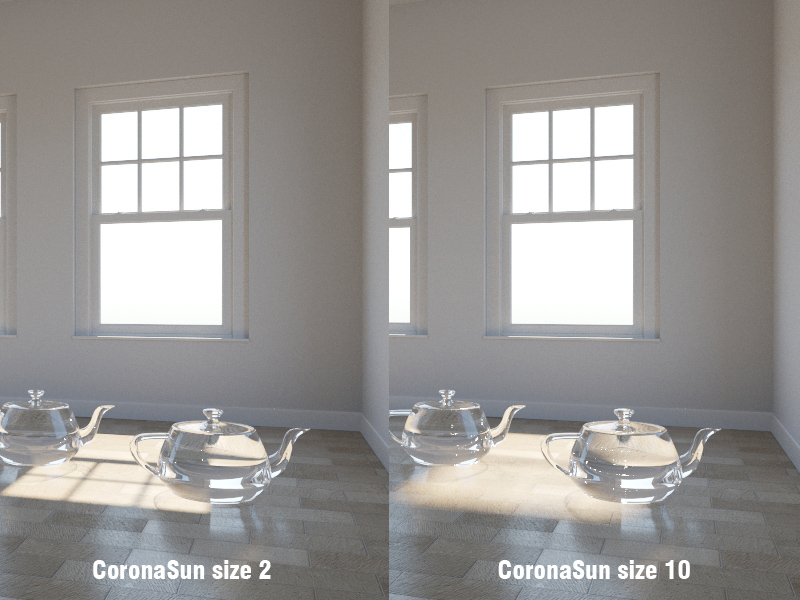
Create soft shadows in 3DS MAX
By default intensity and size on CoronaSun are set to 1. Intensity changes sun’s brightness and size practically changes the sharpness of sun’s shadows. A size value of 2 is usually a realistic approach. Below there is a comparison between sun’s size 2 and size 10.
Another interesting issue about Corona is that rendering process will not stop by itself , by default it keeps progressively rendering. We can determine time and number of passes before rendering process in Rendering->Render Setup->Scene->General settings.
Simulate cloudy sky with diffuse light
For our tutorial in every output were used 100 passes.
Below is an example of lighting the scene just with CoronaSky map (sun is disabled).
The disadvantage of this method is the lack of background images so we have to add them manually either by using environment settings, capping window holes, or by creating large flat objects in the background. Generally, it is recommended to use the direct/reflect/refract environment overrides loaded in Render Setup->Scene->Scene Environment slot. Another -more common -option is to create Corona Light Material with Emit light option turned off and load the background image as aTexmap.
Using HDR Image in 3DS MAX
Another option to bring light to our scene is to use HDR images. This is a specific graphic file format which also includeds the information of the lightning intensity in the scene where the picture has been taken. This lightning information can be used to create light in our virtual 3d scene as well!
There are two ways to use HDR (high dynamic radiance) images with Corona:
- Method 1: 3ds Max Environment
- Method 2: Corona Environment
HDRI as 3ds MAX Environment:
Inside 3ds Max we go to Rendering->Environment->Background->Environment Map slot and upload our HDR bitmap. We ensure that real pixels is enabled and we click OK. In order to have more control over our map we drag-and-drop the loaded bitmap from the Environment Map slot into an empty slot in material editor. When asked, we choose Instance.
We must ensure that in the bitmap’s parameters, under Coordinates rollout, Environ is checked and mapping is set to spherical, corresponding to our bitmap’s mapping.
From now on, our HDR bitmap will be used both as the background for our scene and to generate lighting. Offset allows us to rotate the sky (0 being 0 degrees and 1 being 360 degrees, therefore 0.5 would rotate the sky by 180 degrees).
HDRI as Corona Environment:
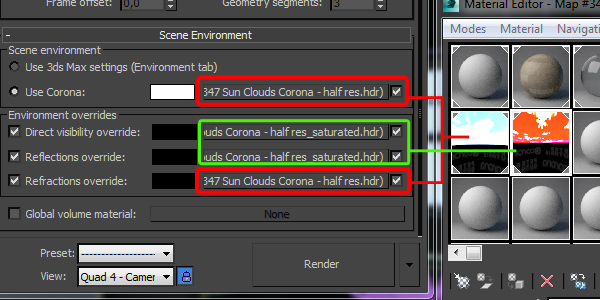
Alternatively, we can use Corona’s environment overrides from Render Setup->Scene->Scene Environment and under Scene environment switch from Use 3ds max settings to Use Corona. Then we load our bitmap into Corona’s environment slot. With this setup, the map in 3ds Max’s environment slot will be ignored. There is no performance or quality difference between these two setups.
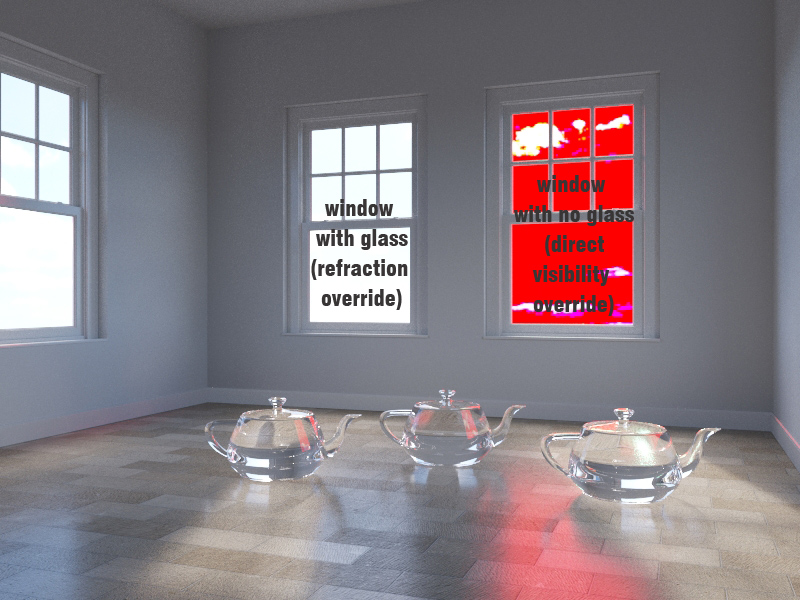
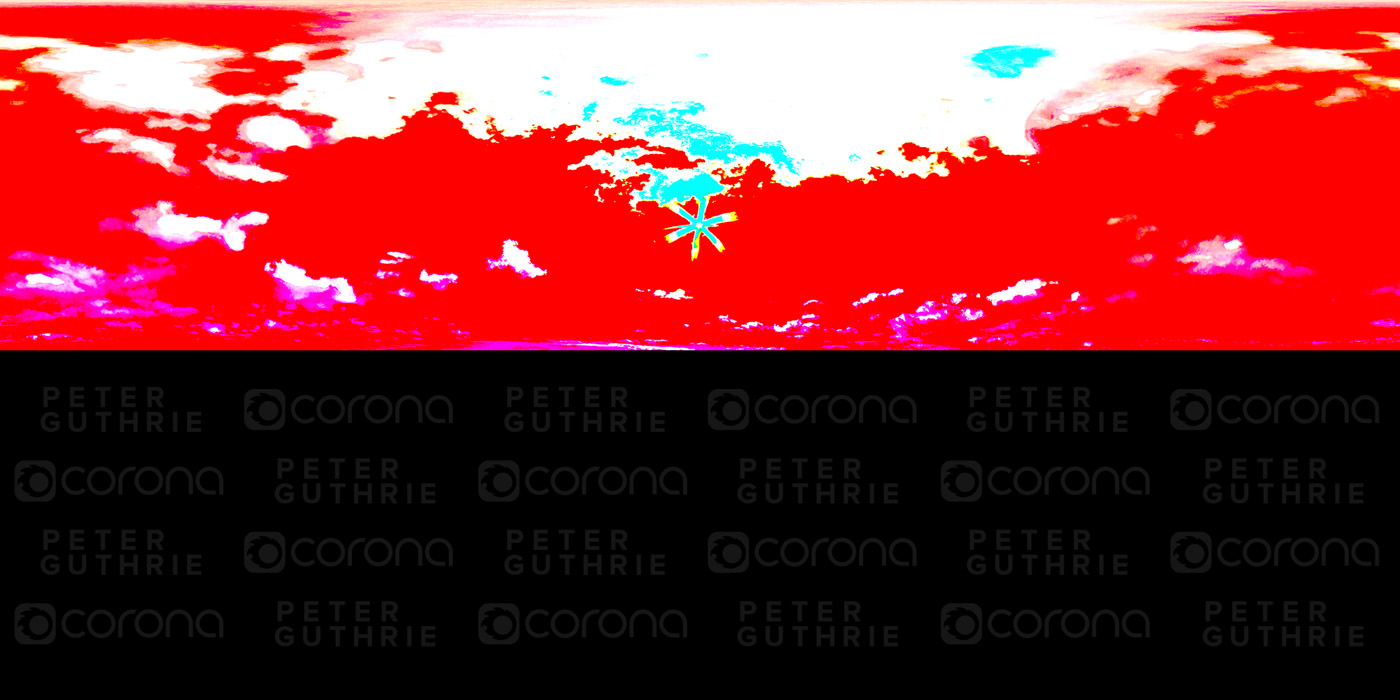
If we want to use HDR bitmaps as overrides, we can put them respectively in Direct visibility override , Reflections override or Refractions override. Here is an example of mixing original hdr image by P.Guthrie and a modified one in different override slots. For test purposes we hide the glass of the right window to indicate the Direct visibility override.
The main disadvantage of this method is that user cannot change sun’s position or size.
Combination of Corona Sun and HDRI
The best of two methods comes out when these are combined, wiring up CoronaSun with environment map to quickly and easily synchronize them when they are rotated. With this trick free control of Corona’s sun, natural diffuse light and background of an HDR image coexist in the same scene.
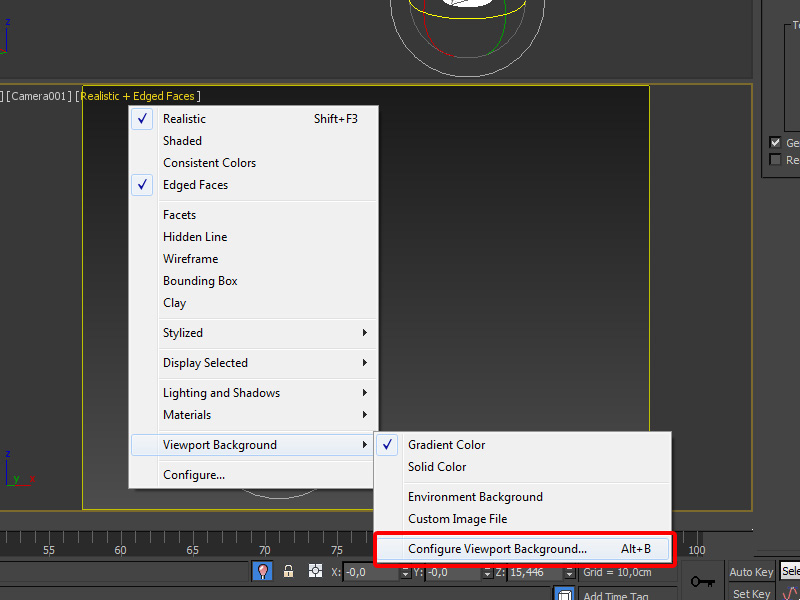
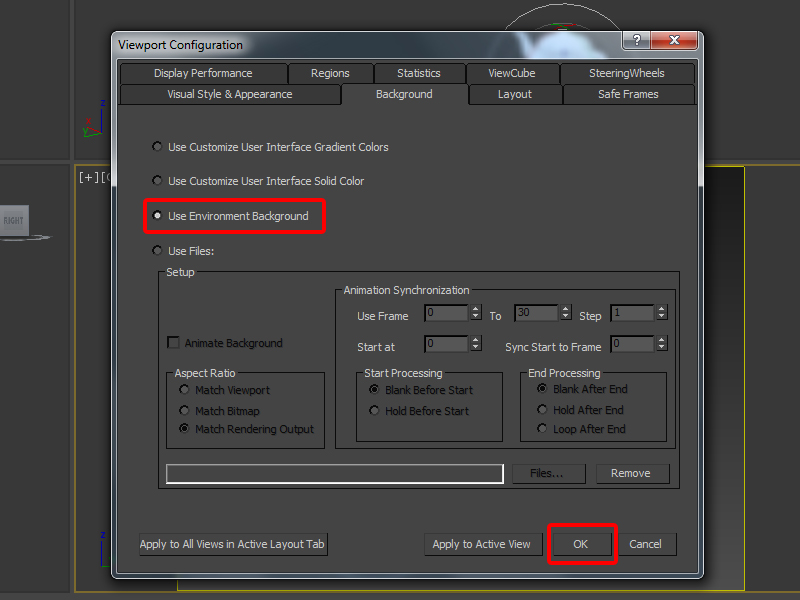
First of all we make a CoronaSun without adding CoronaSky and HDR map is loaded in the environment slot. From Viewport Configuration (Alt+B) we pick Use Environment Background. and the HDR image is showing to our viewport.
In order to detect HDR’s sun we must lower the values of output amount and RGB.
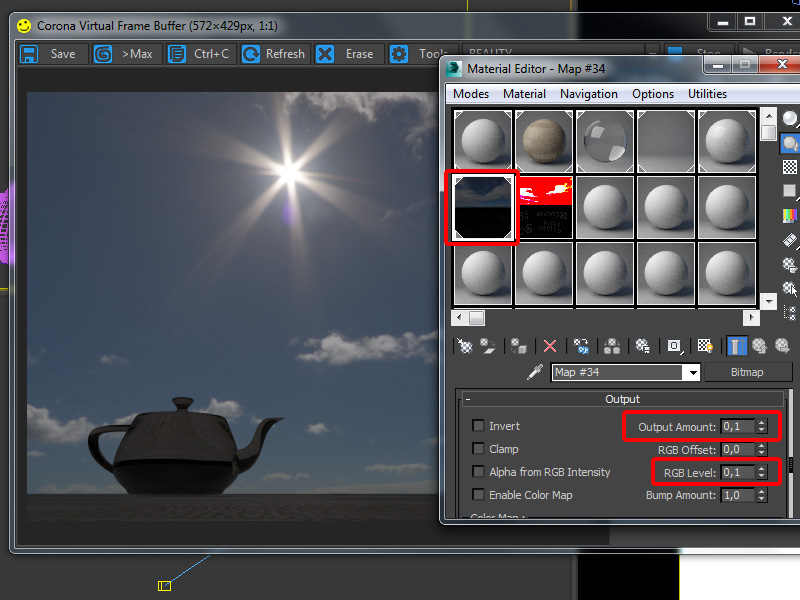
We change the camera angle to find the sun in the bitmap and align it with CoronaSun, Corona sun’s target in order to be perfectly placed in an imaginable straight line.
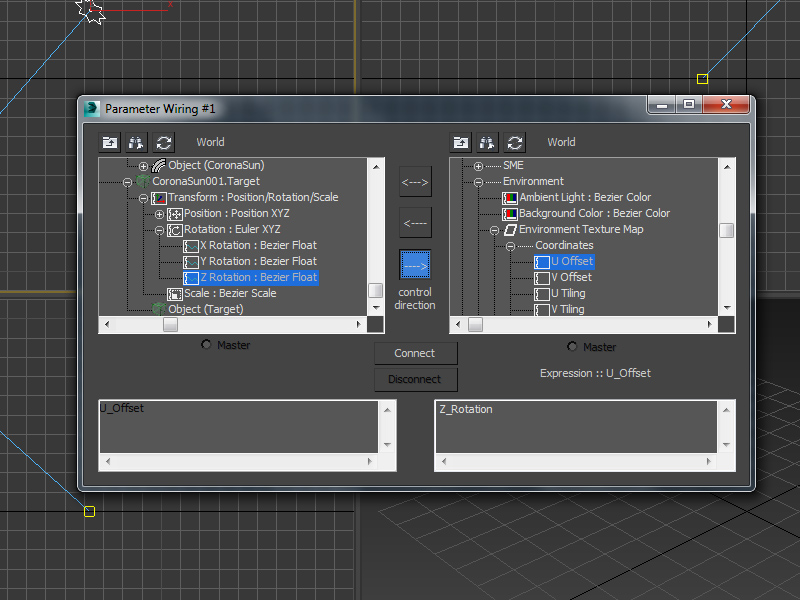
Next step is to is to link CoronaSun with its target. From the Main Toolbar of 3ds max we pick Select and link, we select CoronaSun and then its target.
From the Main Toolbar we select Animation->Wire parameters->Parameter Wire Dialog and a window pops up. From the left column we choose Zposition:BezierFloat under CoronaSun001.Target->Transform:Position/Rotation/Scale->Position:Position XYZ and from the right column UOffset under Environment Texture Map->Coordinates.
We click on the arrow button and we paste the following code in the place where the below pictures shows: radToDeg Z_rotation / 360
We click update and we are ready!
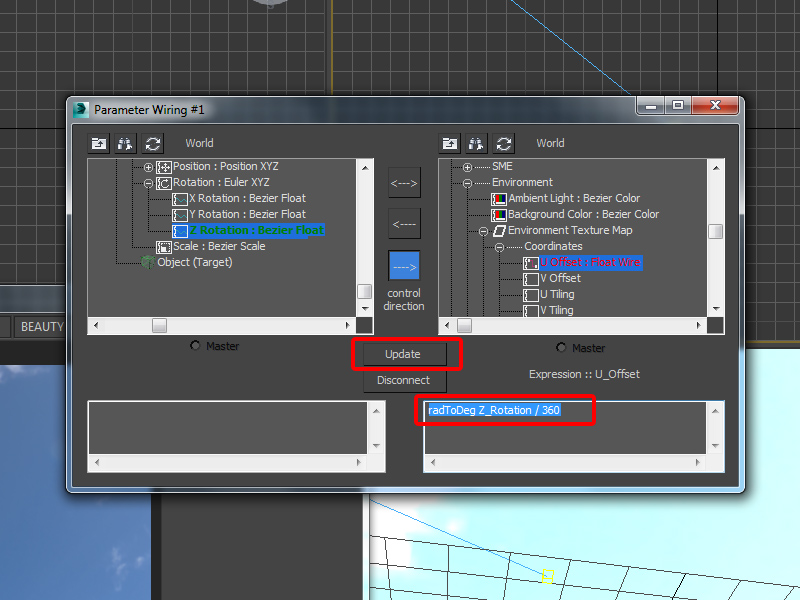
From now on when we rotate the target of the sun, CoronaSun along with the HDR environment map will rotate together!
We change back the output and RGB values of environment bitmap and optionally we can lock Corona sun’s position to avoid accidentally movement.
Wrap up of Corona Rendering Tutorial
Hope you like this little tutorial where we focus on rendering with the corona engine in 3DS MAX. I think you could get a feeling about the capibilities and that it can be are relatively quick process to set up a realistic lightning for an indoor rendering in this case. Maybe you are now curious to test the waters in your next architecture visualization project?! Happy rendering!

Leave a Reply