In this tutorial Apostolos from Greece will show us his workflow for an architecture visualization project with 3DS MAX and the free Corona Renderer which creates pretty good photorealistic renderings. You should check it out!
Background of this architectural rendering job
In this tutorial we will try to go through the basic steps of architectural visualization using one of our recent projects. The client requested to create a number of still visuals of a new modern-classic private residence with a big lawn garden, placed in Athens, Greece.
We had a very tight deadline so when we finished the project and delivered the stills (clear sky shots), we had the time and the chance to work further on our project to improve the overall quality and play around with different setups (cloudy mood and night shots). I want to share with you the different steps as well as the lessons learned in this project.
Corona Renderer: The free rendering engine for 3DS MAX
We choose Corona Renderer, a new and upcoming high-performance (un)biased photorealistic renderer, available for 3ds Max. It also supports Cinema 4D, Maya etc – but we use it with 3DS MAX for this tutorial. More specific we used version Alpha V6, which is the free version plug-in for 3ds max. After downloading and installing Corona, we started 3ds Max and select from the Main Menu Bar-> Rendering-> Render Setup-> Common-> Assign Renderer-> Production-> Corona renderer Alpha v6.
Preparing the CAD drawings
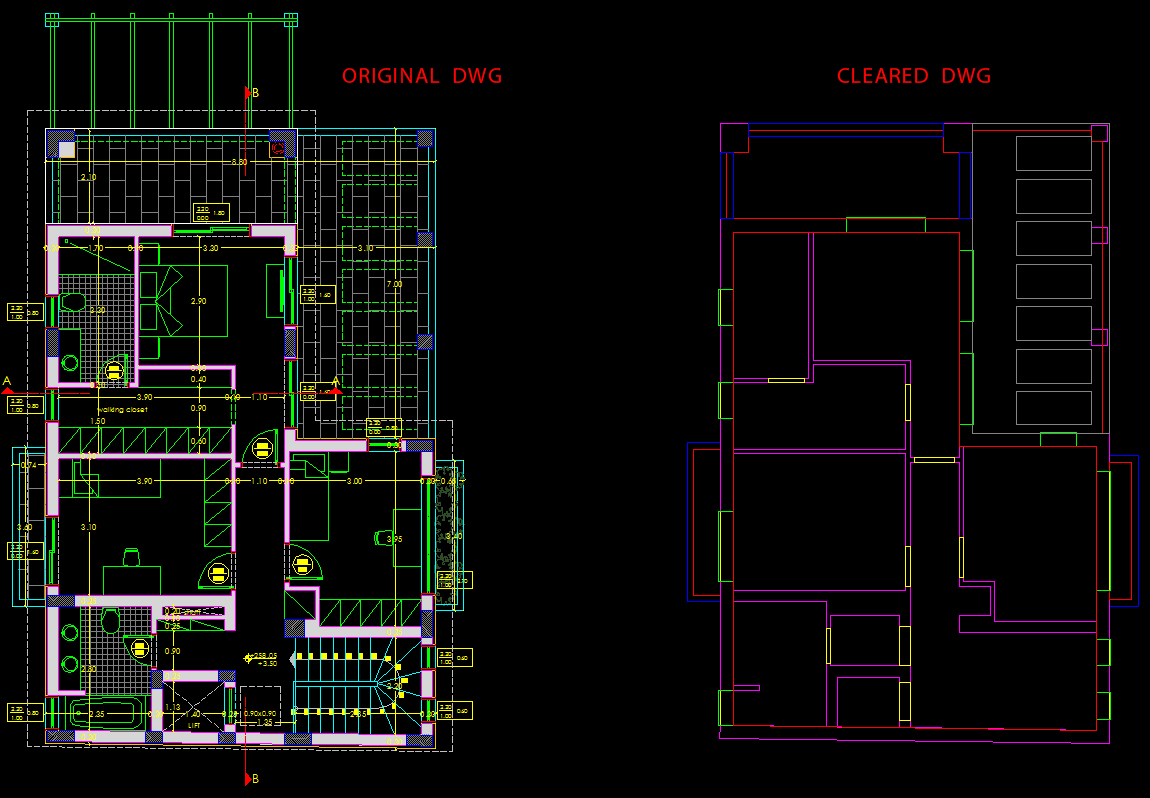
First of all in order to import successfully the CAD drawings inside 3ds Max we must clean them from unwanted information like dimensions, hatches, hidden objects, hidden layers, furniture, blocks, texts etc.
Modeling the 3D building
Before importing our drawing we must prepare also the unit scale inside 3ds Max. Select:
Customize->Units Setup->Display Units Scale->Centimeters. Now we are ready to import our dwgs.
Remember also to enable Gamma and LUT Correction in the Preference Settings tab and set Gamma value to 2,2.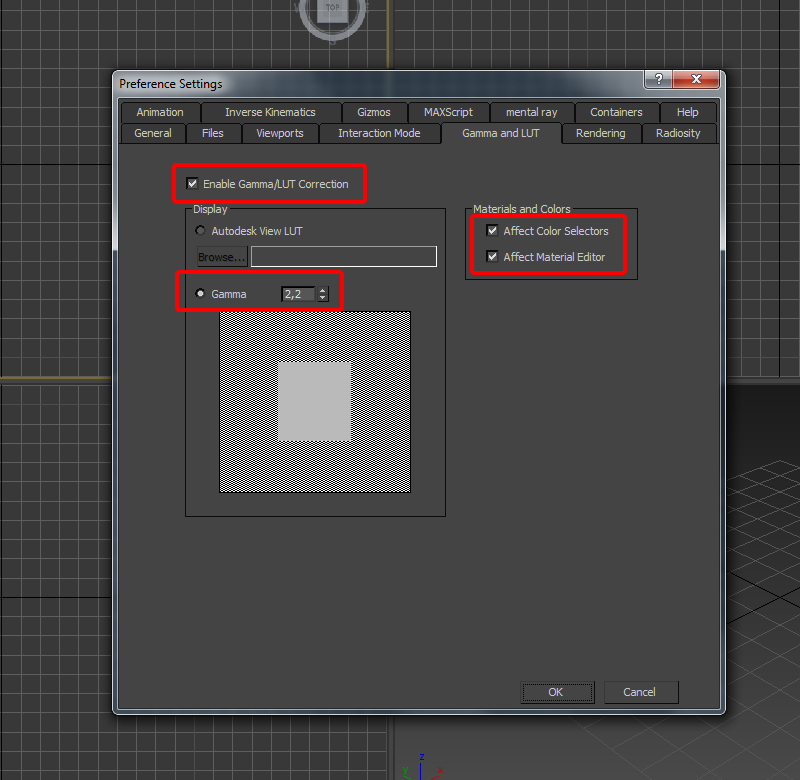
Walls, floors and ceilings formed from extruded polylines.
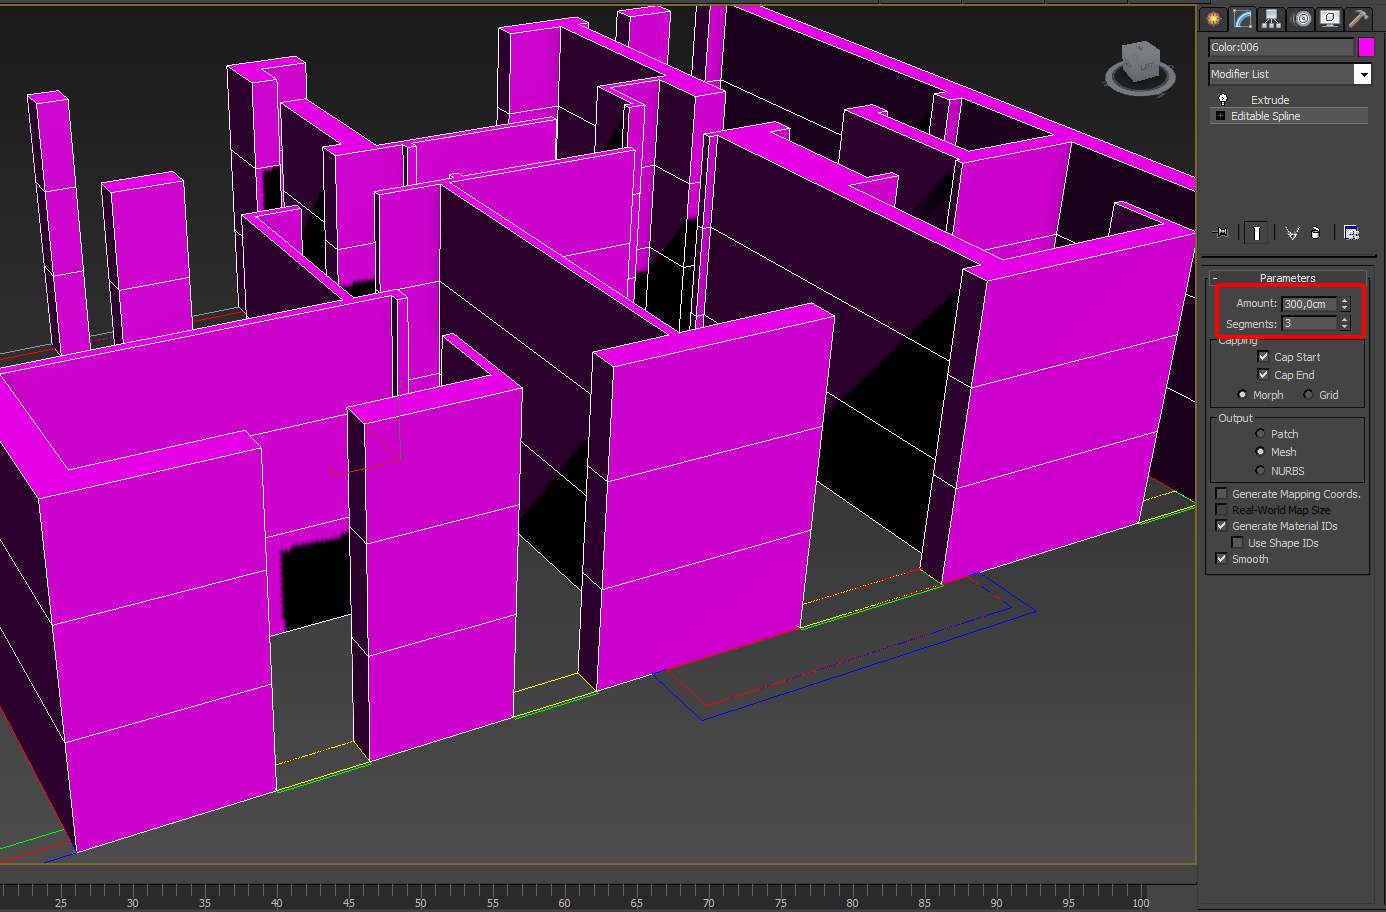
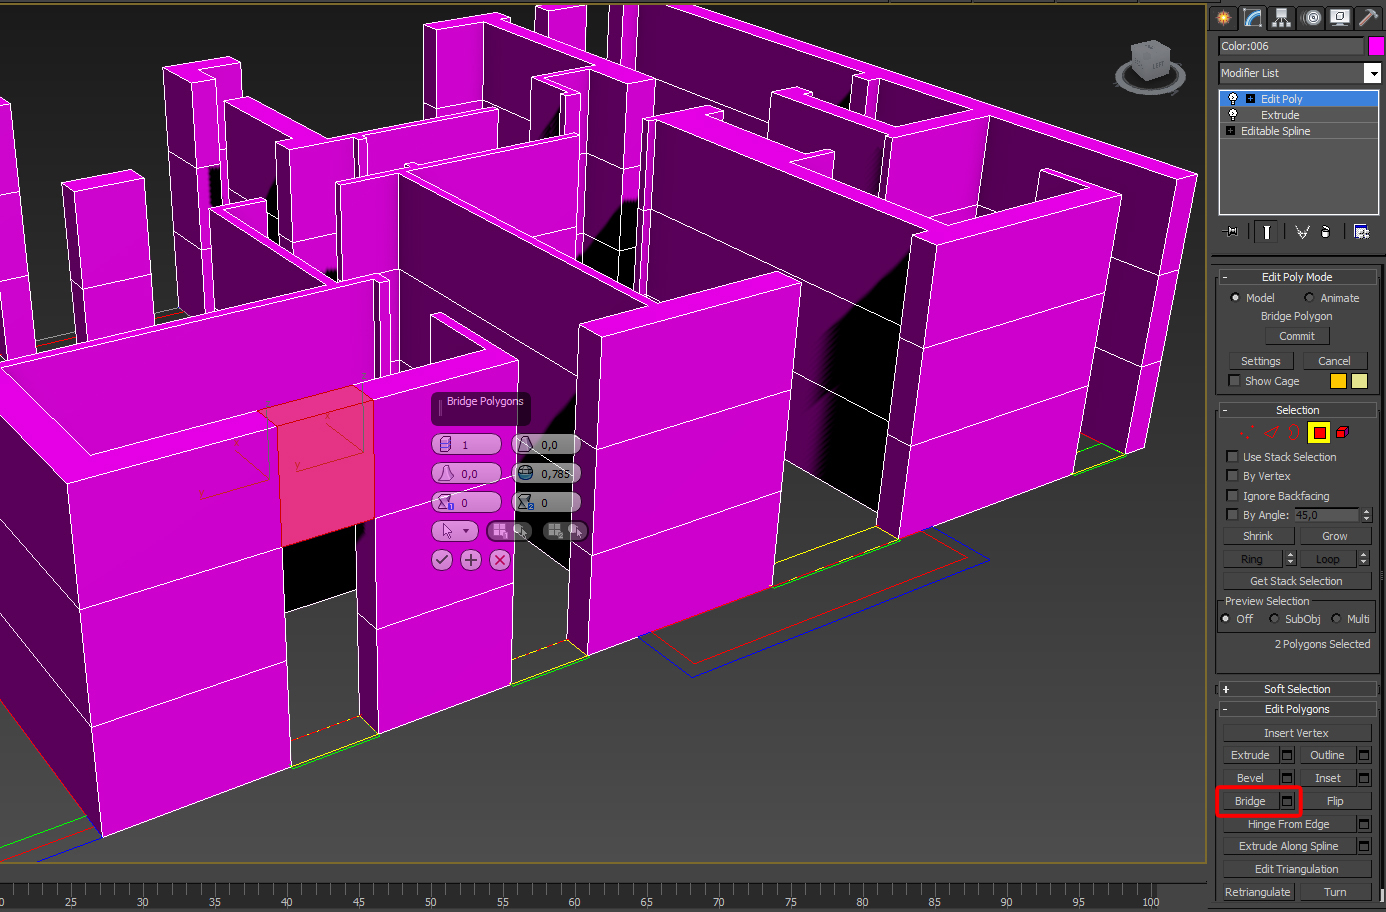
We used bridged polygons to shape the door and window holes in every wall.
Window models, doors, wooden beams, railings, construction details and every other shape are very simple and primitive geometry.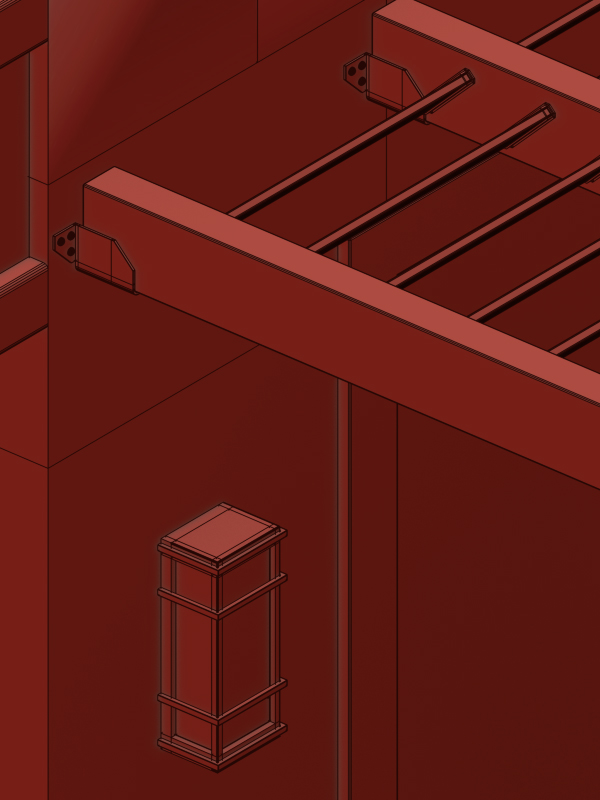
Roof tiles modeled and placed by hand – but a bit clumsy – because in real life thy always have rather a random position and not a 100% perfect alignment.
A subdivided plane was used for the garden ground with a noise and turbosmooth modifier. This will be the surface on which grass will be scattered.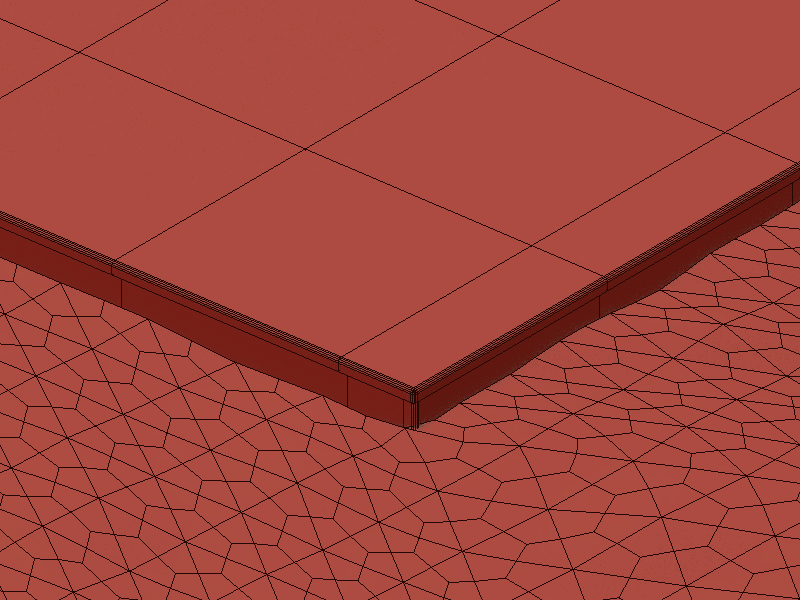
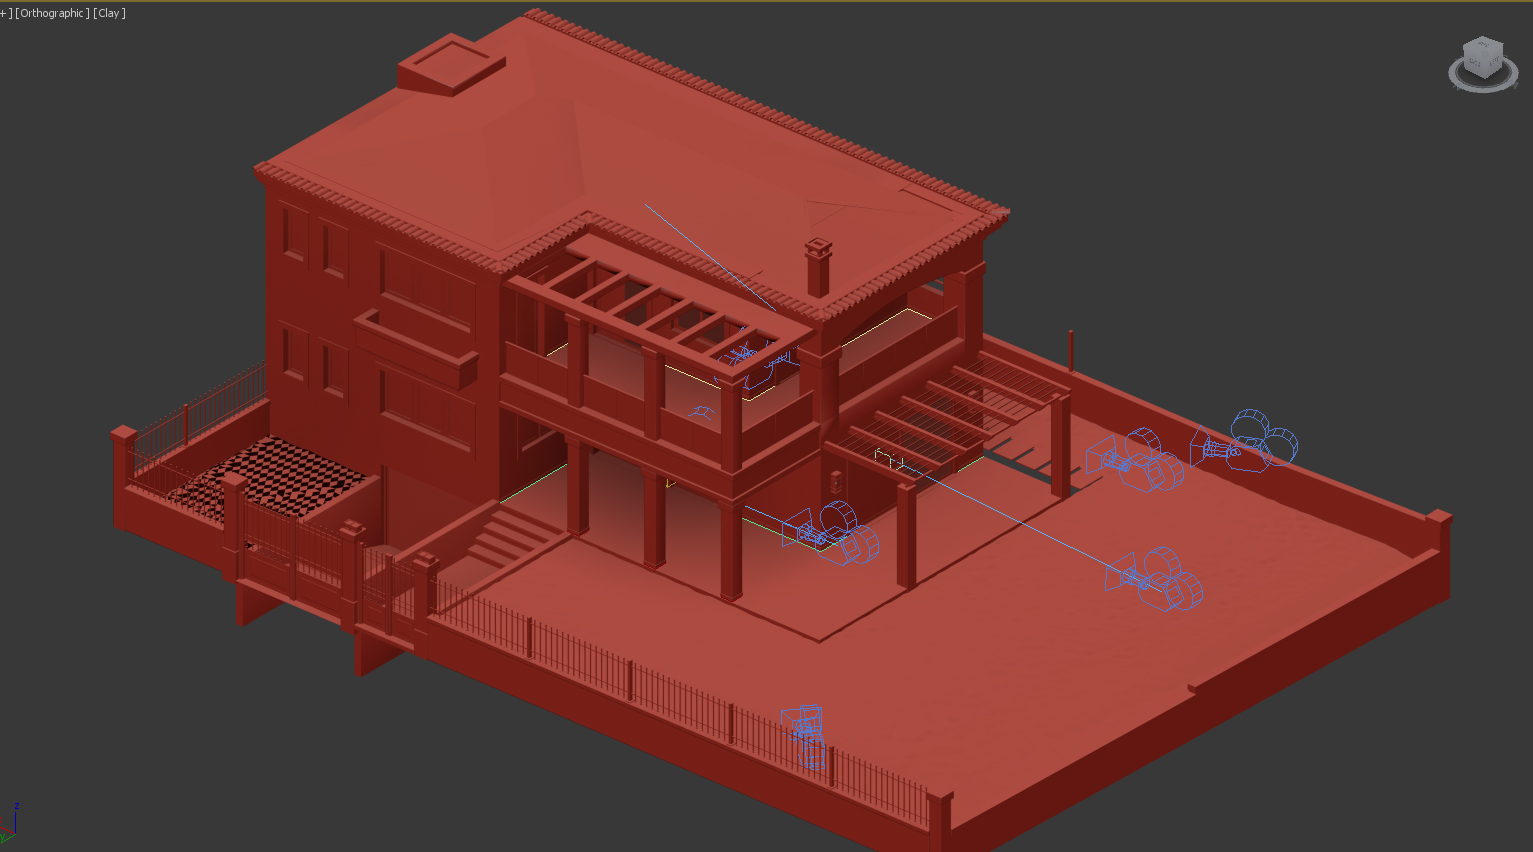
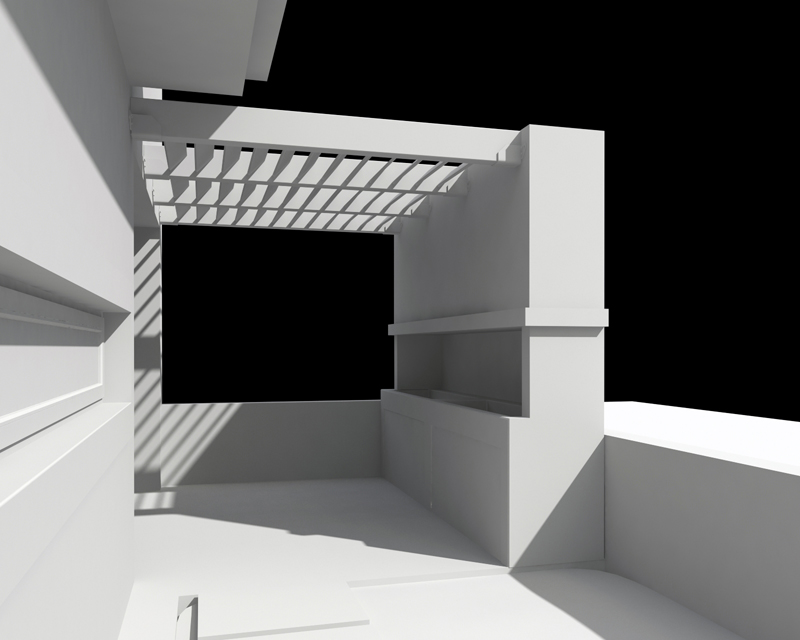
For the external floors we used a floor generator script in order to give material randomness in every tile. This is free, useful and easy to use script for creating floor geometry. In addition I created several cameras to render different views. After all these steps my 3D model of the house looks like this:
Adding furniture and other architectural elements
Adding furniture to the scenery
Despite the fact that we are making an external shot we must equip the house with furniture. Some of them will be shown in different angle views and we don’t want to give the feeling that this house is empty or abandoned. Considering that we used high quality modern sofas, coffee tables, lights from past projects. Internal wooden floor was also made by floor generator script. For the curtain models we used Marvelous Designer, a pretty powerful tool that can push further the level of realism and achieve smooth and realistic results. With this piece of software can be simulated also pillows, beddings, sofa cushions or any other every object made by fabric – but please not that it costs a few bucks…
Modelling widows and doors:
In this architecture visualization project the client asked for a specific type of window and door system and we had to download the blueprints from the company’s website and model them. As we described before section drawings cleared and imported to 3ds Max. With sweep tool’s help frames were formed. We added also 2 parallel panes to achieve beautiful double reflections.
Create realistic grass with corona scatter
At first we created some individual blades of grass from planes, converted them to editable polys and attached them to a single poly. We modeled 5 to 7 blades with different shapes and heights and applied them some gravity using a bend modifier.
Then we used the very handy Corona Scatter tool to scatter 90000 of these polys on the ground plane. Finally to enhance variety and realism we added some daises manually.
- Stone, peddles and decorative rocks are basic low-poly spheres, been modified with 3ds Max’s free form tools to have random shapes and scattered on a plane with Corona Scatter.
- Bushes and trees
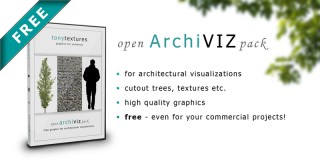
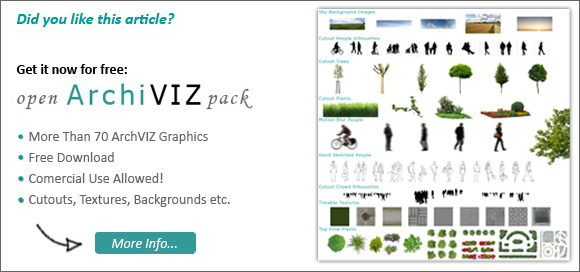
Grab our free entourage for your next architectural rendering job:
Free 3d detailed models are used for the close-ups. For background in order to reduce memory consumption we used cutout trees and buildings. These 2D trees (which are photos from real trees) are blending real smoothly with the rest of the 3d environment saving memory, making the viewport easier to handle and above all rendering faster than 3d trees. You can download our free “OpenArchiVIZpack” of cutout trees, plants people as well as tileable textures here:
- Road and sidewalk are custom made, floor generator is used again for the tiles and basic geometry for the curbs. Every curbs placed manually in random position to enhance realism.
- Background buildings and city furniture are models we used in past projects. Surrounding buildings must have proper attention, must be placed carefully imitating the real environment and producing nice and believable reflections to our main building glass/metal surfaces.
Setting up the architecture materials in 3DS MAX
Our strong belief is that if 3d artists want to achieve maximum realism, they must use high quality textures from real life. You will find some nice textures in our “OpenArchiVIZpack” as well. If you want even more check out our “4000 free textures” library – a ton of graphics that can be used to create your own individual tileable textures!
We tend to use materials with uneven reflections so we often use maps with dirt in the reflection and glossiness slots to add subtle imperfections to the material.
Below are some of the basic shaders:
Basic shader settings for wall plaster:

Material settings for glass in 3ds MAX:

Corona material settings for stone wall:

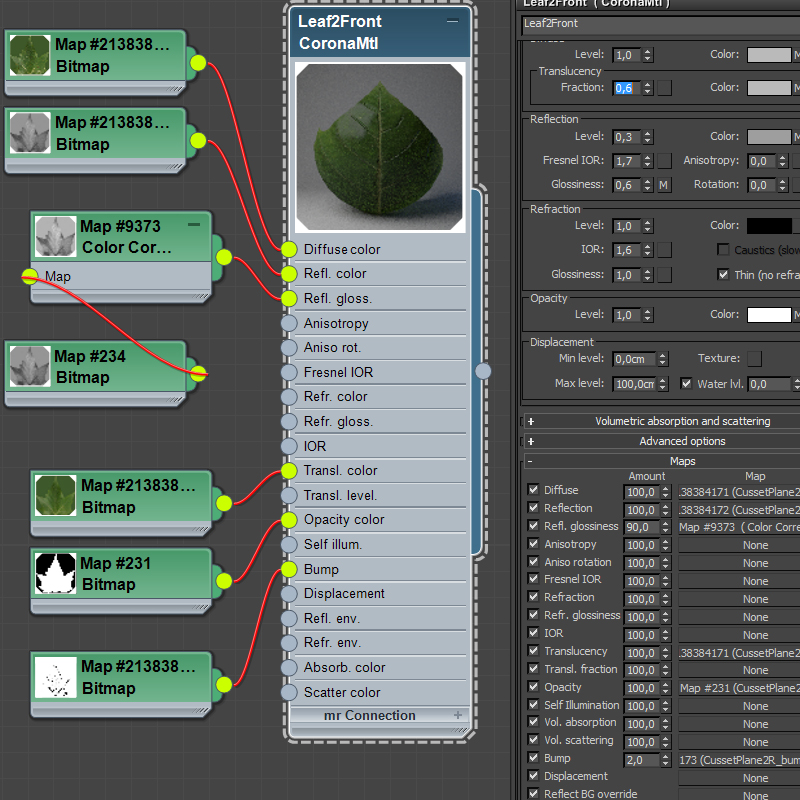
Leaf Material:
Cameras
We used standard 3ds Max cameras with a camera correction modifier applied on them. Cameras are important for the final outcome. It is recommended to have a camera in normal height (160cm~180cm) because this is the average height of human eyes and the output is more natural. Of course sometimes we could have aerial views, or fisheye point of view for more dramatic and artistic shots.
Furthermore we used photographic settings which are closer to real camera results. Sensor width with values around 35mm and F-stop around 16 are the default settings producing nicer and more believable results. If we want to play with strong depth of field F-stop values can be reduced to 2 or 4.
I recommend to define the final camera positions as soon as possible because all additonal works (modelling, textureing etc.) should be consider the camera positions in order to create the best result within the given time.
Corona Sky and Corona Sun to quickly set up proper lightning
When preferable positions are found we started to play with the lighting system in order to find interesting shadows and contrasts.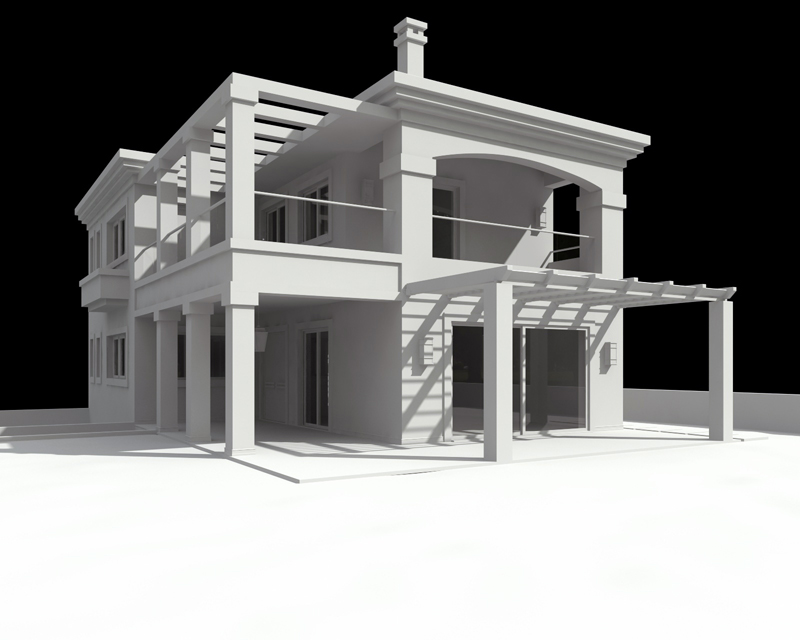
A very fast and accurate lighting is the combination of Corona sky and Corona Sun. For architectural visualization is very important to have a fast preview in order to check modeling or texture mistakes and literally this setup is ready in a few clicks so we could start with some lightning studies:

For the artificial lighting were used Corona lights and again we played a lot with the temperatures of the lights and their intensities. The client asked for a clear sky shot and due to the limited time frame we used the Corona Sun and Corona Sky which gives really good results without big effort!
After the project we played around with HDRI lightning to create cloudy and night shotsas well.
Rendering with Corona in 3DS MAX
Rendering with Corona is a very interesting and easy procedure. We usually play around with different values in the Scene tab->Camera/expose/tone mapping and observe them in real-time. Every other value is left in default unless circumstances require a different setup. For example in this project we increased the displace values (Performance tab-> Displacement) for better and sharper results in the stone wall columns.
Post Production for architectural rendering
Used correctly, post-production can drastically change the final output. Our opinion is that post production on raw renders must very subtle. On that basis we used a slight chromatic aberration pass, a vignette filter, some saturation adjustments and above all a gentle touch in levels and contrast.
Finally for daylight and night shots we added some flare enhancements.
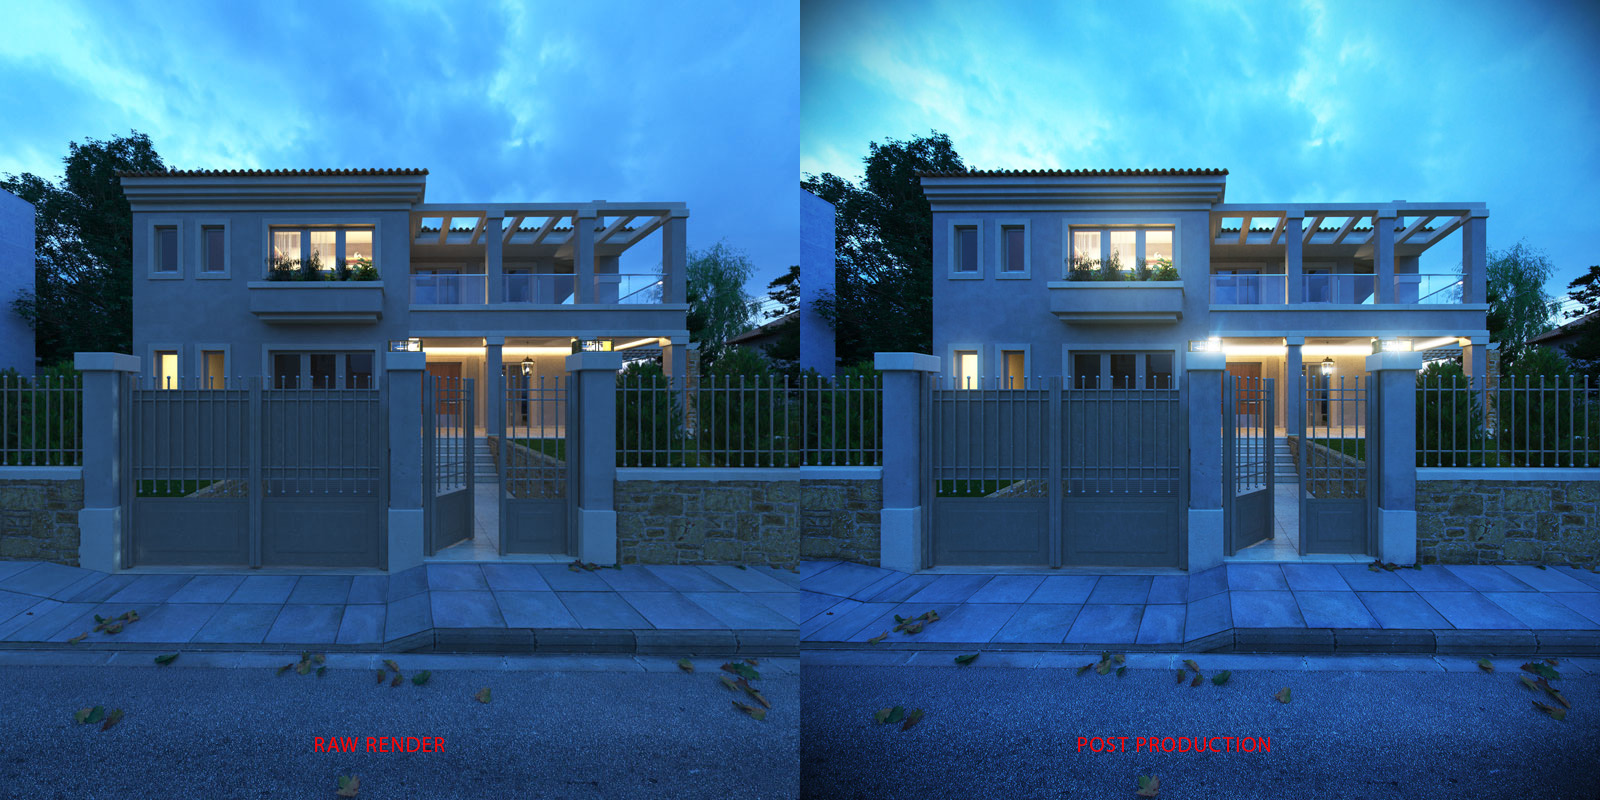
Below are the client’s stills (low quality due to copyright reasons):
![]()
![]()
![]()
![]()
![]()
![]()
![]()
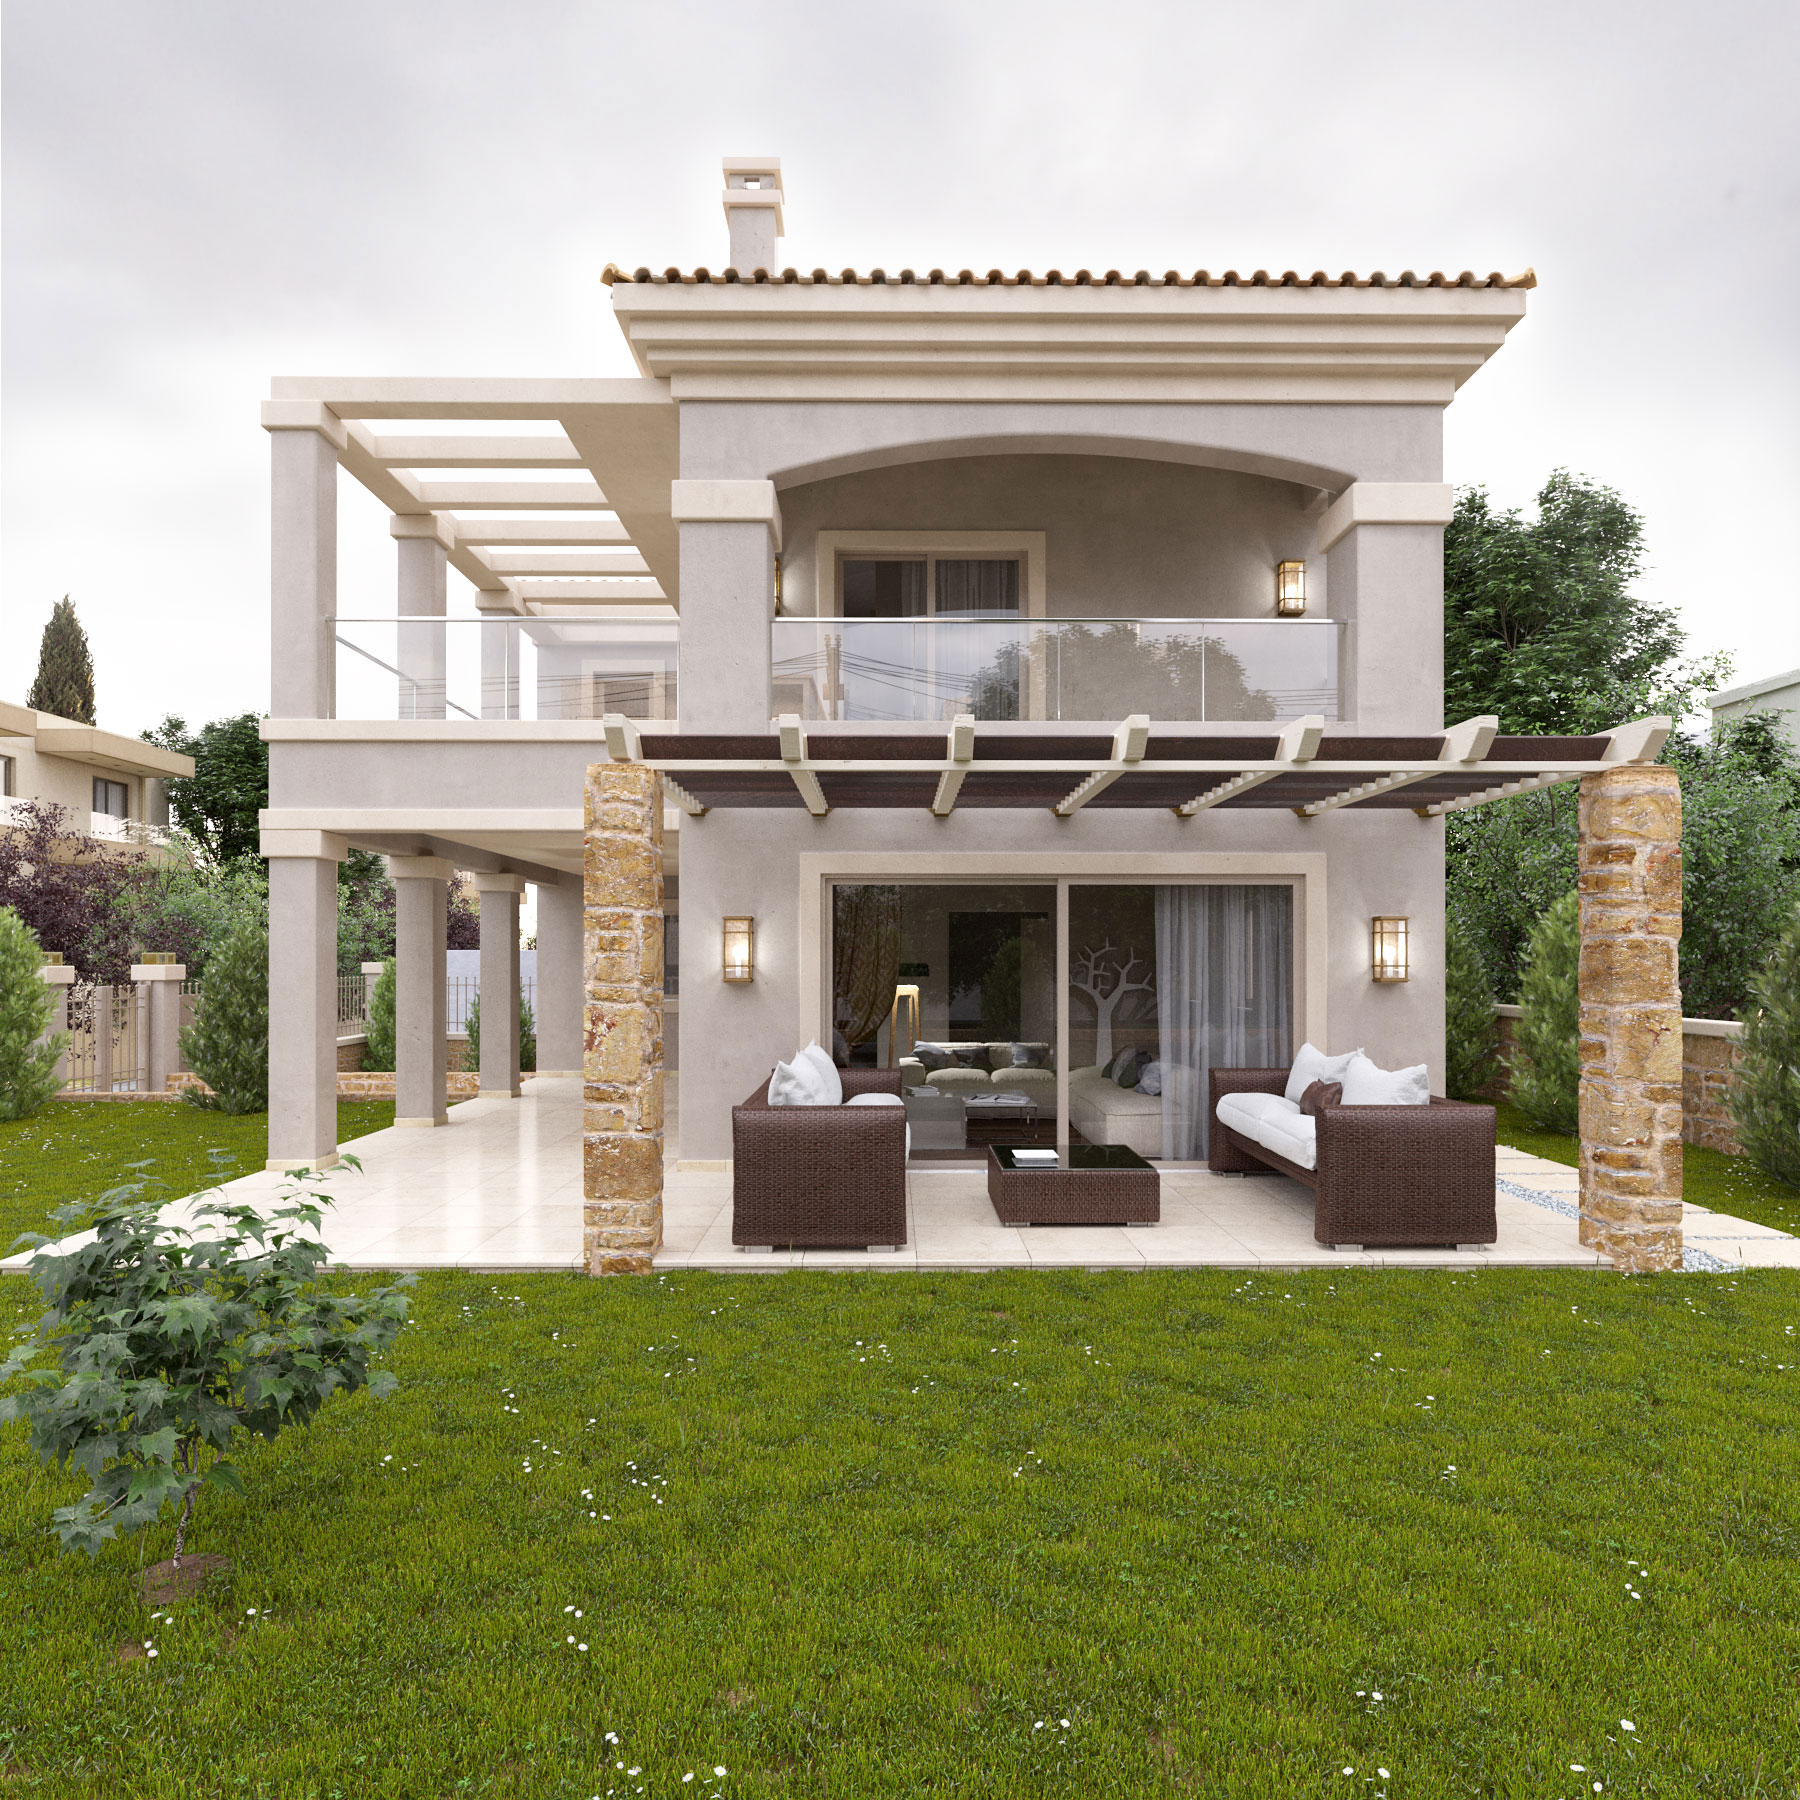
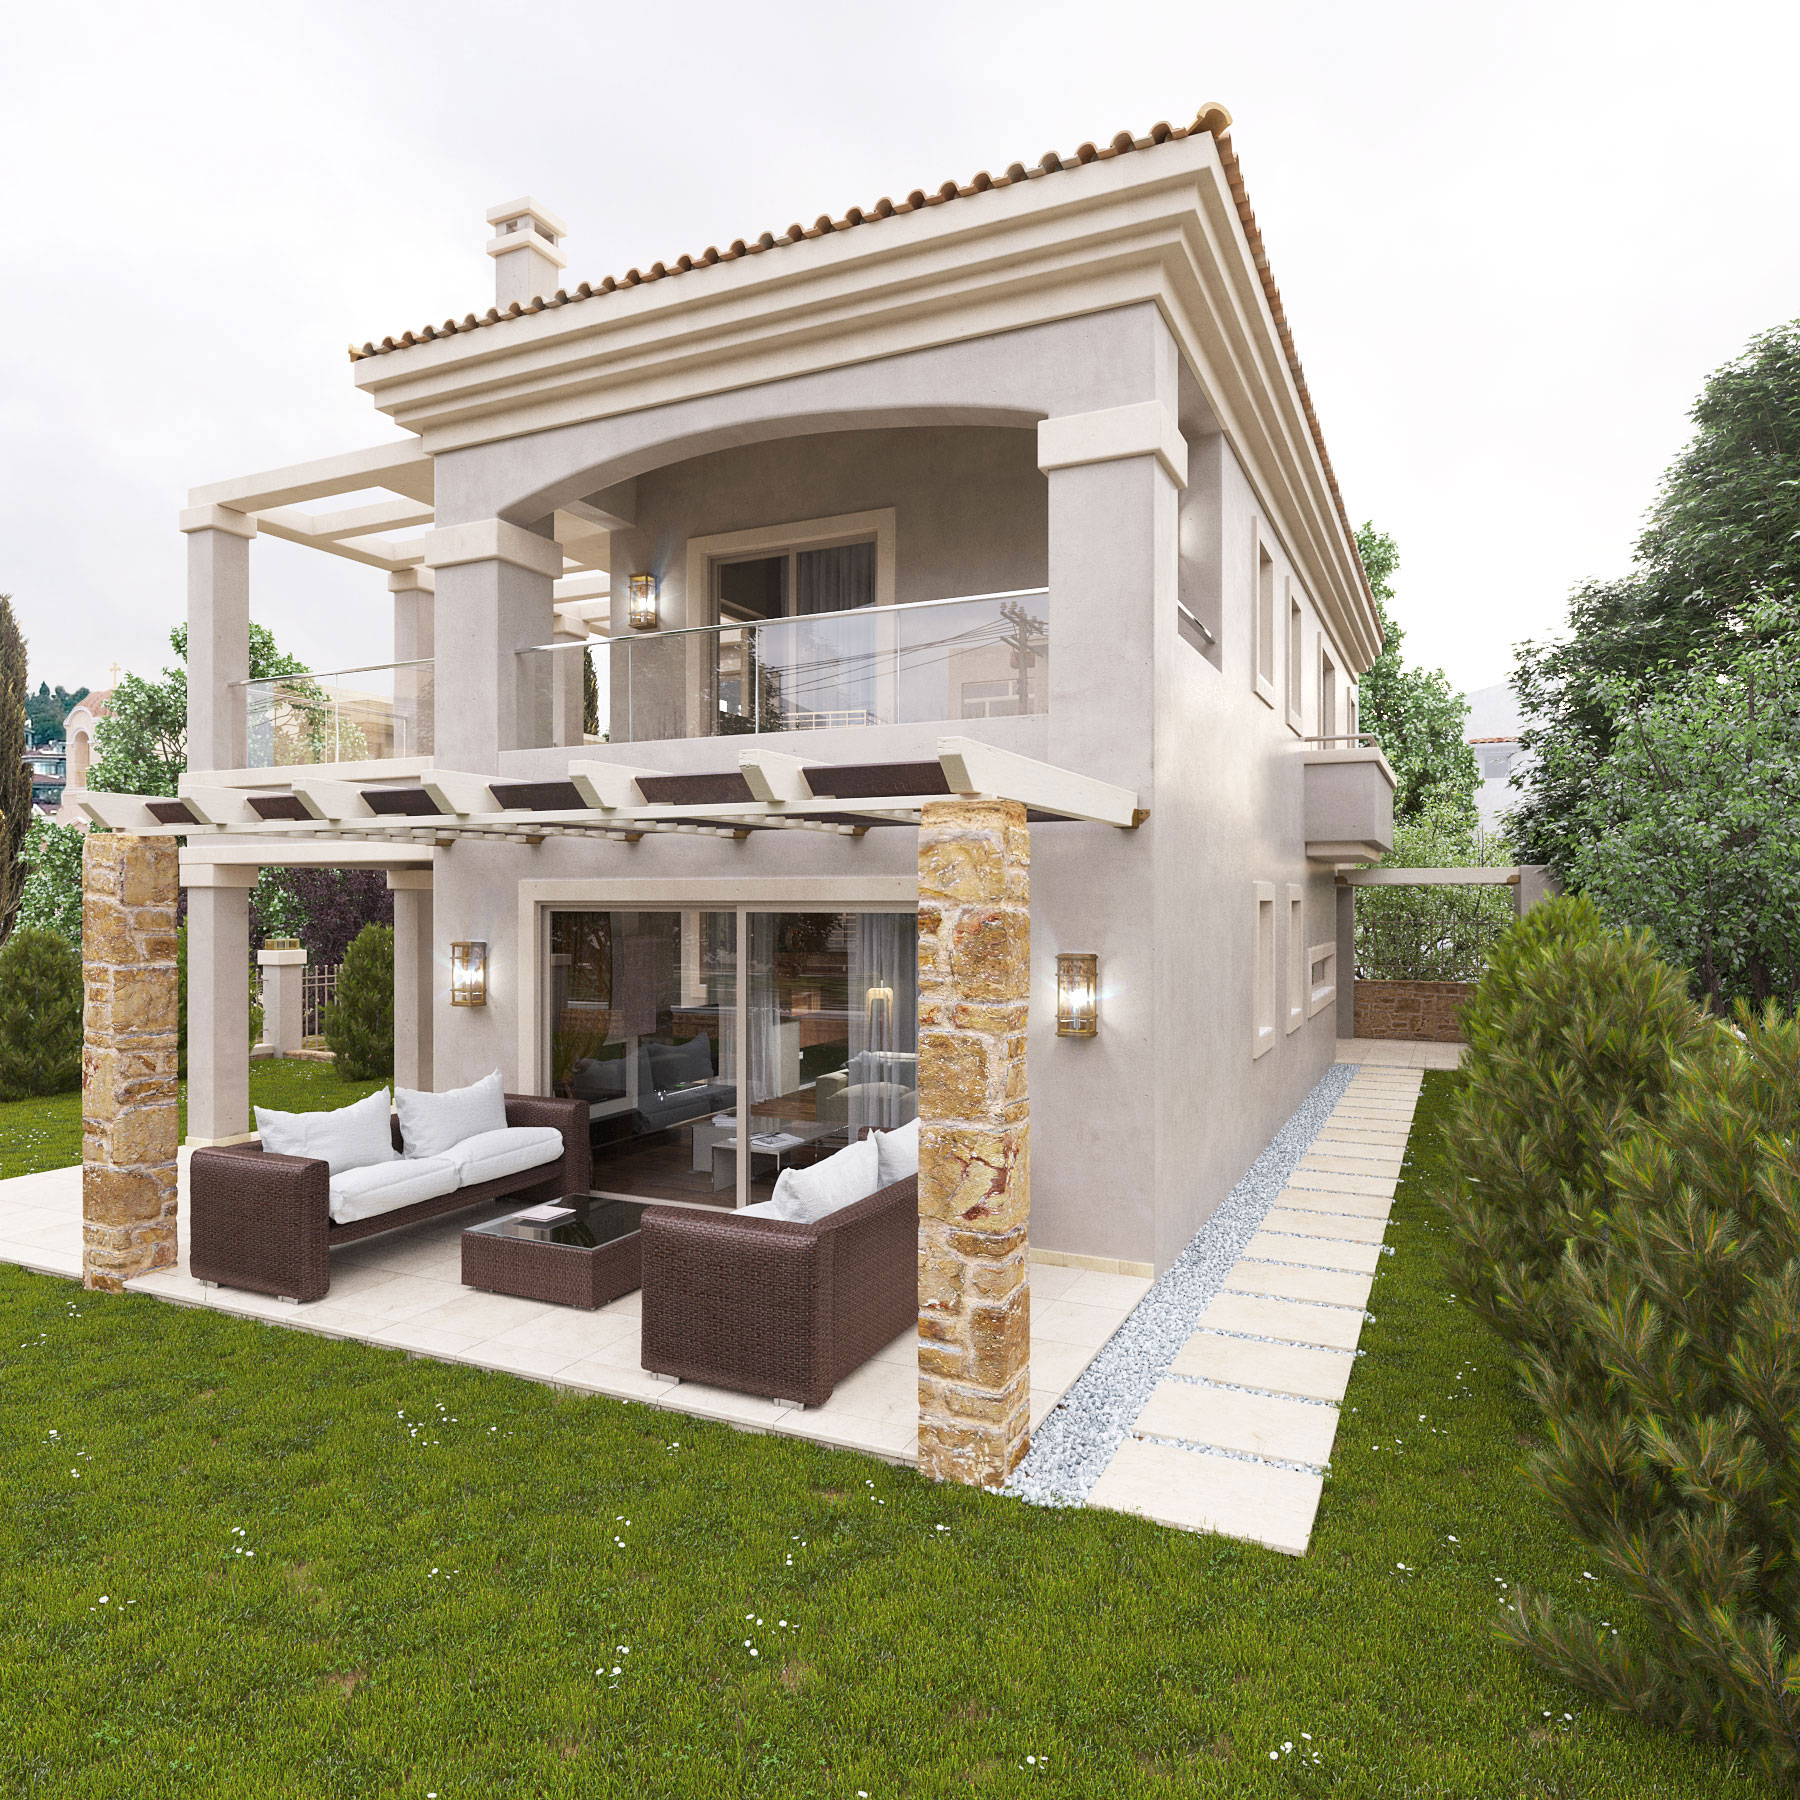
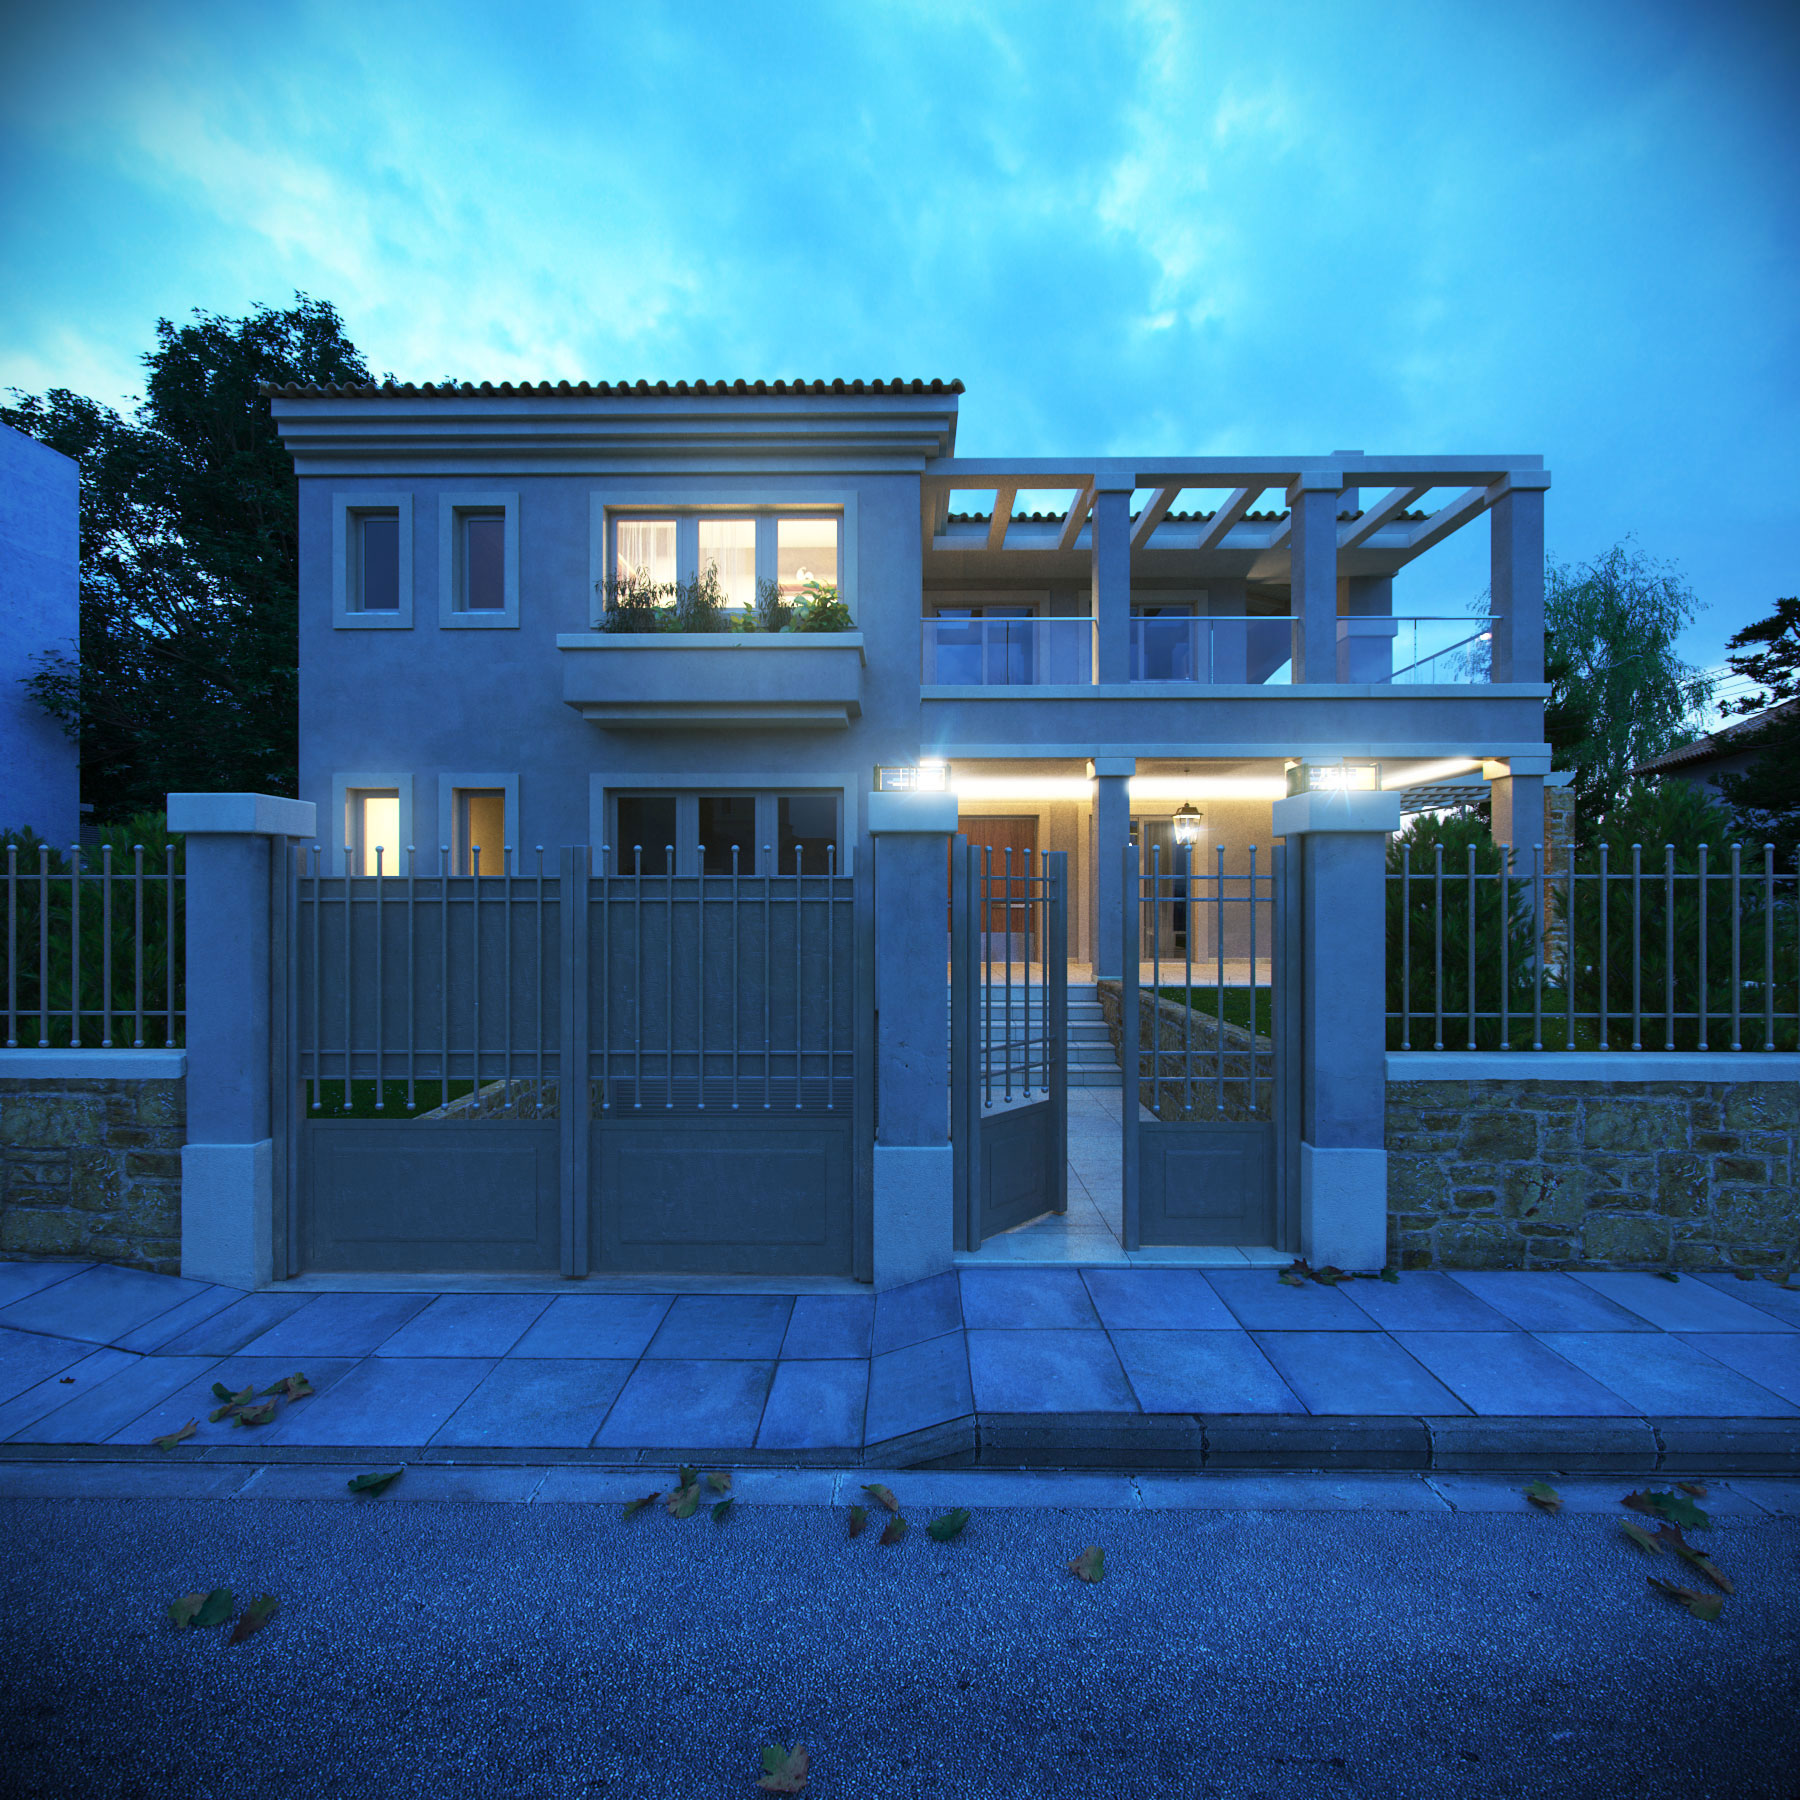
And the extra high quality ones:
I hope you enjoyed this quick tutorial and are curious to test out the Corona render engine in one of your next projects!

Thanks for sharing this article, I am happy to get this. You have the best site and nice posts they very helped us. It’s an impressive one of the best blogs . I am very much impressed with you. Thank u all
Thanks for thi tutorial. Nice render and nice stills, especially at night.