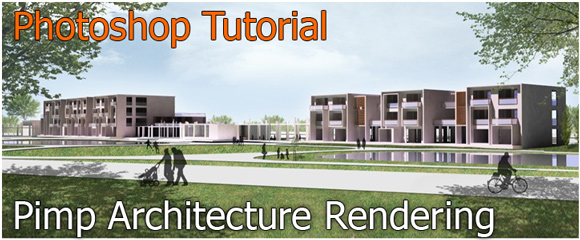
Sometimes, we don’t have time to produce a realistic architectural Illustration and all its effects completely in the 3D environment, therefore I often use Adobe Photoshop in the post process to add some effects.
For this tutorial I want to start with a rendering I created in Lumion 3.0, but at the end it does not really matter which animation or rendering software you use, because I want to show you my step-by-step post processing approach of an architectural illustration in Photoshop.
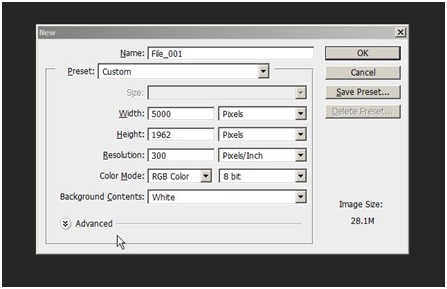
The image size is pretty big with 5000px x 1962px, but I prefer to render the image larger than smaller. Let’s open a new document in Photoshop and set it up.
Now, drag your rendered image and drop it into the Photoshop and it will create a new layer.
Remove the sky background to replace it with a new sky texture
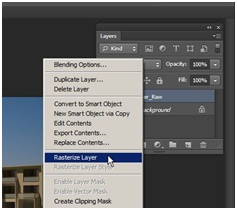
In my case I named the layer with the rendering to Render_Raw. Selected it and press ctrl+J. It will duplicate the layer automatically naming it Render_Raw copy.
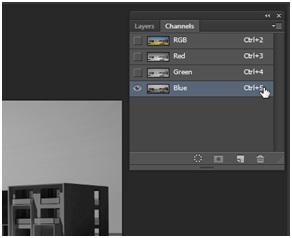
Hide the previous Render_Raw layer by clicking on the eye button. Now go back to the Render_Raw copy layer and go to the channel window. You can find it via window > channels. Because we want to replace the sky we first need to select all areas of the sky, which are blue. We now want to check the channels to find the channel that has the best contrast between the sky and the other elements. Then we can easily select the parts in this channel. Each channel contains the relevant information of the image related to one color. Because we activated the RGB modus we have the channels red, green and blue. The sky is blue so obviously the blue channel has the best contrast between the sky and the rest in the image. We can open the blue channel by clicking on it or pressing ctrl+5.
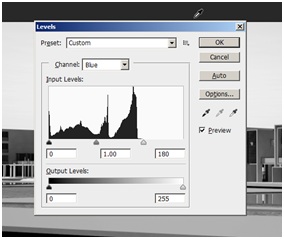
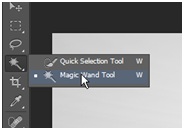
For a better selection of the sky we will now increase the contrast of this channel so that the sky will be more or less white and the rest of the image gets darker. To do so Press Ctrl+L or go to Image > Adjustments > Levels. Now move the right triangle at the bottom of the chart a bit to the left to increase the brightness of the sky area. Next select the magic wand by pressing W or selecting it from the toolbar.
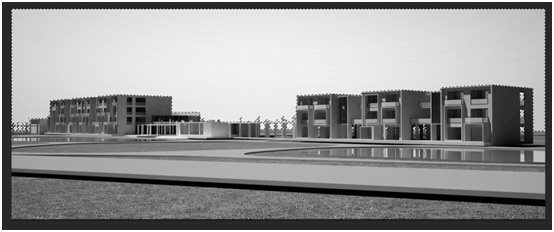
Set the tolerance to 10. Now start selecting the sky – press Shift while clicking on other not selected areas to add these to your selection. Take time and select all the area where the sky is. Now, you’ll get something like I show you in this picture:
Now go back to the layer window (you can press F7). And hit Delete in your keyboard. You’ll see the sky is now deleted. You can repeat the process several times to get the satisfactory result.
Find and replace the sky background with a new free sky image
Now we need to find a new sky background image. Therefore I use the free tonytextures image library where you can download various royalty free textures and background images for free and are even allowed to use them in your commercial projects! So if you are interested in textures and architectural visualization take a look at the huge free texture library:
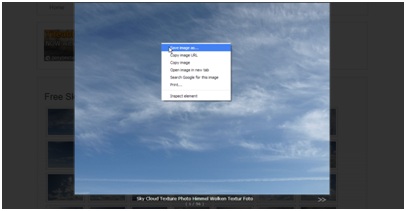
There is even a special sky and cloud texture category so check it out. I pick this nice summer or spring sky photo which I want to use for my illustration and open it in Photoshop
To merge the new sky image with your architectural scenery you can simply drag the new sky image in your document and place it below the layer with your rendered scenery. Now press Ctrl+T or Edit > Transform > Scale and scale it to the scale of your view.
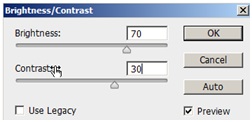
Do not be afraid to not keep the proportion of the original sky image. I like it when the width of a sky image will be highly increased to get a more abstract look. Now go to image > adjustments > brightness/contrast and give it a bit of brightness and contrast.
Add a grass texture to the rendering
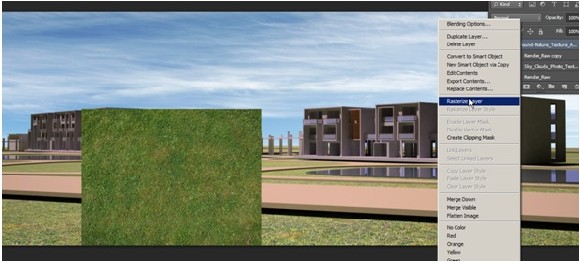
Now we need to replace the grass. So I pick again a nice grass texture from the tonytextures texture library category green nature ground. Download it and drag-drop it into Photoshop.
Next select the texture and press Alt+Left mouse button and drag it. You’ll see the layer has been copied. Put it just beside the previous one. Let’s make two new copies. Now, we’ll merge all three layers. We can select these three layers from the layer window pressing SHIFT. Or, we can click on them directly pressing SHIFT + Ctrl . When they are all selected press click right button and select ‘merge layers’ or just press Ctrl+E. You will recognize that the texture is not seamlessly tileable, but we will take care of this in the upcoming steps.
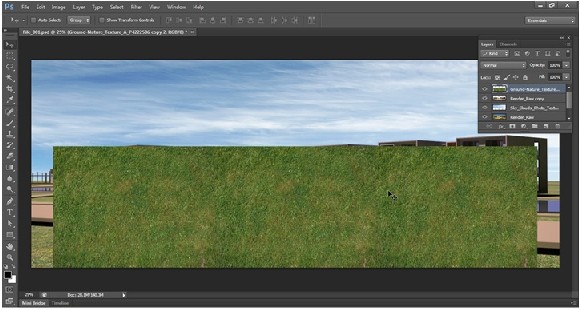
Next press Ctrl+T (transform tool). If you click right button on the texture, you’ll see the distort modifier there. Also if you press ctrl you’ll see the cursor changes. It means you can distort the picture by clicking on the four points of the picture. Now, using distort and scale, try to achieve something you can see in my next screenshot. Hit Enter when the job is done.
Pressing Alt+ dragging with left mouse button will create another copy of the grass (or press Ctrl+J). Move it to the right. We will merge both layers to reduce the tiling effect that you maybe can see now. The grass images are not merged perfectly because the photo of the grass was not seamlessly tileable. To merge both layers we will now delete parts of the upper layer by using a soft brush to reduce the effect. To do so take the eraser tool from the toolbar or press E .
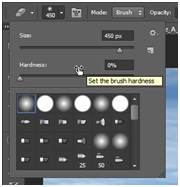
Depending on your image resolution you have to change a proper brush size – in my case 450 is fine. Now erase the parts where the tiling effect is visible to merge the two layers so they look continuous. Then merge the two layers and name the layer e.g. Grass 1.
Next hide the Grass 1 layer by clicking on the eye just beside the layer. Select the Pen tool or press P. Make sure Shape is selected.
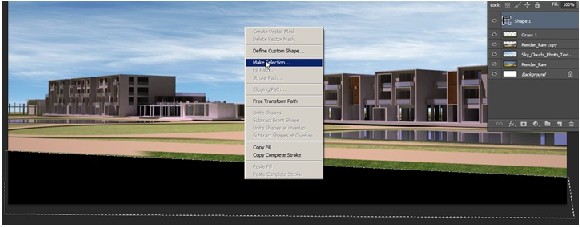
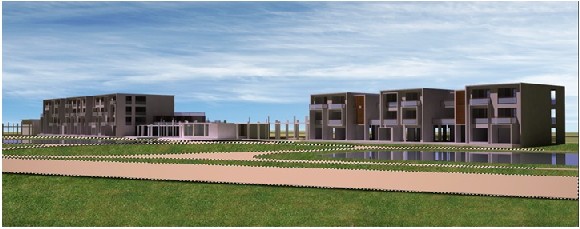
Now draw a shape covering the grass. When completed, click right button, and select Make Selection. Hide Shape 1 and select Grass 1.
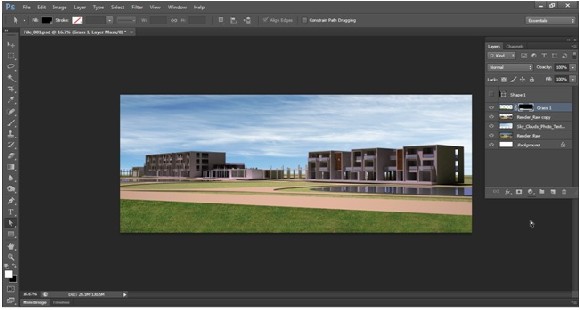
Now add a layer mask. You can do it by clicking the icon with the dot in the rectangular down in the layer menue. Then you will a result like this:
You can now deselect your selection by pressing Ctrl+D. You can delete Shape 1 layer if you’re happy with the layer. If you aren’t you can edit the Shape 1 and do it again.
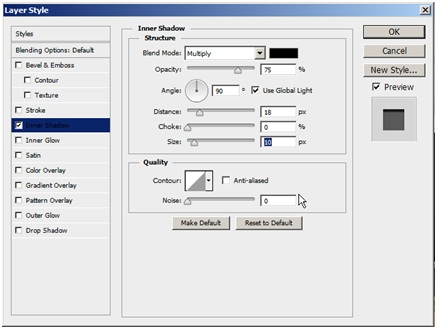
Next we also need to recreate the shadow. Click on the right side of the layer Grass 1. A new window will open. Turn on the Inner shadow and give it the setting like this.
Now, we need to work on the other grass using the same technique. Let’s start drawing the arch beside the water body with pen tool. When drawing the curve, if you hold the pen clicking left button, drawing the curve is possible. Press the Caps Lock button to get more precise selection. When you drag the pen, two handle will appear to make the curve editable. You can edit it using direct selection tool. You can select and toggle between Path Selection Tool and Direct Selection Tool by pressing A and Shift A.
Start drawing the curve. You can also turn the opacity down, so you’ll be able to see what’s under the layer. It helps a lot. Finally you can also keep the shadow by drawing the line just under the edge of the footpath. We can also do it later by the way. After completing the shape, you can do the corrections moving the handles, press A to activate direct selection tool.
Now bring another grass texture and copy it several times. Name it Grass 2. Select Shape 2. Activate the Pen tool pressing A and clicking right button activate Make Selection. Hide Shape 2 and select Grass 2. Mask it. Use the Same technique to make Grass 3, Grass 4-7. You can skip the parts of grass which are far away.
Now Select the Render_Raw copy Layer again and press W or Magic Wand form the toolbar. Use a tolerance of 15 and select the footpath pressing shift.
Now Press Ctrl+J to create a new layer based on your selection. Afterwards bring the layer at the top of the list and name it e.g. Footpath. Double click on the right side of the footpath layer and turn on drop shadow. Set it up according to the screenshot below. It will give the footpath a depth with shadow.
This is another way of putting shadows, so you can now hide the Inner Shadow of Grass 1 if the shadow looks fine in your eyes.
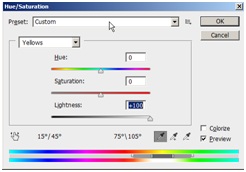
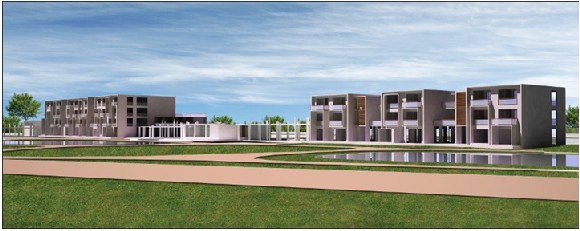
Select the Render_Raw copy layer again and add some brightness and contrast. Then press Ctrl+U. Select Yellows and make it lighter
Add some free cutout trees and people
Now we’ll add some trees in the scene. You can either choose a tree photo from our tree and plants texture gallery and cutout the tree manually or you directly choose one of our collection with professional cutout trees (LINK).
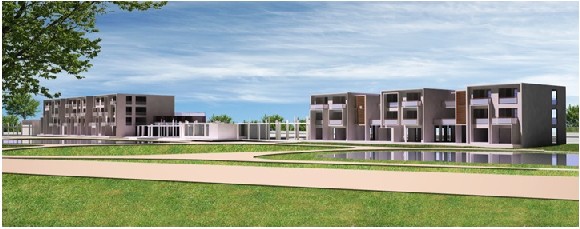
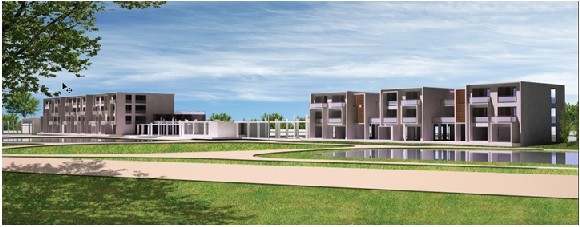
Import your cutout tree and put it under the Render_Raw copy layer. Let’s put some trees behind the building to populate the scene. Here I’ve just used one tree copied several times and resized it to look different.
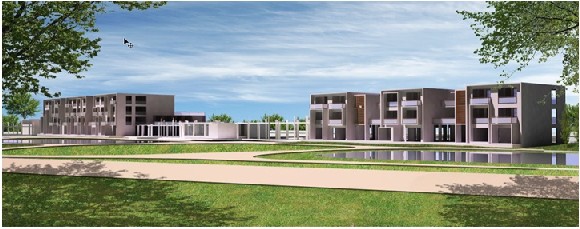
Afterwards pick another tree and put it on top of all layers. I also made it a bit darker by using brightness and contrast, maybe you also need to reduce the saturation a bit.
To make the scenery more interesting you can add glow to the trees. Double click on the right side of the layer and activate inner glow like you see in the screenshot blow:
Now duplicate the layer pressing Ctrl+J. Transform and distort it to get a result like in the picture. We will create the shadow based on this copy of the tree.
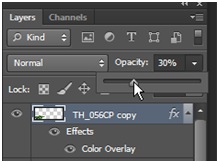
Double Click on the right side of the layer and activate color overlay. Make the color black and hit OK. Give the layer 50% opacity to look like shadow.
Now let’s add some blur to make it look more realistic. Select the shadow of the tree, Filter>Blur>Gaussian Blur. Set the Value 3 or 4 to make it look like this:
You can try some other trees too.
Adding cutout people silhouettes to the architecture illustration
Now it’s time to put some people in the scene. You can download some samples from here: https://www.tonytextures.com/free-downloads/
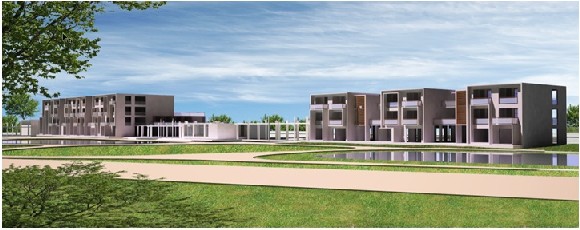
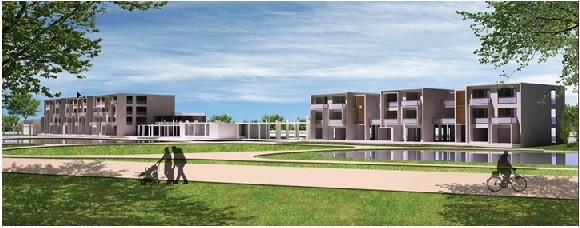
I’ve used some silhouette free people here, but you can also take a look at the ArchitecturePeople package. Don’t use colorful images if they are small in resolution. Most architects rather like the silhouettes, because they will result in a more abstract look. Import the silhouettes, scale it and also give them 70% opacity.
So this is the basic idea. There are some other problems in the scene. But using the technique discussed in the tutorial, you’ll be able to manage it nicely. Try to play around a bit and test new things. Use Brightness-contrast-color balance on different layers to get your desired result.
Architecture Rendering: Set focus on the building itself
So far so good: Since I want to present the architecture I would like to put the focus more on the building. So I first select the sky layer again. You probably will also have now a lot of layers and maybe not named them probably (like me). But there is also a quick way to select your layer. Press Ctrl and click on the object, like the sky. You’ll see the object selected as well as the layer. Now we make some modification to make the building visually more prominent.
- Select the Sky and reduce the saturation
- Select the building and add outer glow
- Reduce all the opacity of the trees into 80%
- Select all the grass layers. Merge them pressing Ctrl+E . Reduce saturation and increase contrast.
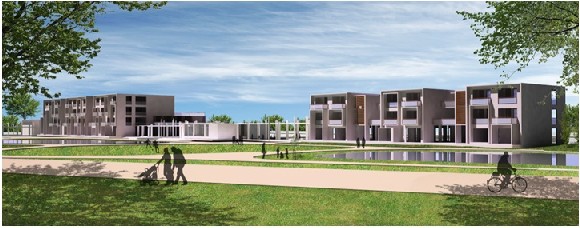
Now I think it looks nice!
Final Architecture Illustration with trees, people and textures
I hope the tutorial helped you understanding the general process and inspires you to try things out by yourself













Leave a Reply