
How to add/make rain in Photoshop?
Architectural visualization should awake emotions so it is quite imporant to create the right atmosphere in your rendering! Typically most renderings shows sunny spring weather with light blue sky and perfect green trees. But sometimes you want to stand out or show your architectural design in another mood. In these cases a rainy situation can be an option too! Therefore we want to show you in this tutorial for architects how you can create a rainy mood in Photoshop based on a regular daytime rendering.
Creating a rainy mood for your scene can be tricky, and it takes a lot of time and experience to achieve good results (i.e. in 3dsmax-vray). Therefore we want to show you an easier way to convert your regular daylight scenes to rainy moods with the help of Photoshop in the post production.
We tried to decribe the technique in general so you can apply it to any scene you work with.I am going to use a rendering produced for a client. The original scenery of the image is mostly exposed to sunlight at dawn.

1. Reduce overall saturation, exposure, brightness etc.
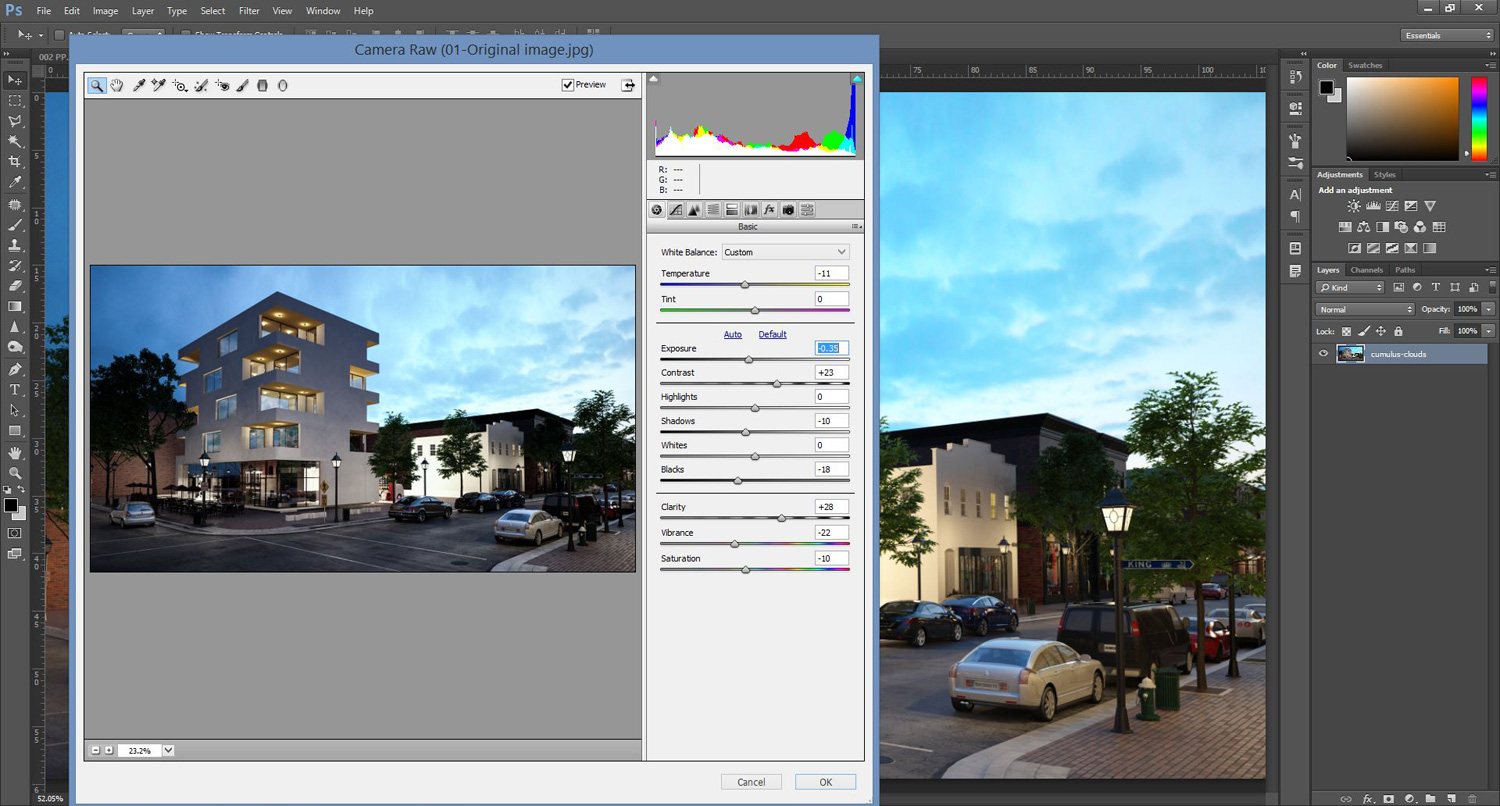
Firstly, we start changing the colors of the image, we want give it more of a darkish sense of scenery. The reason for that is because, usually when we have a lot of rain, we don’t have such light on the scene, as we see in the original image.
Hence we go Filter>Camera Raw (CTRL+SHIFT+A) and we adjust the settings as seen below. This adjustment of values, most of the times, depends on the scene that you work with. Still, these are the adjustments I made:
- Temperature: -11
- Exposure: -0.35
- Contrast: 23
- Shadows: -10
- Blacks: -18
- Clarity: 28
- Vibrance: -22
- Saturation: -10
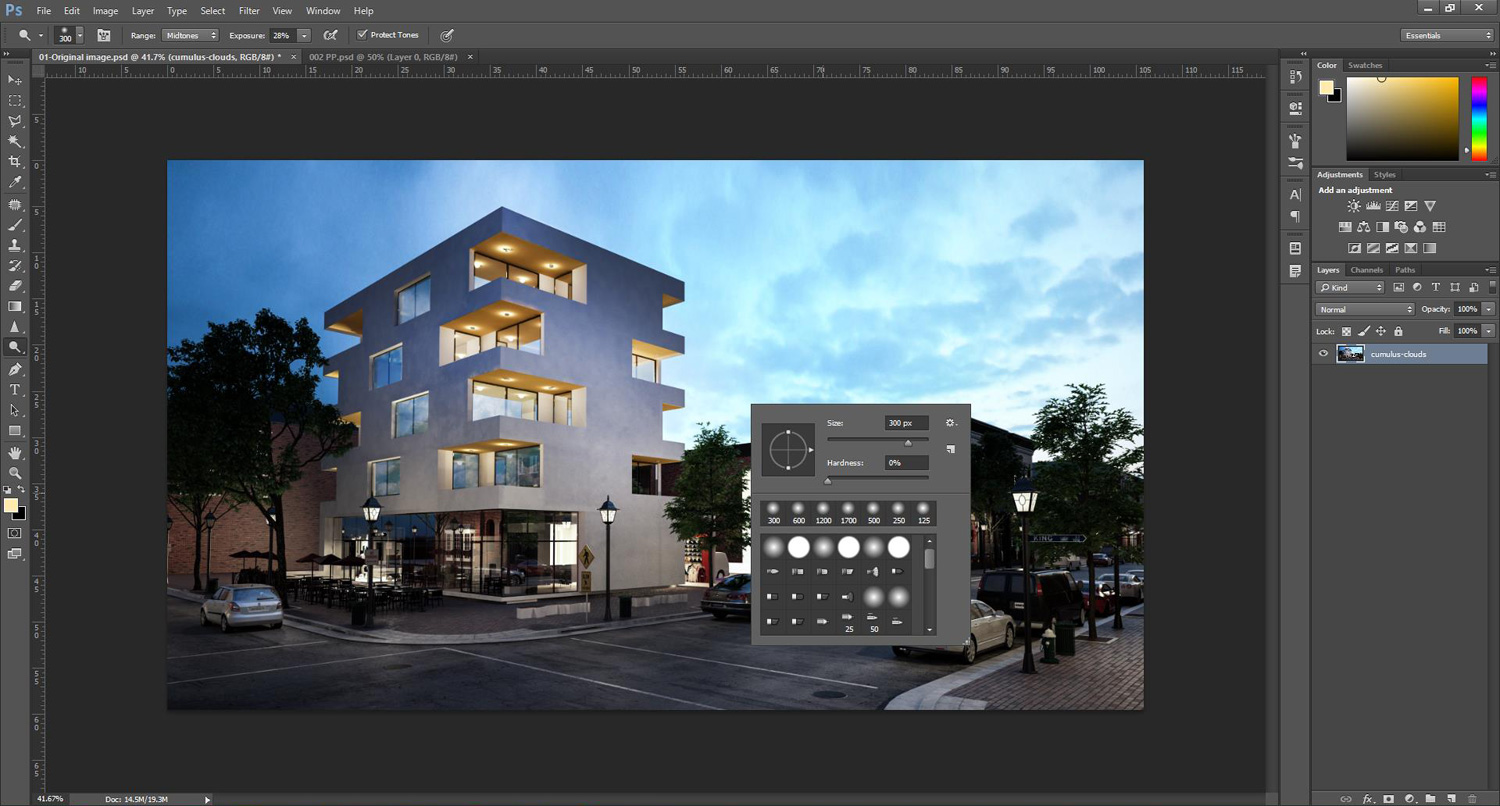
2. Increase contrast here and there with the Dodge and Burn tool
Secondly, in order to create a contrast in the image, and in order to darken or brighten some
parts of the image we pick up the Dodge and Burn tool.
The brush settings that I used for both tools are:
- Size: 300
- Hardness: 00
- Exposure: 28%
3. Sharpen parts of the image with the Sharpen tool
Thirdly, to shape up the image properly, I have used the Sharpness Tool, to sharpen the edges that I see as necessary, to make the scene better shaped for a rainy mood.
Sharpen tool settings that I used are:
- Size:400
- Hardness=0
- Strength:39%
Be very gentle when you work with the Sharpen tool.

4. Add artificial lights
Afterwards, we want to give some more artificial light to the scene. Always according to the dark weather that is created when it rains. Therefore we open a New Layer (CTRL+SHIFT+N), pick up the Brush Tool, we select a color similar to the light source that you have and we adjust the Size, Hardness and Opacity according to your scene. These are the settings that I used to spread the light from the lamp posts:
- Size 125
- Hardness 5%
- Opacity 80%

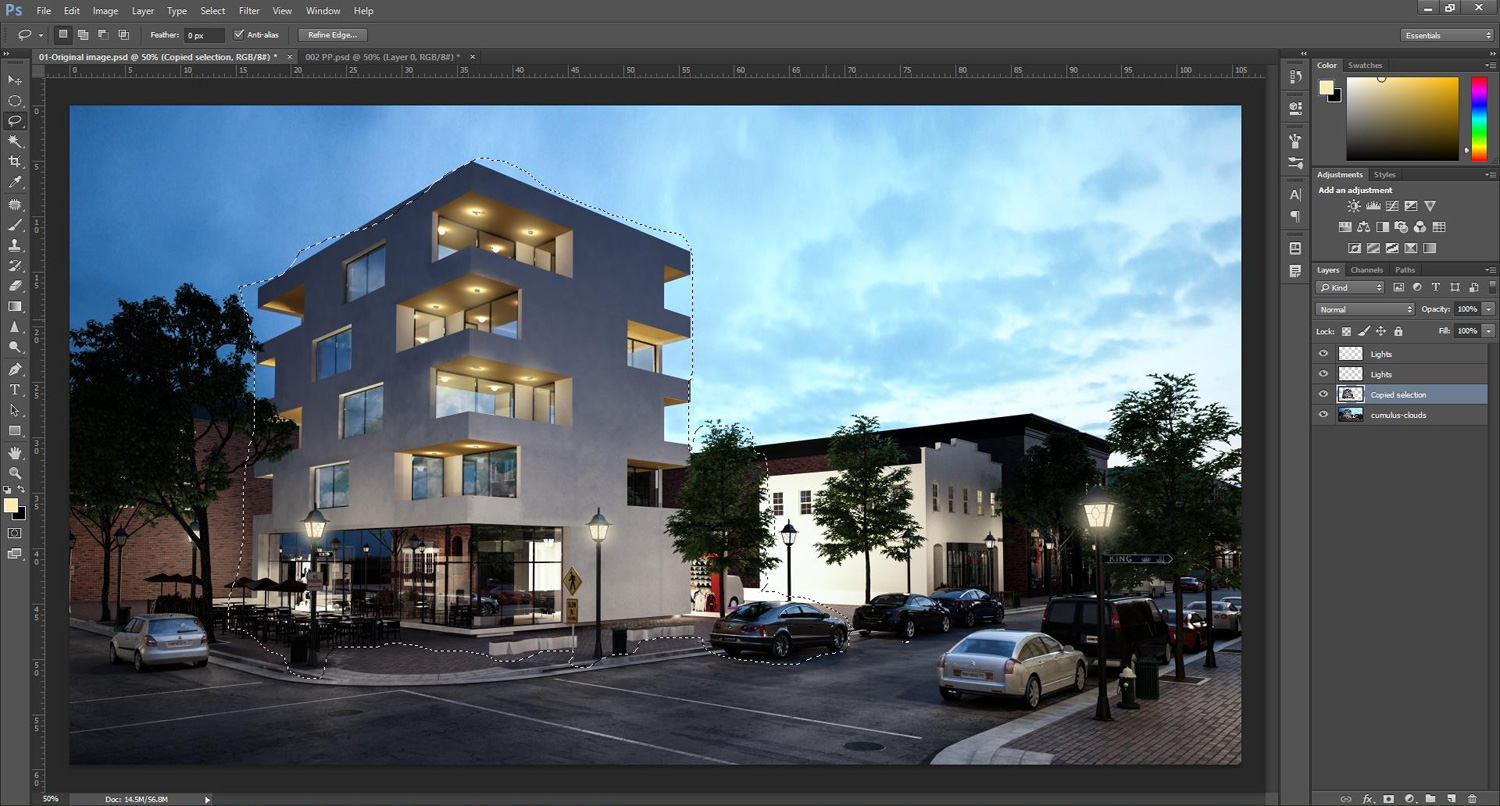
5. Select areas that should be reflected on the wet road
The next step is adding the reflection that is created from the rain on the ground surface. The easiest and fastest way to make the reflection, is to select the parts of the image that you want to see reflected on the ground. In this case we have to select roughly the white building, the lamp post and the cars on the street individually, according to the angle they will reflect. To select the parts of the image, in this case we use Lasso Tool. I selected the areas shown in the following screenshot:
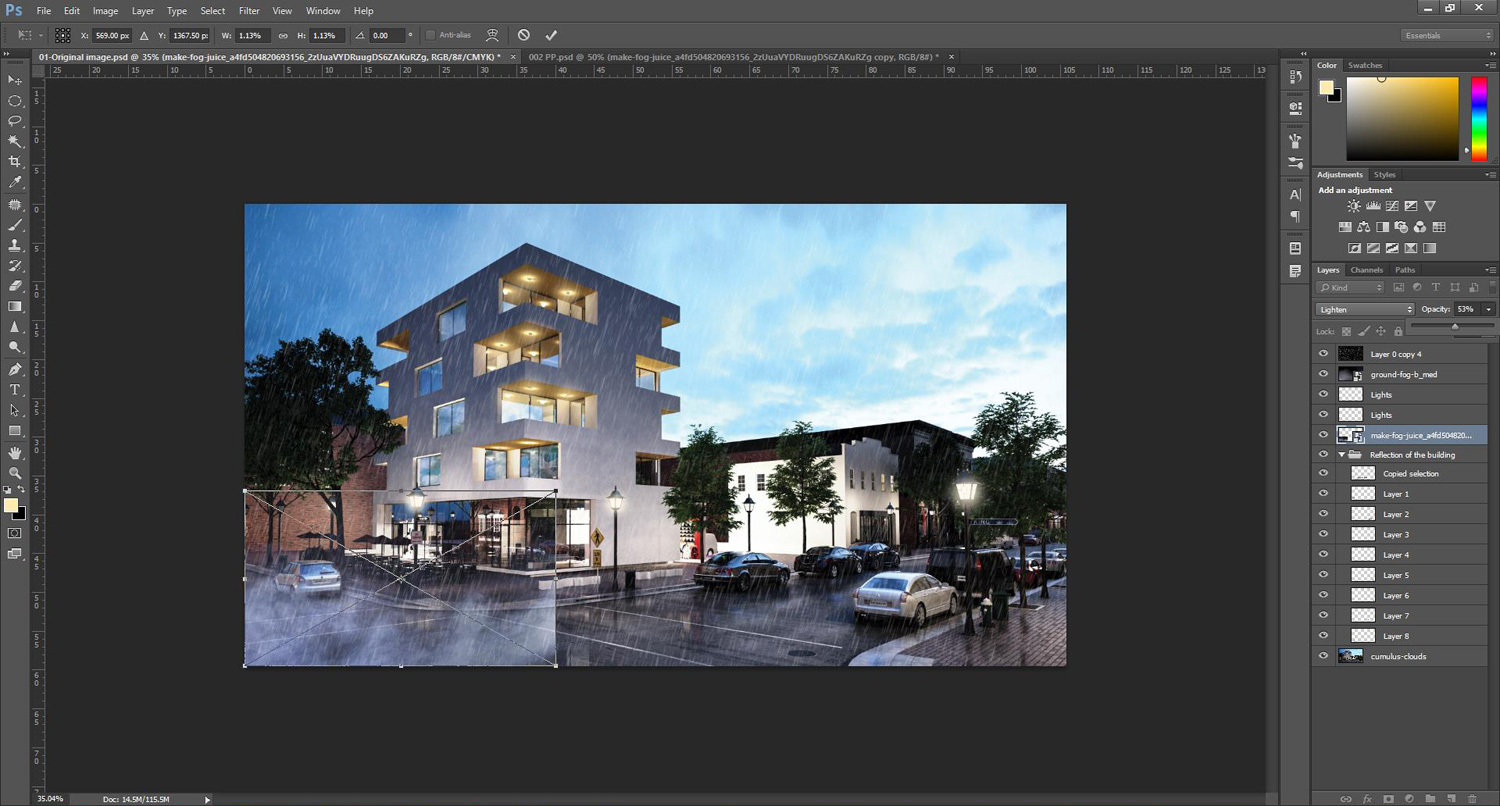
6. Vertical flip areas
After selection is completed we copy it to another layer by hitting CRL+J. Then, we want to hit (CTRL+T) to Transform the selection, and click Vertical Flip. Position the flipped part of the image, just at the place where you might think the reflection could occur. In this case, this is how it is positioned:
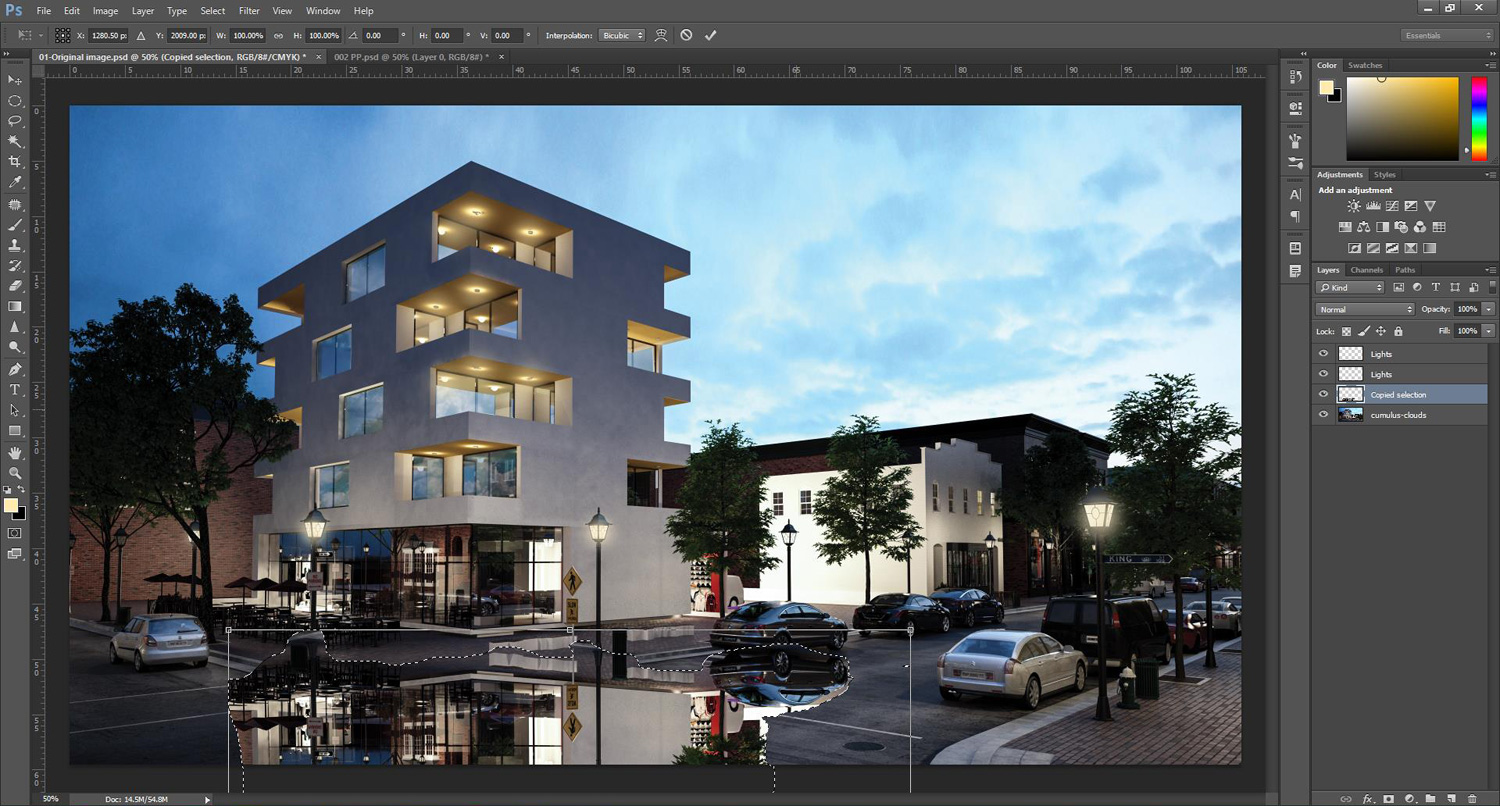
7. Repeat mirror effect for other single elements
We want to continue the same procedure, by selecting roughly other parts of the image, such as the cars, the trees, the lamp posts etc. The selections should be made individually for all of the items that are not close to each other. We repeat the procedure carefully, by flipping the selections vertically and by positioning them at the right place. By the end of this procedure, it might look pretty scary and chaotic. Don’t step back; we are already in the process of producing the results.

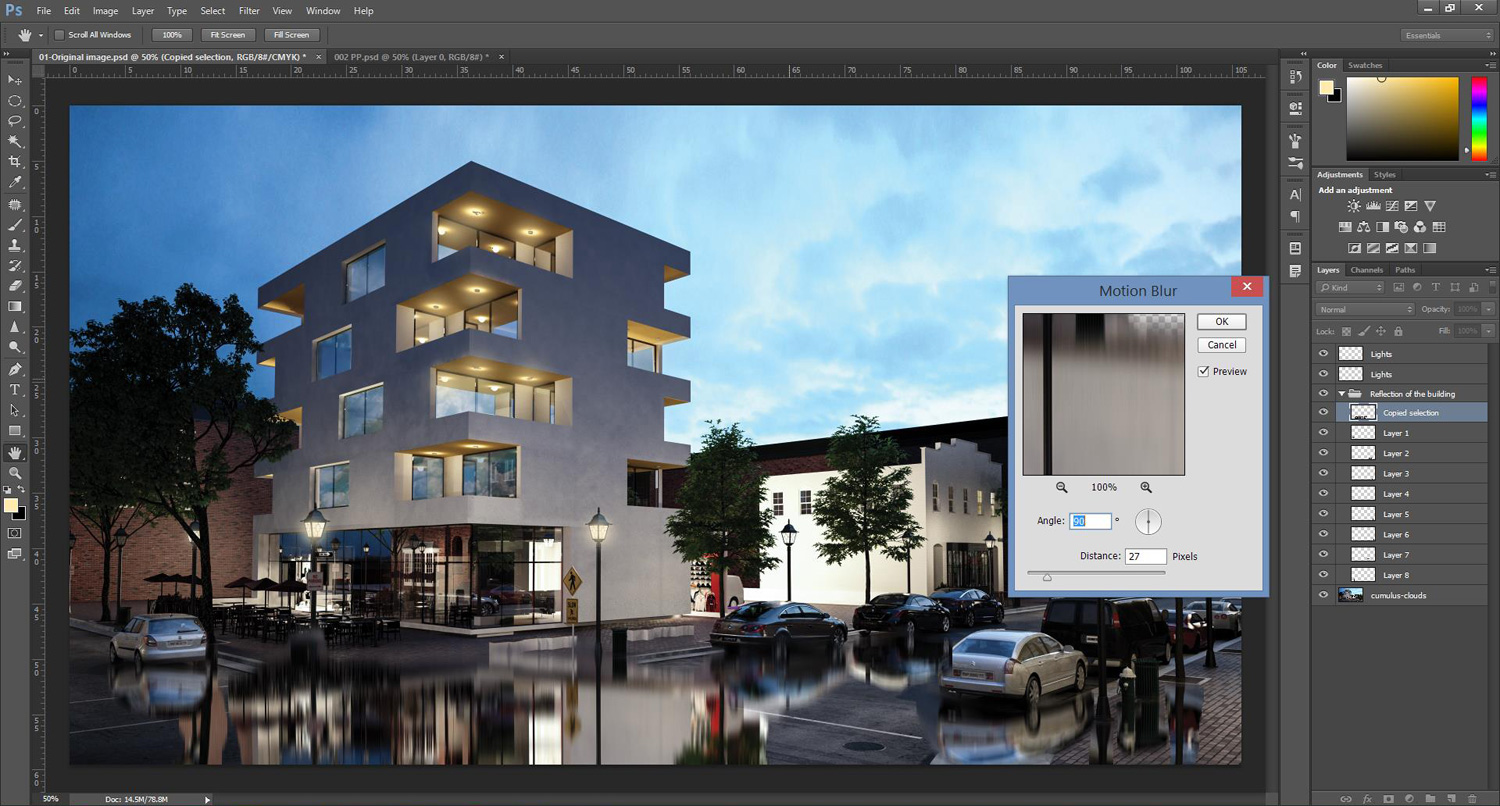
8. Add Motion Blur to the reflections
In order to give the reflections a more realistic look, we need to go Filter>Blur>Motion Blur. And then we apply the settings to all of the reflected parts of the image. We put the values as seen below:
- Angle 90
- Distance 27
This is what it should look like after we apply this filter to all of the selected layers.
After this, select all the layers that have the reflection, by holding CTRL and clicking in all the layers one by one, hit CTL+G, to Make a Group so we don’t have a complicated situation with the layers.
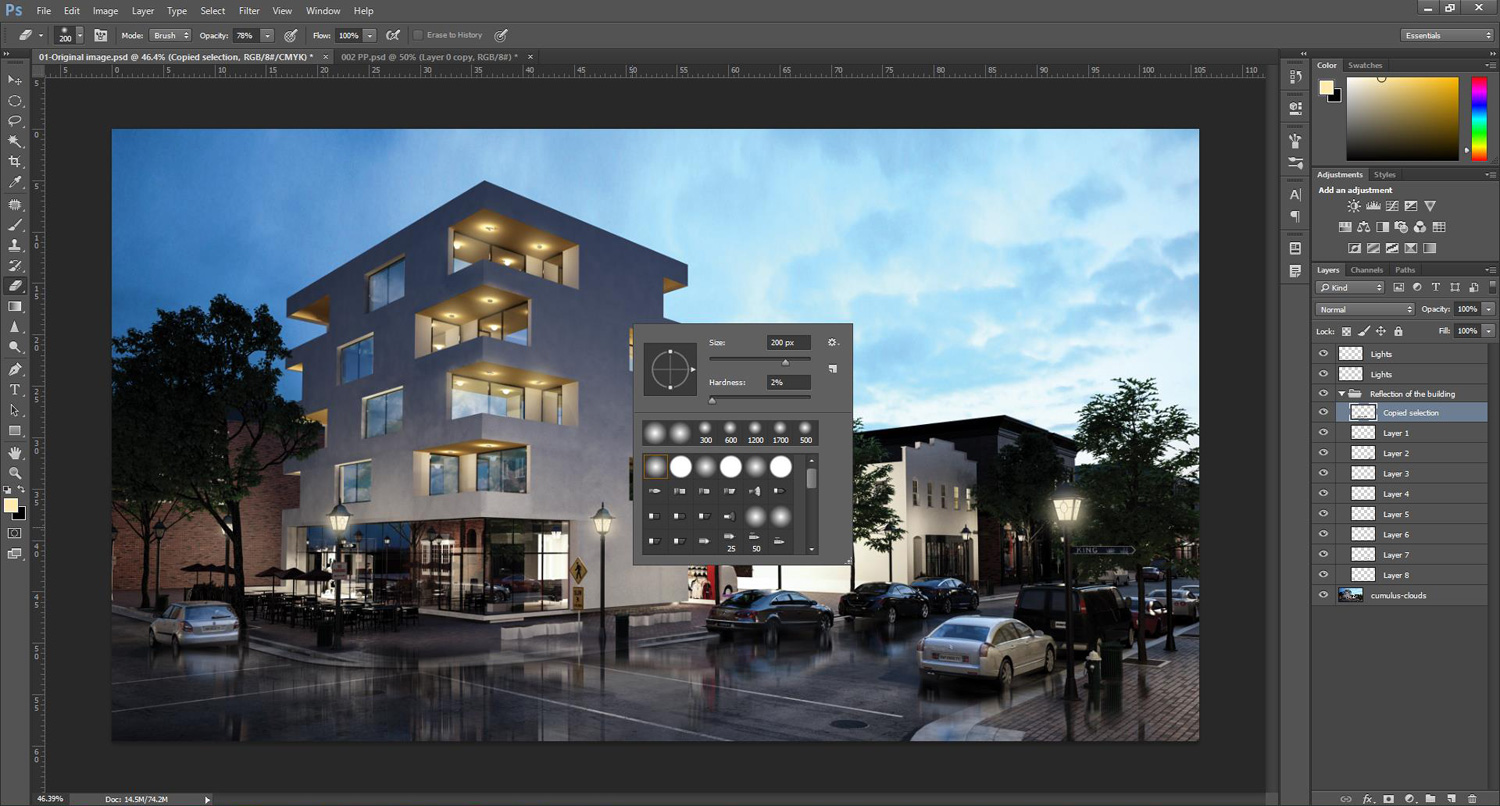
9. Reduce reflections with Eraser Tool
Moreover, we want to take smoothen the edges of the reflected layers. To do this we pick up the Eraser tool and we set:
- the Opacity to 78% and
- the Hardness 2%
The eraser size can be adjusted according to the area you want to erase. Play around with this tool. By the end you should get something looking similar to the image below
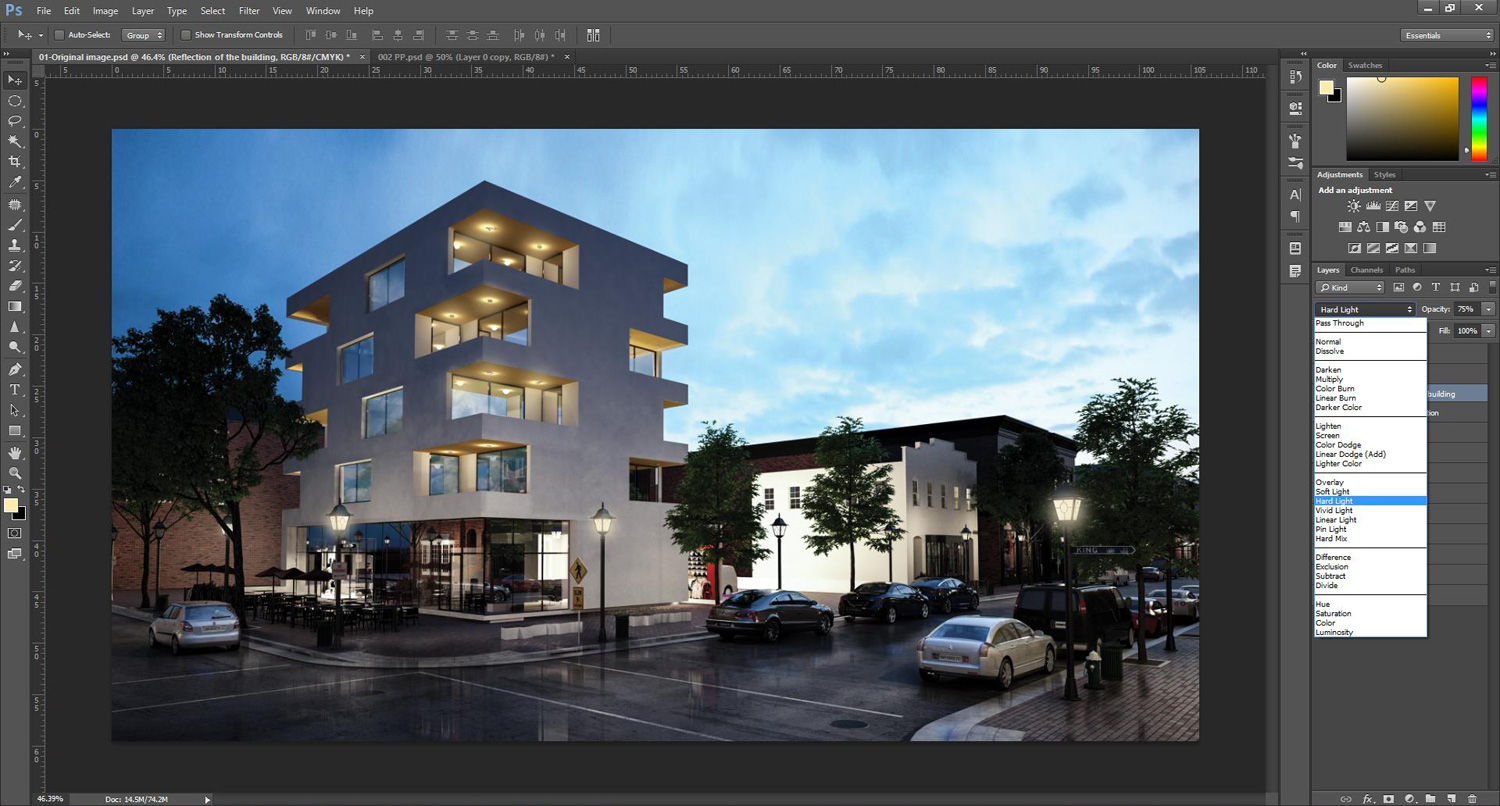
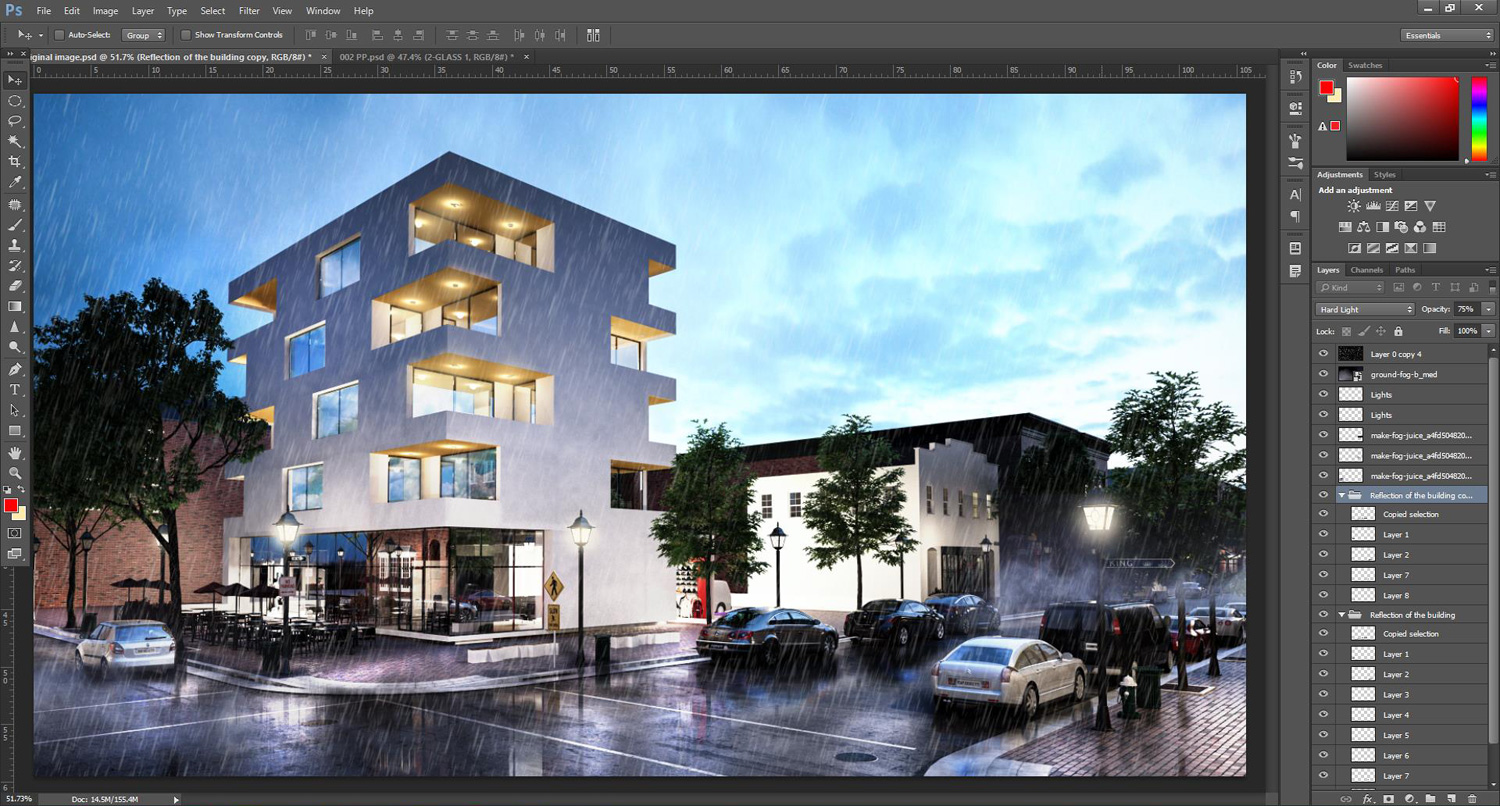
10. Change layer blending options of reflections to Hard Light
In order to make the reflections be in harmony with the entire image. We change the blending mode of the whole group that has the reflections. We click Blending Options and select Hard Light and we decrease the Opacity to 46%. The opacity can be adjusted according to the scene you are working on.
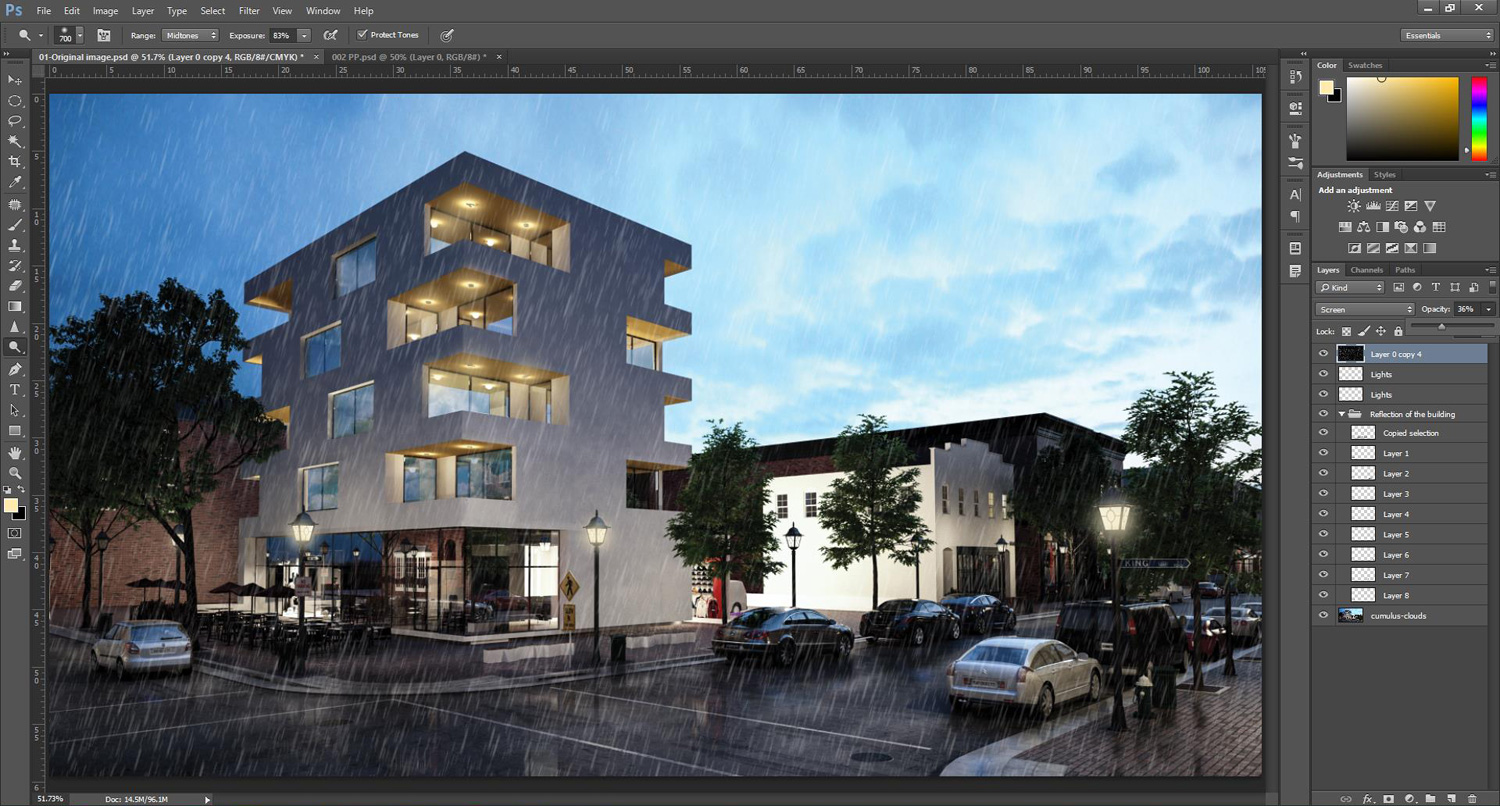
11. Add rain effect in Photoshop with rain texture
Now we need to add a rainy image at the top of all the layers. This will be the most important effect of the image obviously. We use an rain texture overlay image with a black background, but in order to make it suitable for the whole scene, you need to change the blendin mode. By doing so only the white parts of the image (the raindrops) will be merged with your basic architectural scenery.

We have created a set of rain effect textures you can download for free here:

OK – grab one of the rain texture black/white texture if you want (or create your own) and add it to your scenery. Next scale or transform the raindrop texture to make it fit to your Photoshop basic image. Then I changed the Blending Mode to Screen and set Layer Opacity to 36%. Once again, opacity can be adjusted according to your scene.
12. Creating fog in Photoshop
I also want to add some fog on the ground as the scenery might look morerealistic with this additional effect. Imagine this rainy situation… yes some fog appearing on the ground can bring some more realistic look, right? OK, we use the same technique as we used to add the rain effect. So first we need a fog texture image. You can use this one if you like:
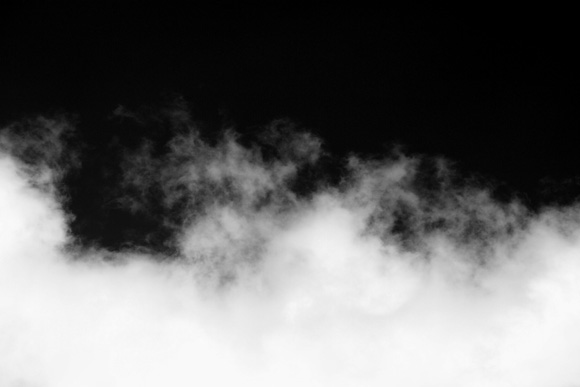
Do you recognize? I simply took a photo of a part of a cloud, reduced Saturation and played around with the Levels – boom you´re done. Use it if you like it and add it to your scenery. Afterwards again: Set the Blending Mode, but this time to Color Dodge and Opacity to 67%. We position the Fog layer underneath the rain layer.
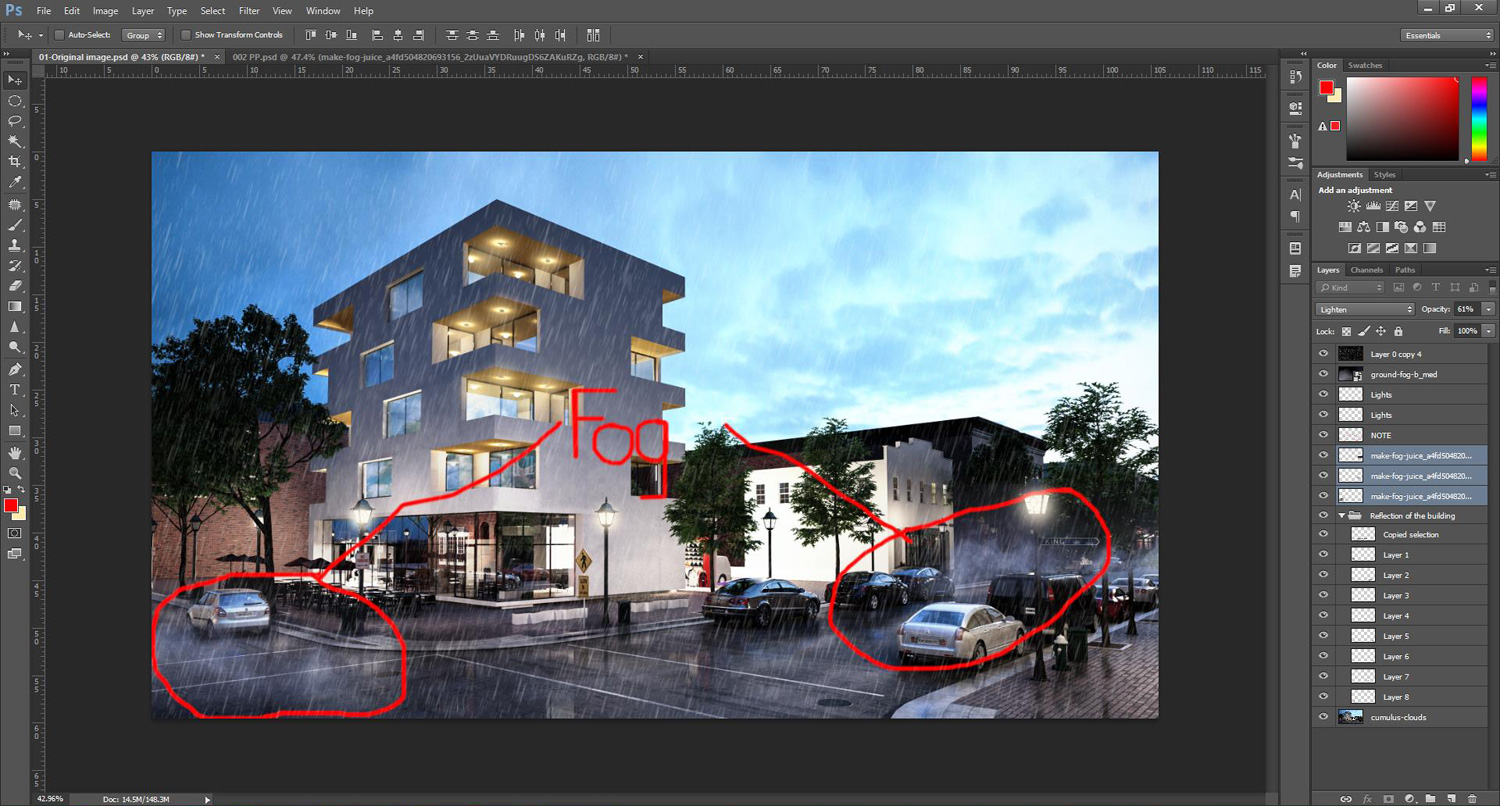
13. Adding fog in Photoshop – more on specific parts
Now, we want to add more fog to specific parts of the scene. You can use the same basic image, but maybe modify it by using a black soft brush. Then set set the Blending Mode to Lighten and we set the Opacity 54%.
14. Modify fog effect with the eraser
We right click on the layer, and click Rasterize Layer, in order to allow us to modify in the image. Hence with the Erase tool we erase the edges of the Fog image. We try to use some type of brush that has Opacity from 50-70 and that has a low value of Hardness. The size of the Erases tool depends on your scene and depends on which parts you want to erase. Now we duplicate layer and play around with the fog. We need to be careful to apply fog wherever we see it as necessary to make the scene look more like a rainy mood.
15. Add shiny look to water on the ground
Obviously we delete the layer “NOTE” 🙂 Now we start manipulating with the original image. We pick up the Dodge tool.
We set:
- Exposure value to 83%
- Hardness is 0%
- Size is 300 Px
The size does not have to be fixed this way, it can change according to the scene you are working on. We play around with the Dodge tool, mostly in the ground, since we want to give a shiny look where the rain lays still. We also use the Sharpen tool a little bit more in the original image, in order to sharpen the edges and improve the shiny look that the scene must have.

16. Increase reflection effect
In order to make the reflections appear more in the ground surface. We duplicate the “Reflection of the building” Layer. At this phase, we can remove some of the layers that we think , have enough reflection on the scene.
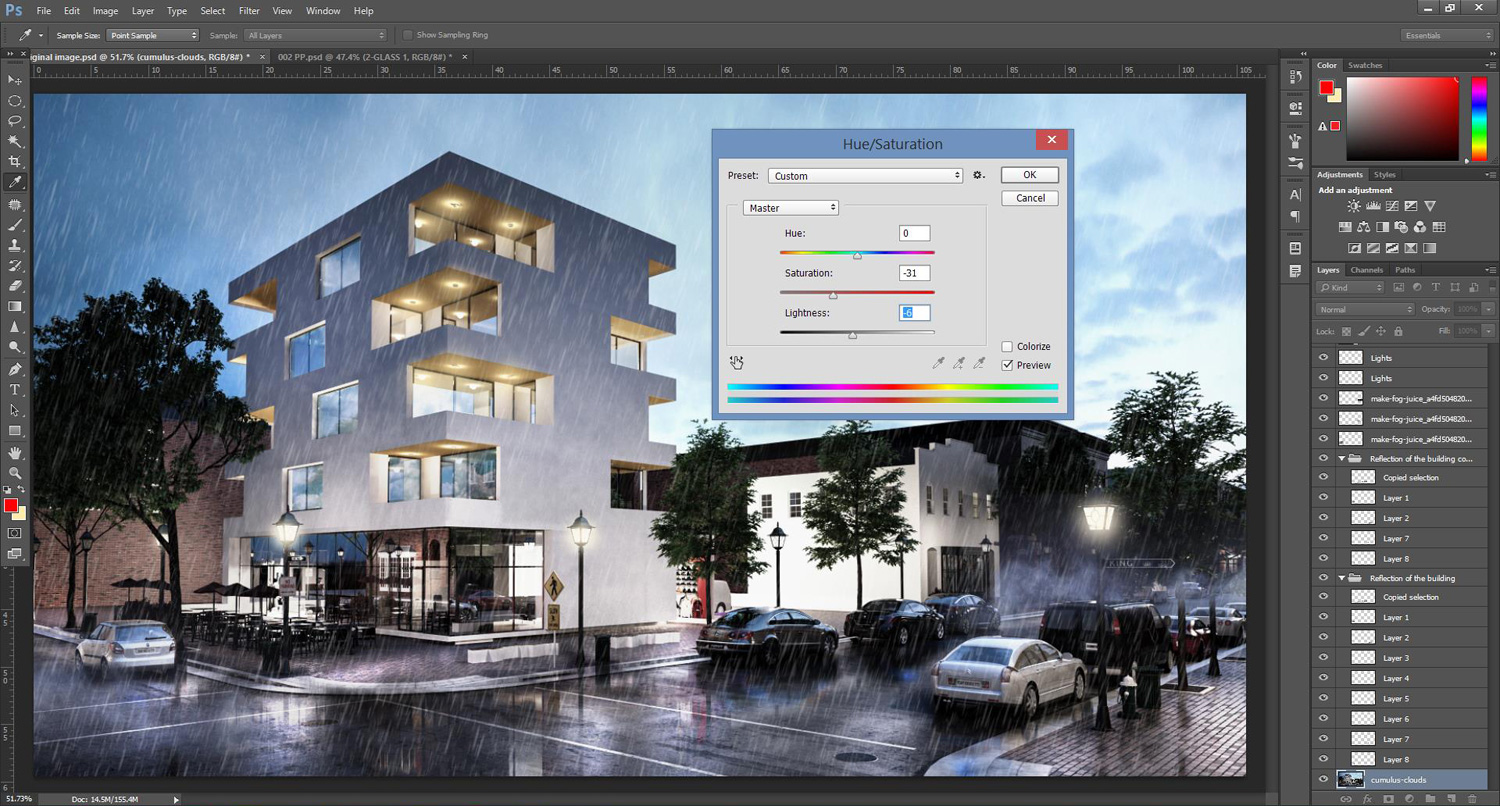
17. Decrease Lightning and Saturation
Now for the final touches we want to decrease the Lightness and Saturation value of the original image.
Hence we hit CTL+H, and we decrease the values as seen below:
- Saturation value to – 31
- Lightness value to -6
18. Darken bottom part of the image
Now we want to darken the bottom part of the image, by using the Gradient tool. We select the black color for the Foreground. At the Gradient Palettes (Top left) we choose the second option, the one that picks up only the color from the Foreground. Then we drag the line as seen below, in order to create a fading black color to the bottom of the image.

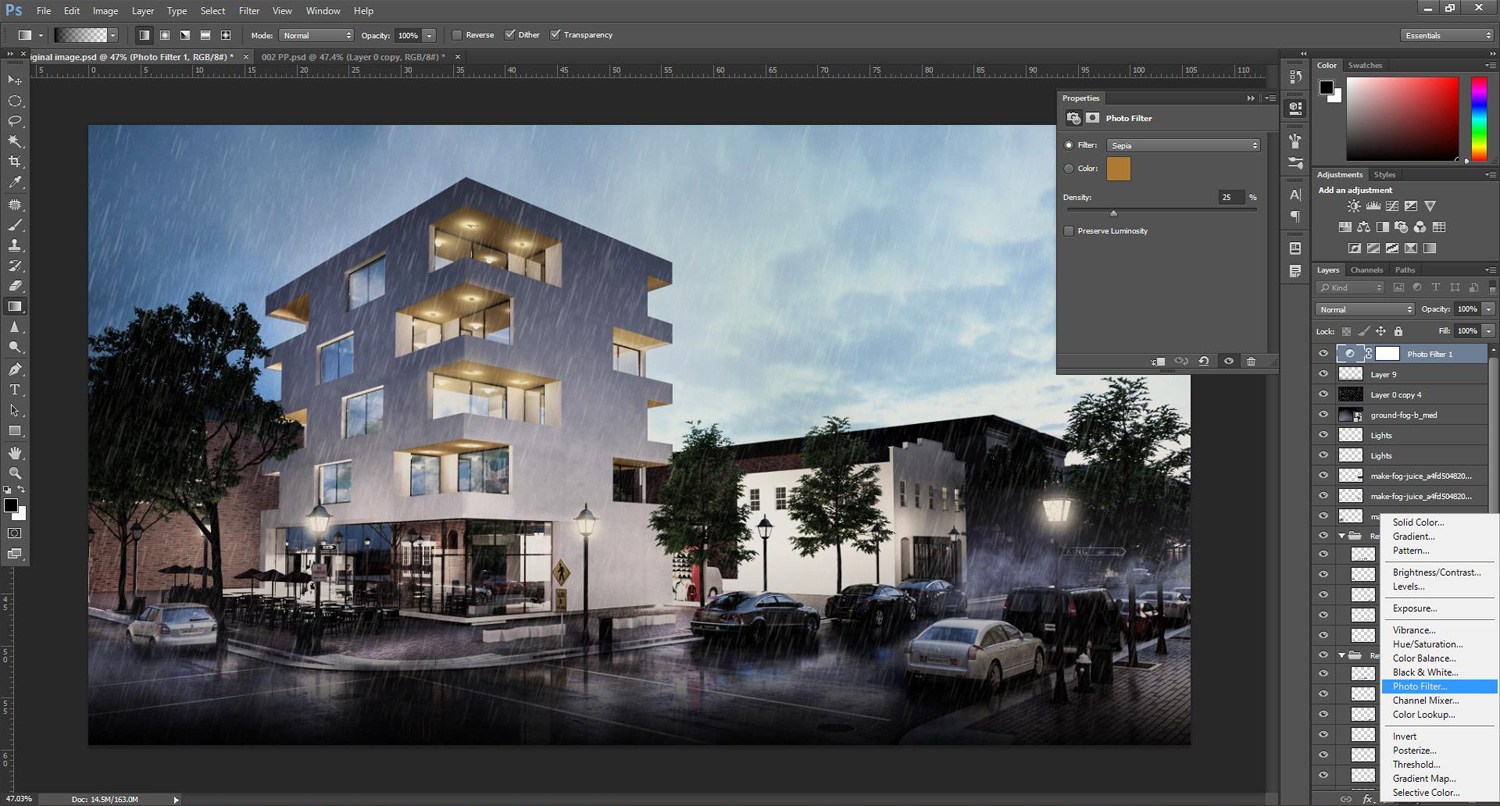
19. Add Sepia filter for the final touch
For the final result, we want to add an Image filter to the entire work in psd. Hence at the top we click Photo Filter…, then we select the Sepia Filter. Again, the type of Filter depends on the image that you are currently working on. This is what the entire image should look like, by the end of the whole procedure.
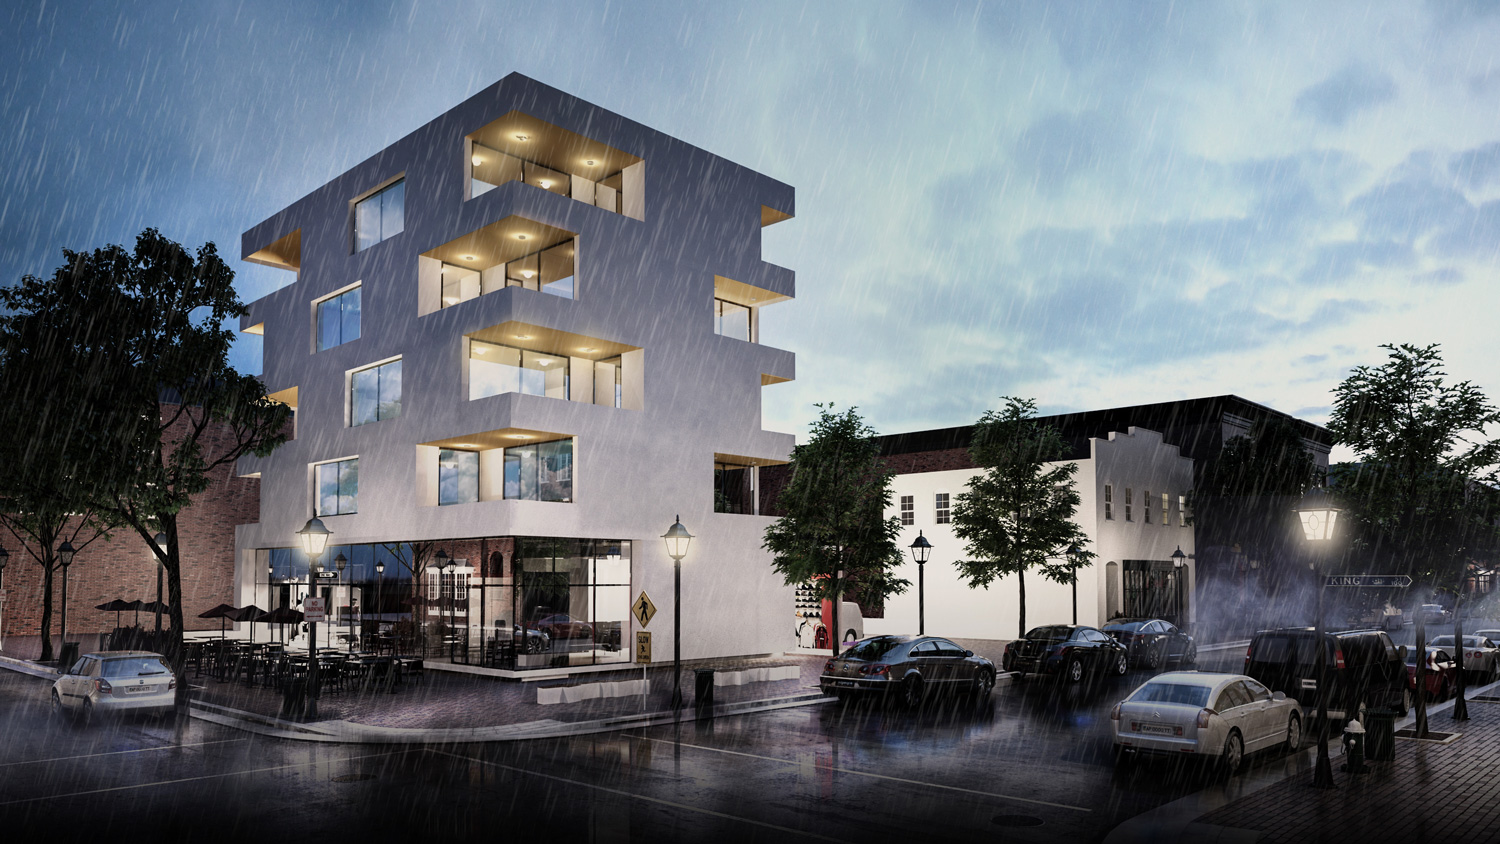
20. Result how to add rain in Photoshop to architectural render
It is important to know, that each image deserves huge attention. The approach that one should take to convert a normal day/night mood to a rainy mood is basically the same for every scene.
But they should be treated differently when it comes to color correction and manipulation with brushes. Therefore, as an overview of the whole process, primarily you would start off changing the tones and the colors of the image. The goal is to make the entire image darker than the current view. Afterwards, you need to select and flip vertically all the parts that you need to be reflected. With some brush and eraser manipulation you can surpass this step. Finally you need to bring the raindrops into appearance.
Working carefully through these steps, always gives great results. Besides this, you can apply these principles to any scene that requires reflections. Such an example would be a scene that has a lake (sea or river), or even an interior scene (baths or pools).
Hope you enjoy the photoshop render tutorial! If yes – please leave a quick comment below! Thank you!

Thanks for share with us this nice topic. This topic realy helpful. Im looking for this topic from last 7 days. I was a problem about Photoshop. Im seeking this topic and I have gotten best suggestion from this post. I hope same topic in future. Thanks
I’m pretty pleased to discover this website.
I wanted to thank you for your time for this particularly fantastic read!!