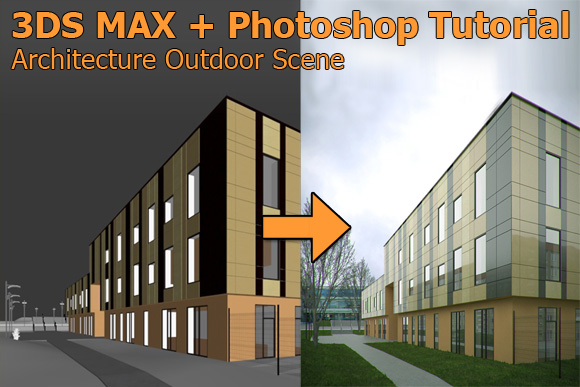
In this tutorial I’ll show you how to make an over casted exterior scene. I will not go into every detail and explain everything, but rather want to give you a quick overview of my approach.
For this tutorial I use a relatively easy 3D model and show you what you can do with the help of a few high quality textures. In addition I will show you what effects you can create in Adobe Photoshop to avoid time consuming rendering tests in the 3D environment. By the way: The building is inspired by an academy building in UK.
Modelling and Importing the 3D Building
First I modeled this building in ArchiCAD with the help of some reference images. Then I exported the ArchiCad exported model in .3ds format and import to 3ds MAX, where I added and changed some building details, like the facade, the roof or windows frames. This tutorial should not cover the modeling part, but more the texturing and post processing work – therefore we switch to this part directly.
For the textures I will mostly use photos from our free 4000+ texture library that you are allowed to even use for your commercial project. Check it out here:
Now it is time for the overall scene and the environment. The ground is just a simple plane where I added a noise modifier. The walk paths are extruded splines. The fence you can see in at the top of the building is a model from ArchiCAD, the lamps, benches and trash cans are modeled by me. I can highly recommend working on your own library of textures and good 3D models over the time. It really helps to speed up the overall process. The stairs in the background are just simple boxes and the rails are splines.
And that’s it what I’ve done in 3DS Max. All the other elements like trees, sky image, background buildings etc. will be added in Photoshop afterwards. If I need to get quick results I always preferred to work add most effects in Photoshop.
Vray Rendering Settings Architecture Scene
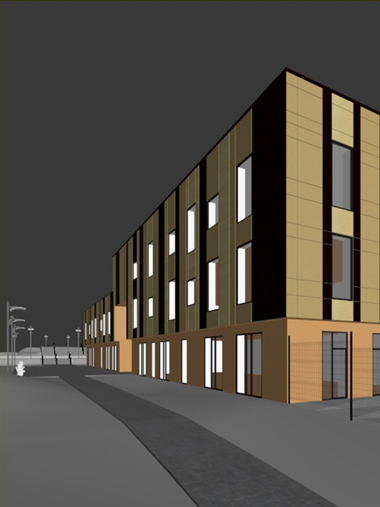
I use a Vray Physical Camera and Vray dome light for lighting. Because the scene should look overcasted I use Vray HDRI overcasted sky image on dome light. The scene now looks like this:
Vray physical camera uses neutral white balance, ISO speed 100 and shutter speed 120. Dome light is invisible because I will import another sky map afterwards in Adobe Photoshop. I do the same with the reflections of the environment on the windows.
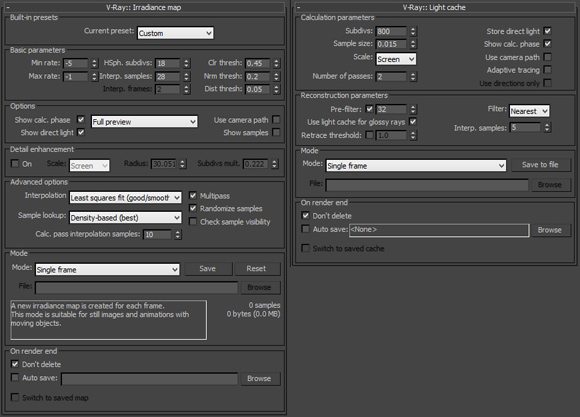
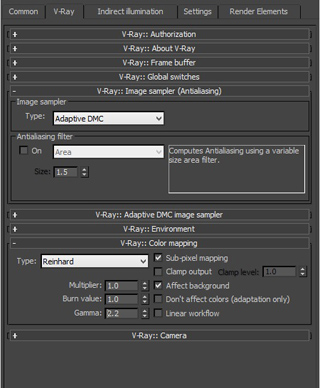
My redner setup look like this : For image sampler – Adiptive DMC, Antialiasing filter is off, color mapping is Reinhard with Sub – pixel mapping and 2.2 gamma. GI is on primary bounces is Irradiance map and Secondary is Light cache ( Image 2 ). With that setup we will get nice image and very small render time. Setup is not so high, so render will be little noisy but it’s fine for this visualization. Render resolution is 1200×1600.
Layered rendering in channels of the architectural scenery in 3ds MAX
To ease the workflow in the post production in Photoshop I need a few more render elements:
- Vray Zdepth
- Alpha Color
- Vray Wire Color
Zdepth is for postproduction depth on field effect, and I need the WireColor for the new layer with reflection on windows.The trick to render each effect as a layer for the post production in Photoshop is a very clever technique to save extra time for masking and selecting areas of the image in Photoshop afterwards. So do make use of this method – it really speeds up your workflow.
Here you see the results when rendering in different layer/channels:
You see that each rendering represents a different effect of the image. When importing all images in photoshop you can easily select parts of the image and add filter to this selection or use the selection as a mask for other layers. Pretty cool!
Creating a realistic grass texture in 3ds MAX
My materials are basically Vray materials with reflections, and texture maps- so basic stuff. But I want to share you my approach for creating a realistic and nice looking grass texture.
Grass is a Blend Material with combination of two almost the same Vray materials with in my case 15 mix amount.You can use an amount of your choice. The difference between this two materials is only the diffuse map. First we use the nice green grass texture,and afterwards the dirty texture with only a little bit of grass visible.With changing the mix amout you can go from nice green grass to the dusty ground.
Both materials use the same displace map,but one is rotated for few degrees. That´s a little trick to create a nice looking and realistic grass effect for the ground.
At the end you can play around to get a nice effect to get a realistic and somhow irregular grass texture.
Editing the 3D Architectural Rendering in Photoshop
Now we head over to Photoshop to mix everything together and give it the final touch. Therefore we will do following steps:
– Import background building image
– Import a nice sky background image
– Add cutout trees to the architectural scene
– Make some color corrections and tweak the levels and contrast
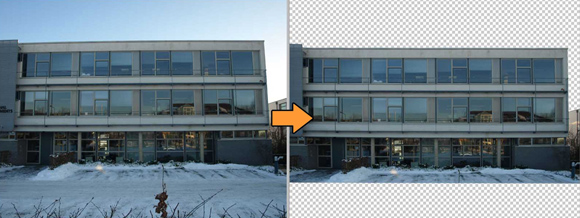
First I prepare all images with elements I want to use for my rendering. I start with a photo of a building that I want to use for the background of my rendering. Therefore I picked the photo “Building_Texture_A_P1109031.jpg “ from our free texture library I use from the transformm menue the disort and perspective tool to do some lense correction and align the building more or less like you see in the screenshot below. Make also sure to delete the background and parts of the foreground image to cutout the building itself.
Use cutout billboard trees to bring life to your architectural visualization
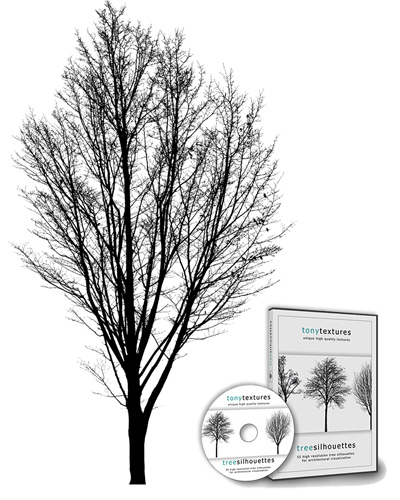
For the trees I want to use a ready to use cutout tree silhouette from the TreeSilhouettes Collection. But you can also easily use our free texture library for architectural visualization and look for nice trees there and mask it manually by yourself. If you need help you can check out my tutorial “How to cutout a tree in Photoshop” here.
Now that we prepared the images we can start with merging everything together in Photoshop.
Combine the sky background image with alpha channel rendering
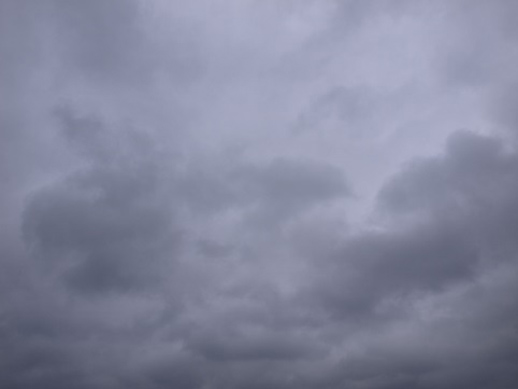
We start replace the background with a sky photo I also found in the tonytextures library in the subfolder “sky and clouds”
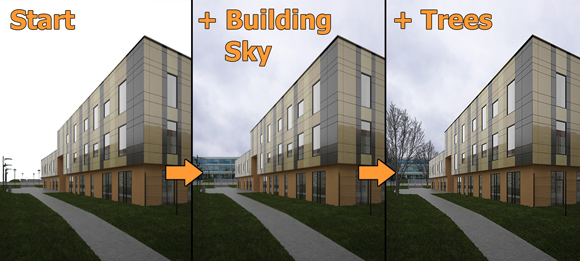
First of all we open the RGB channel image – so the standard rendering from our scenery. Afterward I open also the alpha channel image and copy/paste it into the RGB channel image. Because we used the same camera both images fit perfectly together and the all black areas in the alpha channel image stand for the areas where my background image should be shown. So we simply select the black color (e.g. by using select/color range) and delete this selected area on the RGB layer or hide this area by using a layer mask. Now you can delete the alpha layer and afterwards import the sky image to place it under the RGB layer. Transform it and do some color correction until the result looks fine for you.
Next we import the prepared image of the background office building and place it also behind the RGB layer but over the sky image in the right position.
Finally I will add the cutout tree silhouettes in my architectural illustration which I already prepared. Transform these trees and move them around until you like the arrangement. Following screenshot shows the steps I made:
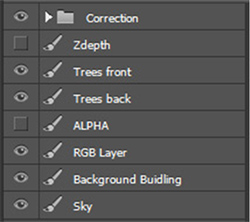
At the end I add color correction,levels and depth on field effect on image. My layer tab now looks somehow like this:
To add a blurred effect to parts of the rendering with a higher distance to the camera I use my zdepth map. After importing it I can also select the black parts of this layer via color range. To apply the effect on the correct elements (black parts of zdepth layer) I chose the quick and dirty way and simply merged the sky, background building, RGB Layer, trees back and trees front. With the selection made I then can select the merged layer and use the gaussial blur filter (something 0.5 – 0.9 max 1).
Finally some last corrections:
- Hue-Saturation: +10
- Add lightness: +3-5
- Levels (just play around to get more contrast)
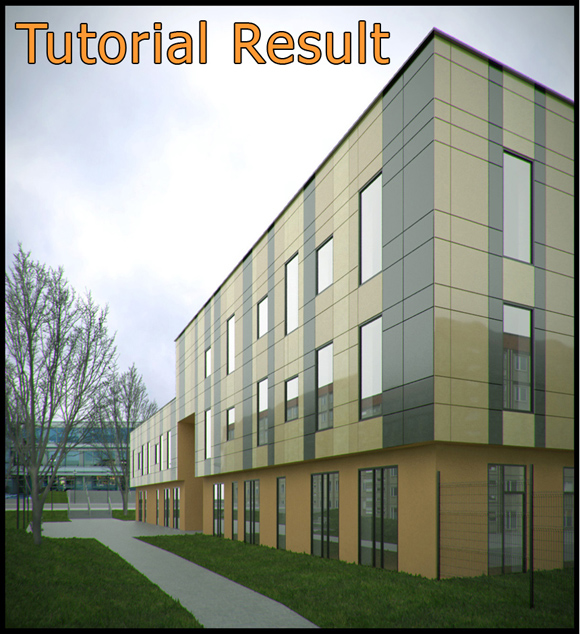
- Color balance to highglight some color and get a warmer picture. Here I decresed red and blue for 20,and green for 10. In that way I finally have a nice looking image with bright colors.
Looks pretty OK don´t you think?




Thanks for you