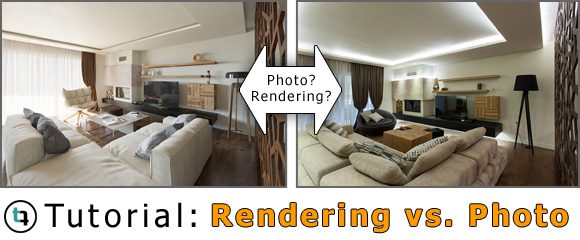
In this tutorial we want to show you how to render a photo-realilstic interior scenery with Corona Renderer and 3ds MAX. Lightning is always crutial when it comes to architecture visualization and especially for interior design the lightning can make the difference. The intersting part here is that we had professional photographs of a private residence where we have also been involved in the design process and now tried afterwards to model and render like the photograph 😉
So it is really a nice case study to get the most out of the rendering skills and compare it to the realistic photos made by professionals! So without further ado – hope you enjoy it:
Corona Render: Real Photos as Rendering Benchmark
Let’s start with a short introduction regarding this project: Several years ago we have been asked to made a set of interior visuals of a private residence in Athens, Greece. Having little experience back then and a tight deadline guide us to produce lets say rather moderate outputs. When Corona renderer appeared in architectural visualization industry we thought that it would be a chance to rework our old project and experiment on a new render plug-in like Corona, in order to introduce more realism and light accuracy in our final renders.
Furthermore, the apartment had been already constructed and we had in our hands some of our client’s professional photos as a guide and reference point to our work.
Below are some of the professional photographer’s work that we could use as a guideline.
Setup Corona Renderer in 3ds Max for our Architecture Scene
As usual we choose Corona as the prime renderer from Main Menu Bar->Rendering->Render Setup->Common->Assign Renderer->Production->Corona renderer. We recommend to try the latest commercial version since it is oftetn time more stable and faster than the free version and above all it is available for a 45 day trial.
Next step is to setup Gamma and LUT Correction in the Preference Settings tab and Unit’s scale from Customize->Units Setup->Display Units Scale->Centimeters. These are fundamental steps in preparing 3ds max.
Modeling Interior Design in 3D
After cleaning the dwg file from all the unwanted information like dimensions, hatches, hidden objects, hidden layers, furniture, blocks, texts etc. we start to model the walls, ceiling and window/door openings. Common modeling techniques are followed such as extrude, bridge and chamfer.
Most models are taken from free 3D recourse websites or are simply custom made. We use basic poly modeling with a lot of chamfering and Turbosmooth modifiers.
Using Floor Generator Maxscript with Multi Texture Map
Finally we download the Maxscript named “Floor generator” which generates floor objects consisting of individual boards. These boards can easily be textured using MultiTexture map, a plug-in for 3dsmax that loads multiple textures and assigns them randomly, either by object or by material ID, with controls to randomly adjust the gamma, hue and saturation. Both are free to use and can be downloaded from cg-source (https://www.cg-source.com/floorgenerator.php)
Alternative comparable tools that can be used as well are “Mighty Tiles” or “Walls & Tiles”.
In this tutorial we want to put emphasis on how we generated the floor with the floor maxscript: To model the floor we drag n drop the floor generator.ms file and main panel appears in our viewport.
From Shapes->Splines->Line we draw a closed line to determine the surface where the wooden floor will be created. With the spline been selected, we set the dimensions of panels as given from the wooden textures in order to avoid distortions.
In our case scenario wooden planks have 48,5cm length and 12cm width. We configure also the gap length and the edge bevel of each plank and we hit Create button. That’s it, our floor appears!
If we need to change something, click the button Interactive Update in order to view real-time the changes we have made.
3D Furniture and Accessories
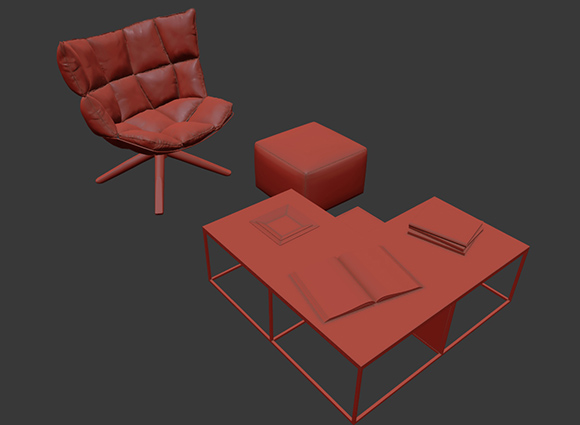
To bring life to the 3d interior model I use some 3d furniture models etc. Some interesting clay renders of my mobile equipment is shown below:
Using Corona Light Portal Plane for Daylight
Last but not least, we cover the window opening with a Corona Light portal plane from the outside. The huge importance and benefits of this procedure is covered thoroughly in our past Corona tutorial which you can find here:
For now we only model the portal plane – the lightning settings will follow later down the road…
To give you a first impression, here are two perspective views of our 3d model with all 3d furniture and accessories placed in the living room and the dining room.
Texturing the Architecture Model and Background
We use high quality textures and in most cases a UVW map modifier with a box mapping or cylindrical mapping (for example the pile of logs) relevant to the texture size, give us the best results. As always the trick is to mix different textures in diffuse, reflection and bump slots to add subtle imperfections avoiding repetitiveness.
Maximum realism can be achieved only by using high quality textures from real life and there are plenty of reliable websites with free high quality textures. Feel free to browse our extensive 4000+ free texture library with all kind of photo material for your next architecture visualization project:
For the background scenery we use a 180 degree panoramic image, inserted in a CoronaLightMtl shader which was applied on a simple plane. In the 3d environment it looks like this:
Creating Afternoon Lightning Mood with Corona
With CoronaLightMtl we can adjust intensity values and change map’s illumination, imitating a real background environment from a strong daylight to an afternoon/less light mood.
How to Create Realistic Wooden Floor Material
As for wooden floor this is a bit more complex material. At first we make a simple Corona material (CoronaMtl) and in diffuse slot apply a Color Correction map and upload a Multitexture map. We click the Manage Textures button and we upload the wooden plank bitmaps. We choose to upload 8 different bitmaps , each saved as a separate image in a horizontal direction.
From the Color Correction map we can reduce a bit the saturation in order to give a warmer and natural tone to the wood. We copy the Color Correction map to the reflection slot, choose Monochrome and increase Brightness and Contrast to enhance reflection by plank. Finally we use a RaySwitch material (CoronaRaySwitch) that let us assign different kinds of materials for different ray types (GI, reflection, refraction) and reduce color bleeding (the effect in which bounced light also bounces color and tints/affects all other nearby materials) caused by the floor.
In some cases Multitexture is shown in the viewport as the same texture in every plank. This is a minor bug, but you don’t have to worry because at render time all images will be loaded and distributed randomly.
Setting up Cameras
Nothing fancy here, as usual we prefer to use our cameras up to a normal human height around 170 cm distance from the floor.
Film gate value is pushed to 80 in order to have more wide angles and give an artistic look to our final views. Furthermore a Camera Correction modifier applied to straighten the vertical lines.
Interactive preview can also help us to find interesting angles for the cameras. In our project we preferred to use the same angles photographer used.
Daylight Settings in 3DS MAX
We make a fast daylight setup from Command Panel->Create->Lights->Corona->CoronaSun and create a sun everywhere in the scene trying to find the right angle and make interesting light beams and shadows inside the living room. Below the CoronaSun button we click Add CoronaSky environment button and our sky environment is ready!
Indoor Lightning with Corona IES Lights
We disable CoronaSun and decrease the intensity value of Corona light material that we use on the background plane. Additionally we can enhance the blue/magenda tones of our atmosphere by changing the color of CoronaSky inside Corona Sky Texmap.
Adding artificial lighting proved to be very interesting and funny procedure. The amazing thing with Corona is that there are no sampling parameters that you would have to set by trial and error. Lights will always work as expected.
Internal lighting was done by using a combination of Corona Sphere, Rectangle and Disc lights with some light carrying IES information. This is a very handy feature as in Corona any type of light shape can have a specific IES light type. Disc lights were very effective for spots with IES data added as long as rectangle lights -hidden behind ceiling’s recesses- were more capable of producing ambient lighting. Intensity, temperature and visibility are simply controlled in the light settings as shown in the following images.
Corona Rendering
After setting up the two light configurations we play around with Camera, Expose and Tone Mapping in scene tab of render settings. Usually we set highlight compress to 2, adjust exposure(EV) and observe the changes in real-time. This is the real flexibility and power Corona introduces.
For all the interior shots we used a highlight compression of 5,0 and a contrast of 3,0. This worked pretty well and gave us a vivid, forceful result whilst maintaining the general softness to the pictures.
Photoshop Post Production
Usually we don’t have the intention to interfere the final output adding effects or filters. The main target is to achieve wanted results straight out of the renderer. Apart from color correction and a bit of desaturation, the unique interference to post production was some flare effects we added on every spotlight.
Comparison: Rendering vs. Photo
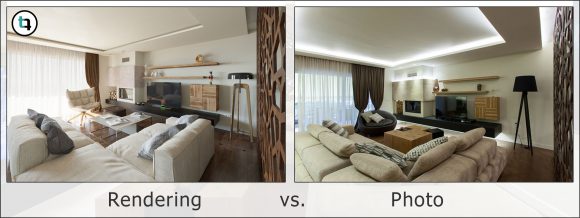
OK – drumroll please! Here are the results of our interior architecture visualization battle rendering vs. photo:
OK – what do you think. From my point of view it is pretty cool! And personally I prefer rendering over reality 😉
Below you will find all the architecture renderings separately. I think it is pretty amazing what you can do with 3ds MAX in combination with Corona Renderer. And as I tried to show you in this tutorial it is not that complacated to render a high quality interior architecture scene especially when you set up the lightning in a realistic way.
Hope you enjoyed it and please recommend the corona render tutorial via social media or give me feedback in the comment section!


Leave a Reply