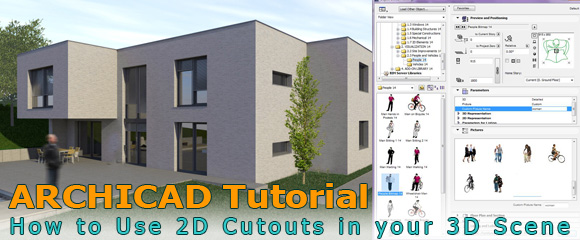
In this quick tutorial I will show you how to use cutout graphics or entourage like trees, persons etc. in ARCHICAD. These ready-to-use graphics without background often times are used in the post processing phase for architecture visualization. Here we want to use them in the 3D environment directly.
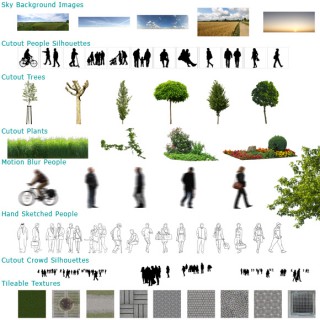
Like in our other architecture visualization tutorials as well we use the graphics from our free archi-viz library “OpenArchiVIZpack” that you can grab here for free:
After this tutorial you know how to use cutout objects like people and treesin ARCHICAD as a 3D object and how to render it with your scenery afterwards.
About the cut-out objects for architecture illustrations
What are the cut-out objects?
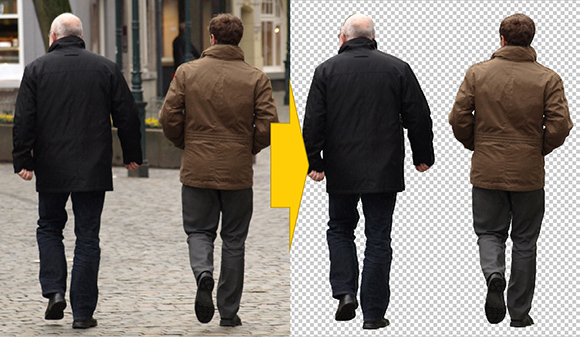
Cutout objects or entourage for architecture renderings are simply photos from persons, trees, bushes or other plants where the background has been removed already. Therefore you can simply import ONLY the persons and not the original background of the photo in your generated photo or rendering.
If you are in this filed you have surely put up with this problem – you would like to make your architecture rendering more vivid and to bring some life in it by the use of cutout graphics. But often time your software will only have a limited number of elements in their library and you want to avoid that one rendering looks like the other…
OK – Let´s phase it: You have to build up your own library of images you can use for architecture visualization. You can start with our OpenArchiVIZpack or directly buy a bunch of graphics from our Shop in one go as well.
Why cut-out object in ARCHICAD?
Is it important to bear in mind that ARCHICAD is software with primary function to make an architectural project from the design part of the project to the building details. Therefore, the variety of so-called details (which are extremely important for a render to look complete) is not so big. Moreover, rendering of a cut-out object which is usually a .TIFF, .PSD or .PNG image, is way easier to render because there is no many so called “polygons” that computer needs to “calculate”.
Which cut objects are we going to use?
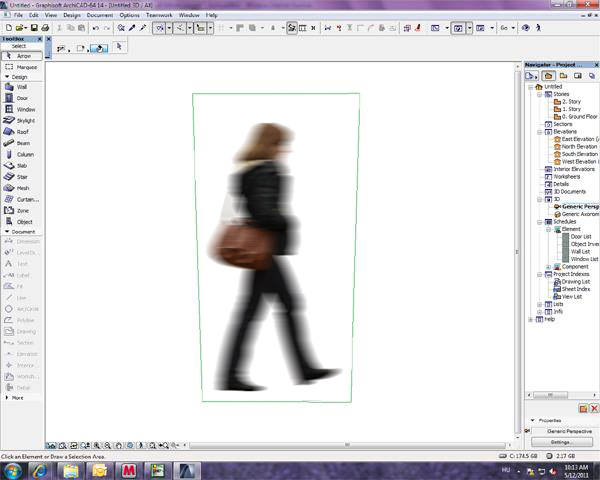
I like to use cutout people with motion blur – an effect to make the images more abstract. It will ensure that the focus of the final illustration will be on my architecture, not the people who are I used in my scene.
In my render, I will be using this man standing, and I am going to put it just in front of the house:
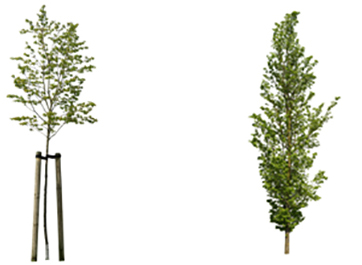
The next thing we will need is proper vegetation to make an interesting and colourful render. I also picked a free graphic from our OpenArchiVIZpack. Here I am just going to take two objects, but you can find more or them when you download this library for free, and choose what is the most appealing to you.
I used these trees for this quick tutorial:
Using cut-out images ARCHICAD
Now, we are coming to the most important part of the tutorial. How to use these objects in ARCHICAD. There are some basic steps:
- First you are going to need those objects in the .gif or .png format. The objects mentioned, are already in the .png format, which means you don’t have any additional job to do.
- It is also essential that the image has a transparent background, so anything can interfere with your render and ruin the whole concept of your idea – don´t need to worry if you use our examples here.
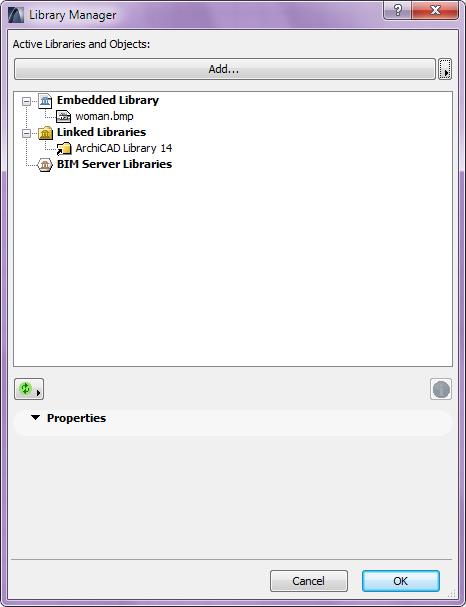
- Add the images to the ARCHICAD Library via File/Libraries and Objects/ Library Managerand add your image to the Active Libraries here. You can directly load the image as shown below, or you can add the image to your (loaded) Office Library or Project Library.
Add the images to the ARCHICAD Library via File/Libraries and Objects/ Library Managerand add your image to the Active Libraries here. You can directly load the image as shown below, or you can add the image to your (loaded) Office Library or Project Library.
- Search for the Bitmap People
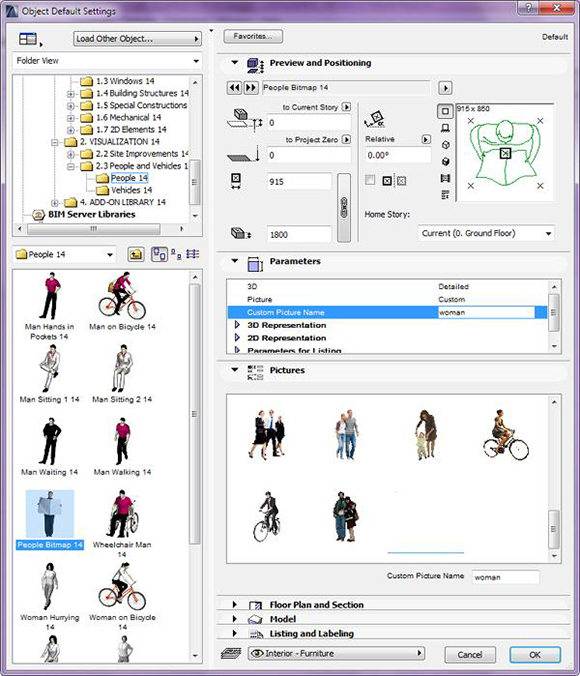
- Open the Object Default Settings Window and search for the People Bitmap 11 object.
- Select the custom picture and in the Custom Picture Name field write the name of your picture without file format extension.
We will do the same with the man riding bicycle, but the vegetation – trees also.
You can also use the people silhouettes and ARCHICAD has also a separate folder to place these cut-out objects.
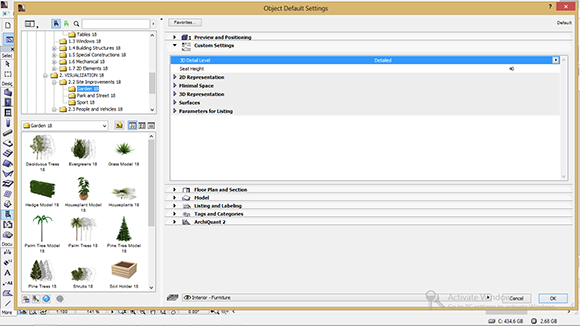
In the same way you can add of course the cut-out trees in ARCHICAD. The only difference is where to place it. You will certainly not place it into a “people” library, but rather pick a proper location:
In our example you also get a feeling of the limitations: See the tree – the lightning of the scene is really slightly different compared to the lightning of the tree photo. Obviously there is no interaction when it comes to lightning etc.
But nevertheless – I think this approach is a good way to quickly get some results when you simply do not have the time to render complex 3D models:
It is also important to bear in mind, that it is not just vegetation, or the people, cut-out objects that you can render and use! You are able to this with the cars, elements of the interior and basically combine your own taste with the general ARCHICAD library – everything that is just not in there you can put in your 3D model and render it afterwards – even quicker and easier than rendering a BIM object.
I hope you enjoyed this architecture visualization tutorial and that the ArchiCAD users out there can benefit from it. If you have suggestions regarding additional tutorial topics – please do not hesitate to drop us a line!



Leave a Reply