I am very happy to present you this time a tutorial on architecture visualization by Armir Shapallo and Dimitrios Kalemis from the “PHORMIN – Architektur und Digitale Kunst” , based in Munich, Germany.
They describe their work for a competition which was actually published several times! Interesting is the fact that they worked with a quite simple 3D Model and put in more effort in the post production with Photoshop which gave them a lot of flexbility as they describe.
Background and architectural idea
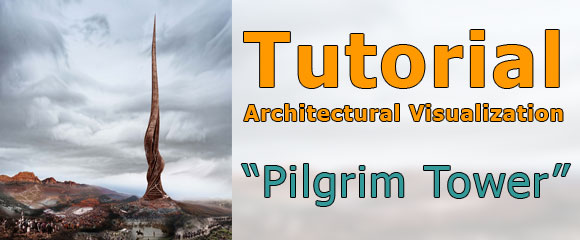
We would like to present you in this tutorial the most important steps to create your digital visualization of the “Pilgrim Tower”. Here we want to set the focus rather on the creative and artistic approach than on the technical know how.
The work was created for an international creative competition “Unbuilt Visions” where the act of pilgrimage should be expressed in an architectural concept. Obviously the project is influenced by a philosophical idea and borders on utopial.
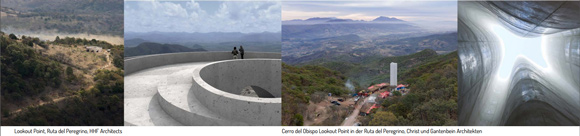
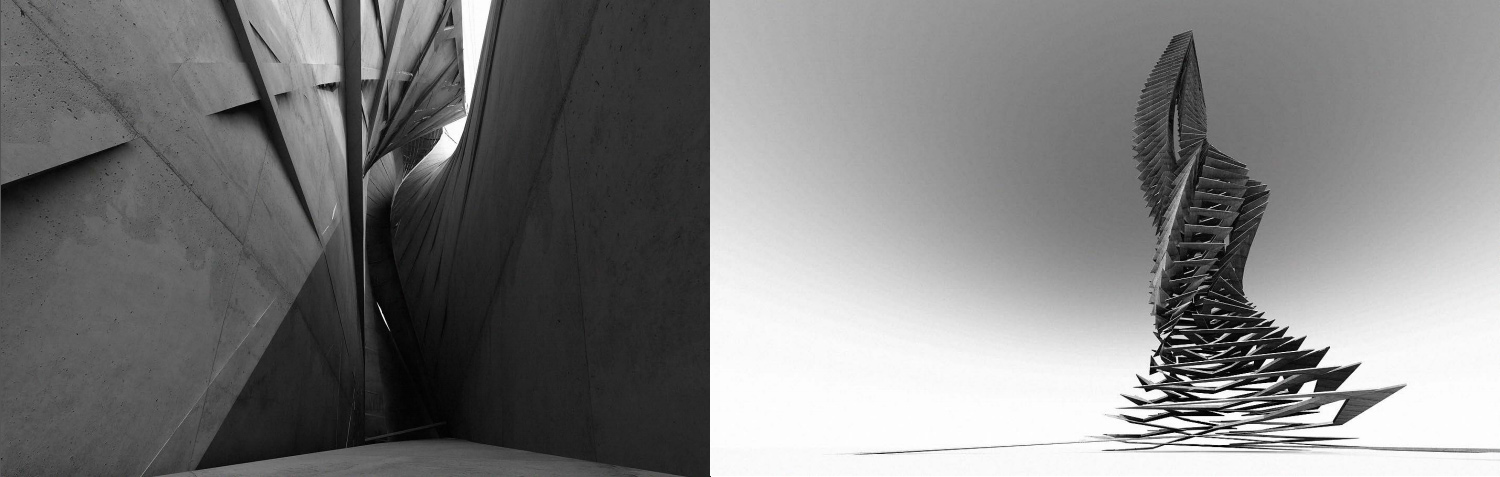
The following examples of architecture influenced our creative design process. We looked for landscape photos and mystic locations. We decided at the very beginning that the final image most important element will be the tower, the landscape and the people.
To develop a sculptural idea of pilgrimage we collected a lot of images and photos which should stand for the athmosphere to support our creative process. The painting “La tour de Babel” from Joos II De Momper (17th century) inspired us the most starting from the early design process all the way to the final images.
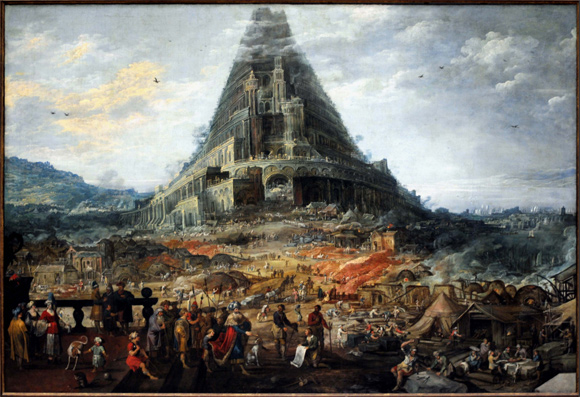
Joos II De Momper (1564-1635),
Quelle: http://commons.wikimedia.org/wiki/File:Joos_De_Momper_-_La_tour_de_Babel.JPG
Simple modelling in Rhino 3D
We decided to use Rhino 3D for the modelling process because the tool offers a lot of flexibility when it comes to creating free and creative shapes and forms. We concentrated here on the building fascade, construcion and the ramps as vertical connections.
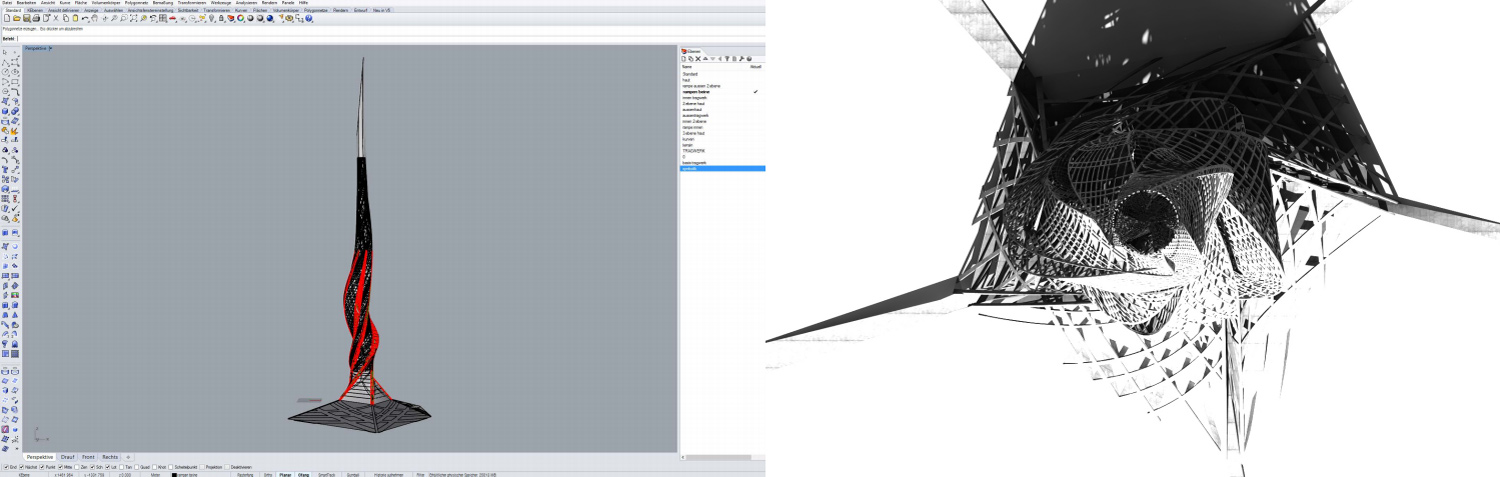
The defintion of the perspective view is quite important for the final image. Most of the time 3D artists concentrate on modelling directly with one main perspective view in mind, which is a limitation when it comes to pick a proper view at the end. We prefer to directly model the building completely to be flexible in the later project stages.
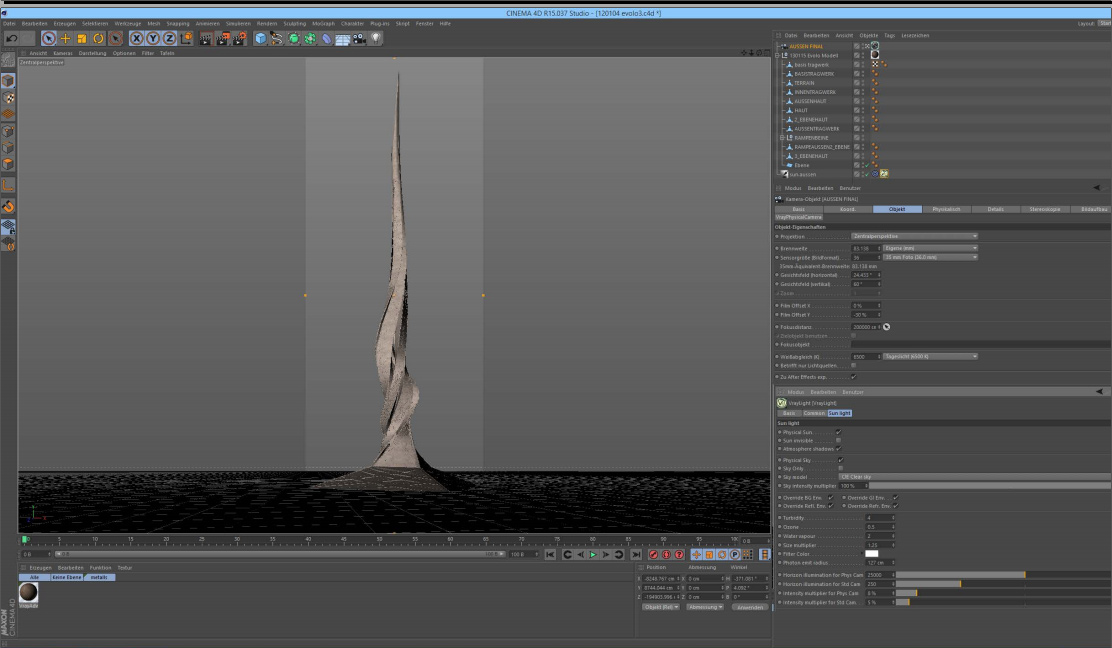
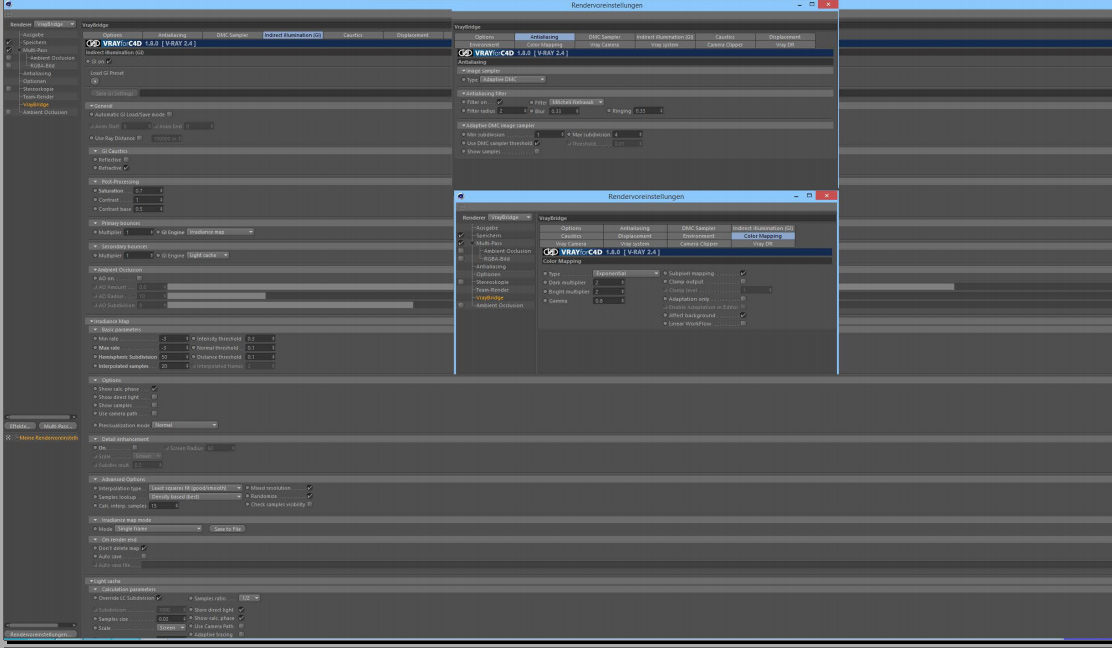
Rendering with Cinema 4D and Vray
After modelling the building in Rhino 3D we use for the next phases – the visualization – Cinema 4D in combination with the render engine Vray. The following screenshots show the most relevant render settings which were defined in Cinema 4D and Vray. As you can see the settings are quite basic. We try to keep it as simple as possible when it comes to architectural visualizations for competitions simply due to the lack of time.
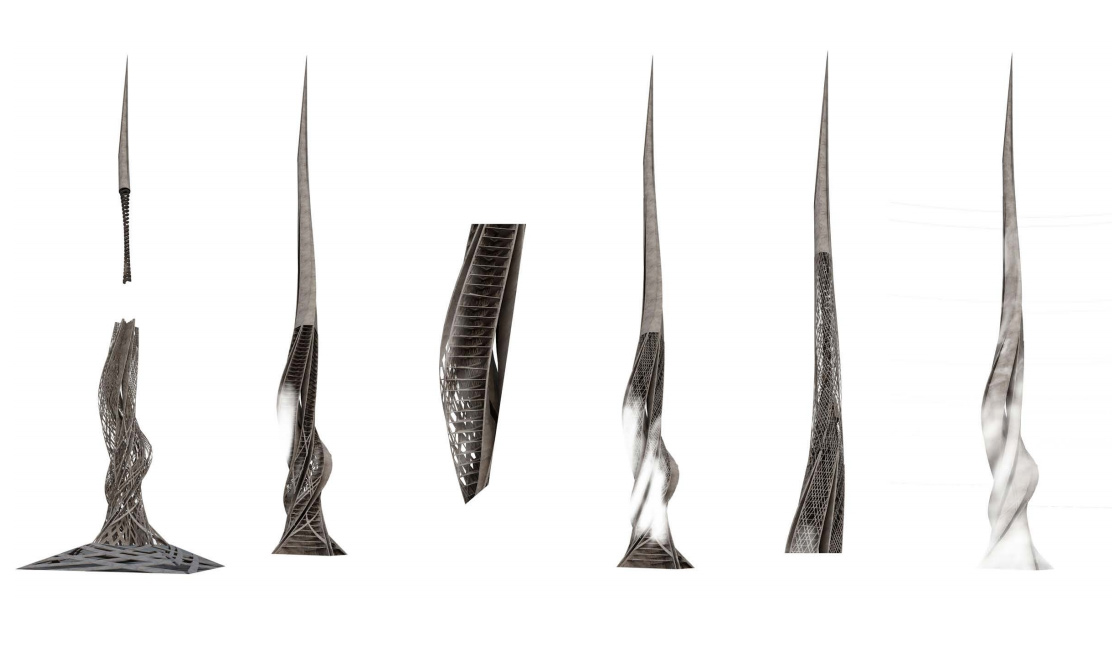
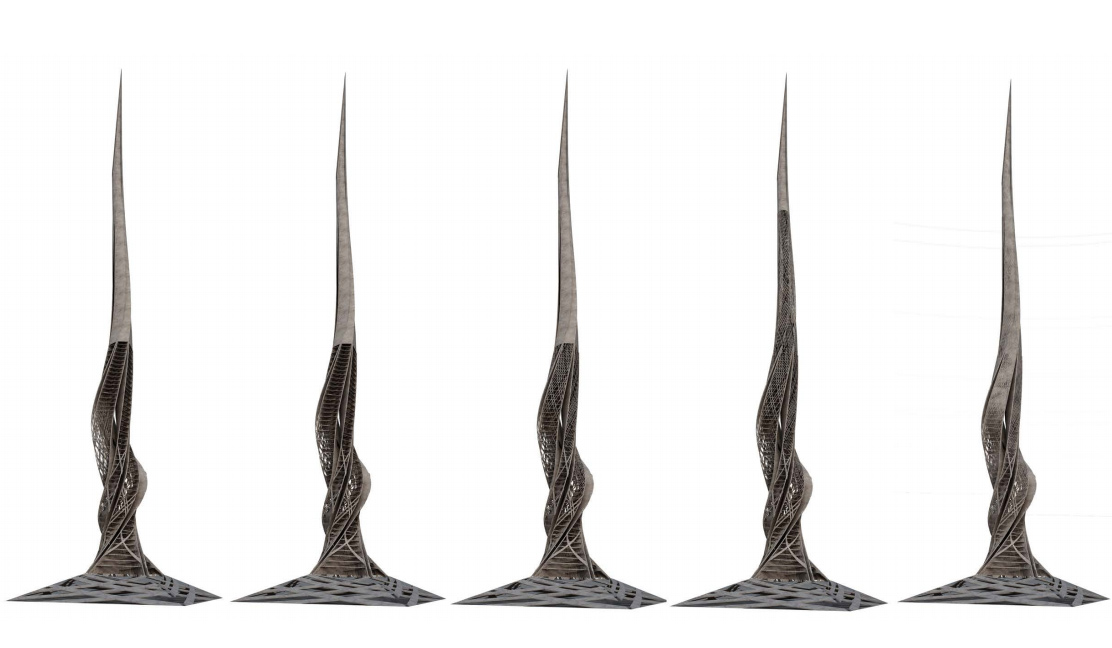
Flexibility by rendering building elements seperately
We chose to render the different parts of the building seperately with alpha channel and merged them later in Photoshop. This gave us a lot of flexibility to change the look of the image in Photoshop without any additional work.

Merging building layer in Photoshop
We put together the single renderings in Photoshop by useing the eraser and different kind of brushes. We also played around with the opacity of the layers to test the look of the image. We found that this was a very effective way of the design process because you got instant results!
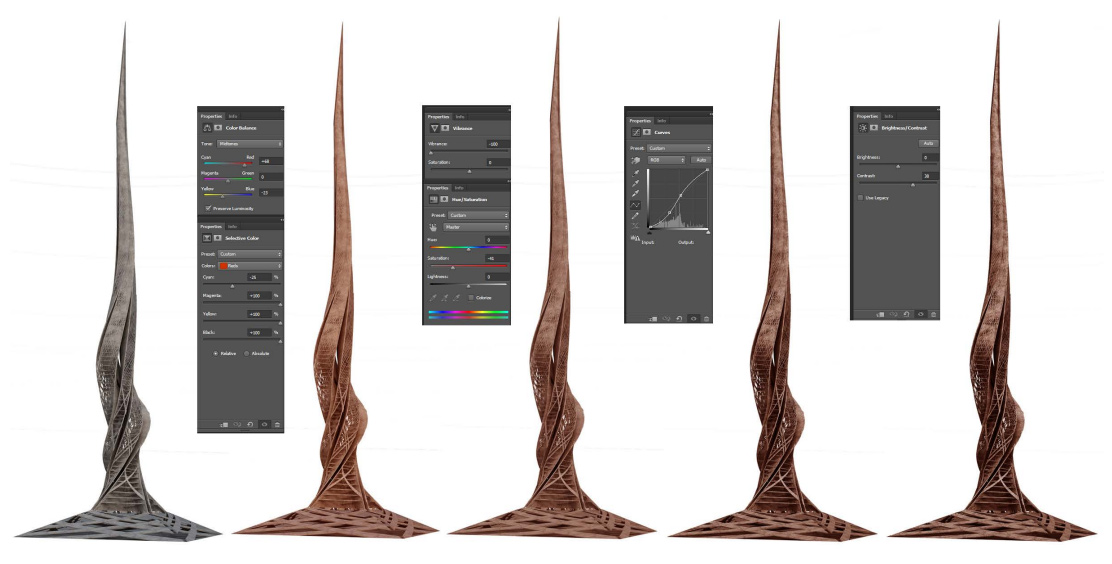
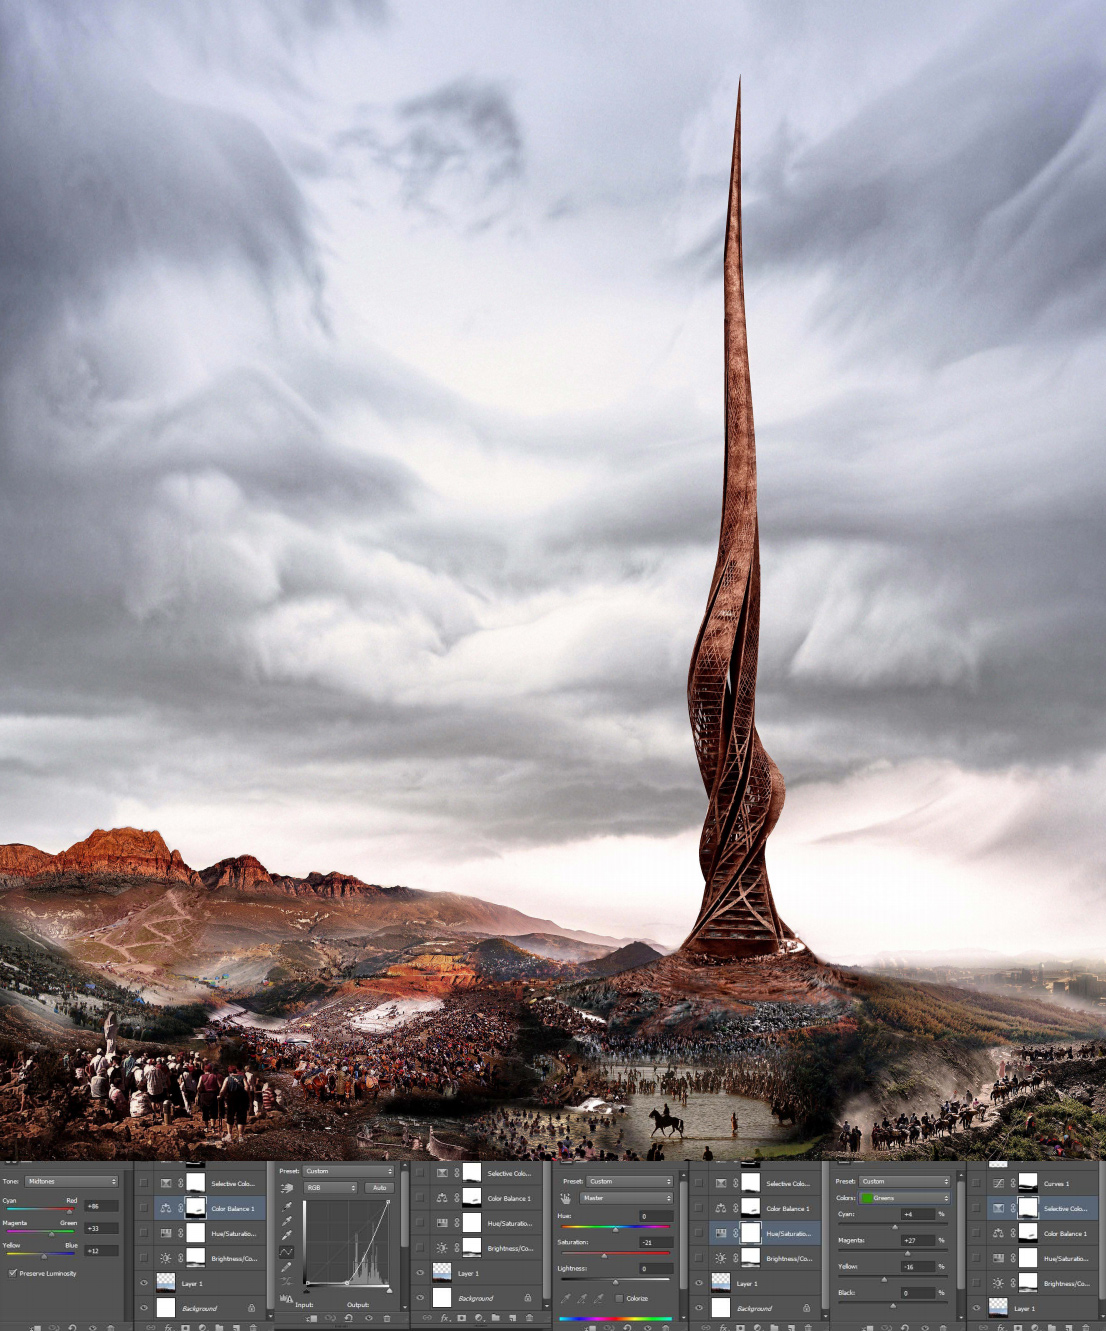
Testing Materials with the help of Photoshop
We still had a key problem: The material of the tower! Based on our design process we thought on some kind of mud-walled architecture, but it would have been too time consuming to render all the images again. So we decided to change the color and overall look in Photoshop. This was really helpful because you have a lot of flexibility in Photoshop to test and find the best color.
Obviously you have more options when it comes to materials, textures, reflections and light settings, but for our kind of building and visualization this approach in photoshop was perfect.
Merging architecture with landscape
The location is a very important element of the complete idea and should support the sculptural character of the tower. It was hard for us to find good background images online that stood for the landscape we had in our mind. Luckily one of our friends – a photographer – supported us with some great photos he took in Albania. We only had to change minor things and recognized that these images support our idea perfectly. Big thanks therefore to Enri Canja: www.enricanaj.com
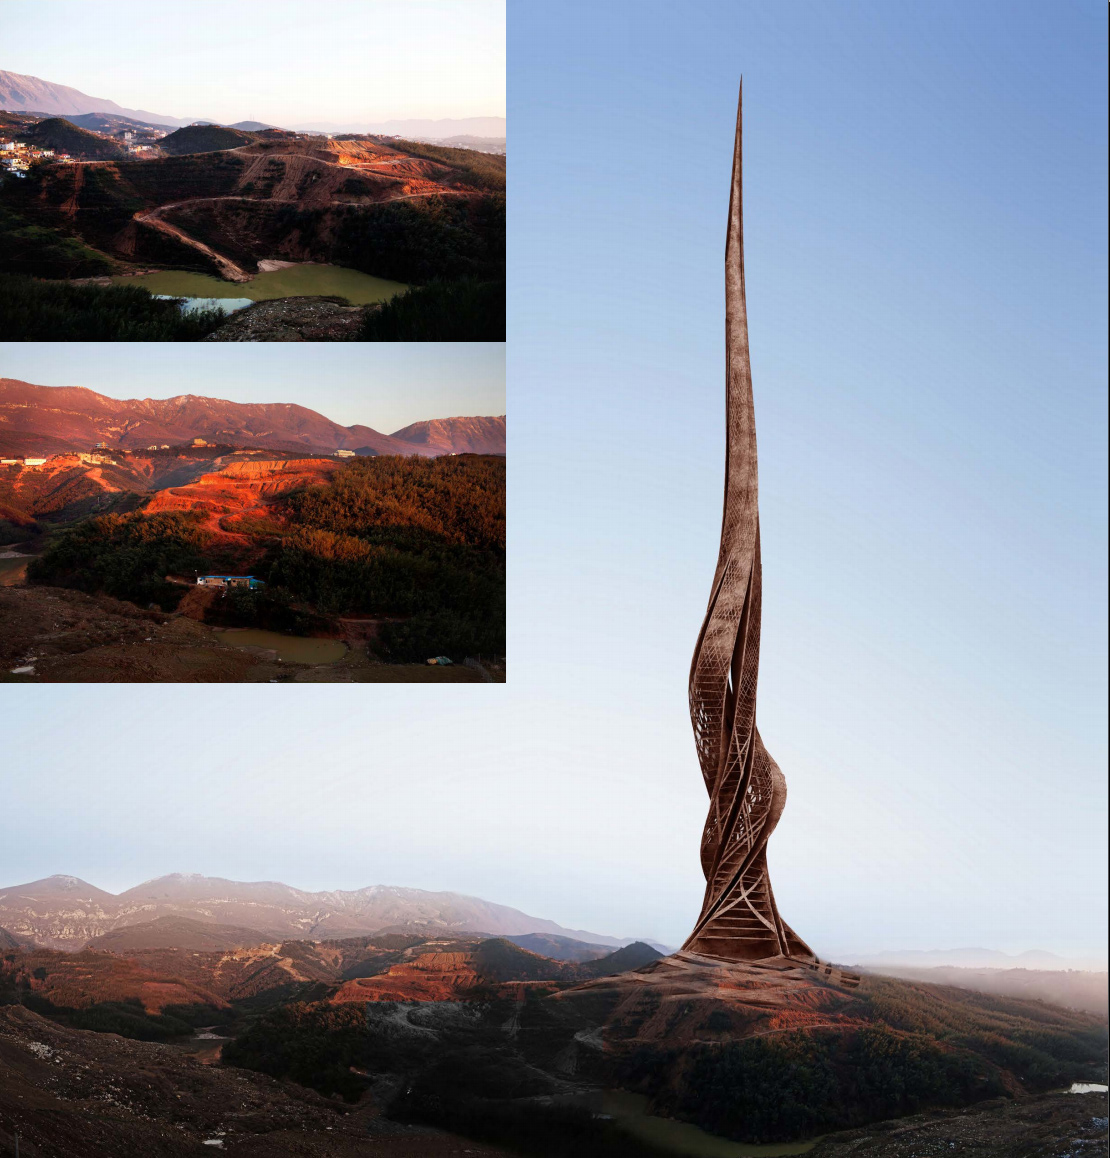
To place the tower on the right side of the image was a very conscious decision. The human eye is used to look from the left to the right side in our culture area. If an object is located at the right side it will be seen as more important which results in an more harmonious image.
Now we had the tower and the landscape which was a key element as well. The only missing part were the pilgrims! We found quite a lot of good images that could be used for our images so we used these to merge it with our scenery. With all the different kind of people the image supports a feeling of cultural diversity.
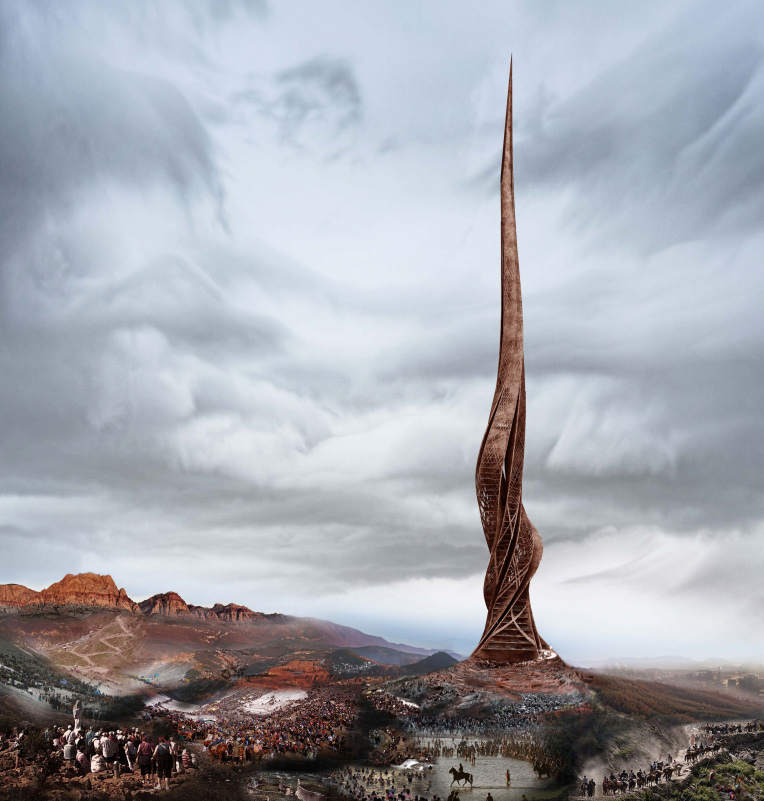
We added several more effects with the clouded sky, the mountain top, the foggy city and the blurred rotation of a crowd at the bottom of the tower. We tried to create a “human landscape” in front of the tower in combination with a surreal athmosphere.
For the final image we only made some adjustments regarding color, contrast, satturation etc.
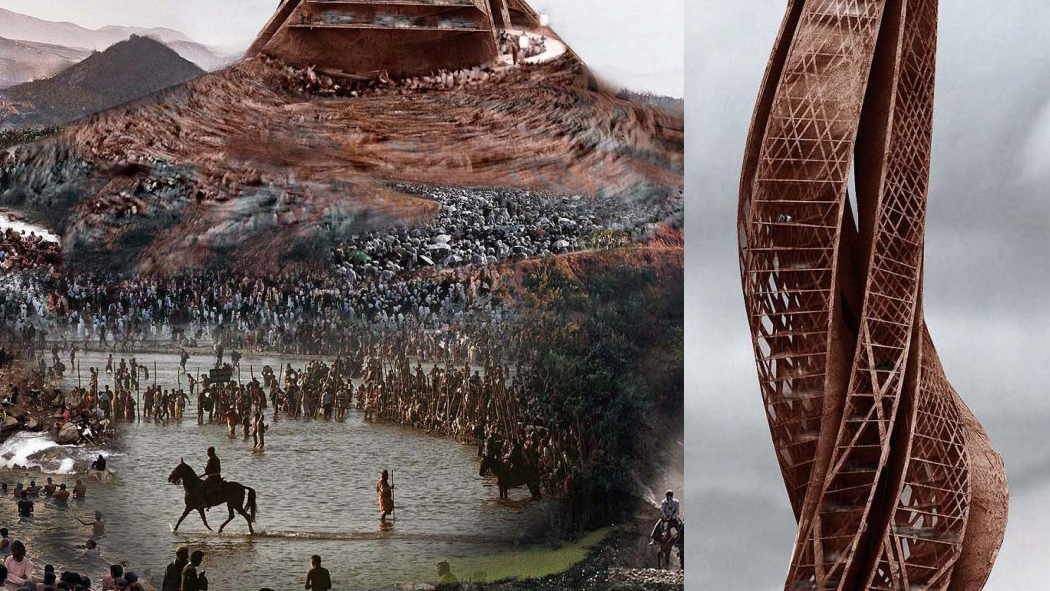
Here you see two images that give a detailed look on two important parts of the image:
To turn an idea into an architectural visualization like this not only the technical know how is important, but even more the skill develop a strong idea. For this process we used exemplary images and a visual vision from the very beginning which helped us to create this special athosphere for an architectural concept.
Find more images of the project at our website over at:
www.phormin.de
We really hope that you like this tutorial!
The Phormin Team,
Armir Shapllo, Dimitrios Kalemis

Leave a Reply