
This tutorial will tell you step by step how to create a building texture in photoshop. We set the focus on a quick and efficient way to find a good balance between the needed time and the quality of the texture.
Textures for architectural visualization and game design
When texturing an architectural scenery you often want to set the focus on a single main building (mostly the buidling you planned) and need several secundary buildings for the environment. Also game designer need several building textures to bring life into their levels. For these cases you need a lot of different building textures with an adequate quality which can be generated in an adequate time.
Demand on Textures for Buildings
The basis of our texture is a photo of an office front. If possible make sure that you take the picture orthographically to avoid negative perspective effects of disturbing shadows.

Basically we need a texture which is seamlessly tileable at the end. In addition we need to avoid disturbing elements which can cause a pattern effect. Consequently we need to eliminate for example a dominant reflected clouds on a windows which could be very disturbing if the texture will be tiled very often on a complete building.
Creating the building texture in Photoshop
We use Adobe Photoshop (version CS4) to create our bilding texture but you can also use older versions or even other graphic tools (e.g. The Gimp as a free alternative). Some steps may differ from the work in Photoshop, but the generally approach is the same.
Step 1: Selecting a relevant area and crop it without perspective distortion
First of all we need to decide which are we want to use from the photo for our building texture. I already mentioned that it eases the process if we took the photo orthographically with a minimum of lense distortion. Take a look at the plug-in “PT-Lense” if you often have to correct lense distortion. It automatically corrects the image based on the used camera equipment shown in the EXIF data of your photo. First we select the Crop tool (Shortcut: C)![]() and roughly select the area we want to use for our texture. Afterwards we move the little marker of the area in that position that the area represents a repeating tile of the building office front with regards to the perspective view.
and roughly select the area we want to use for our texture. Afterwards we move the little marker of the area in that position that the area represents a repeating tile of the building office front with regards to the perspective view.

Please make sure that you are able to transform the selected area in perspective mode by activating the checkbox in the tool bar. ![]()
Now it is possible to fit the selection points to the perspective area of the photo. Press Enter to confirm your current selection which should represent a logical tile of the office front. Now Photoshop automatically fits the perspective selection to a rectangular image.

Step 2: Abstracting the texture in Photoshop
Actually we could use the image already for texturing a 3d building after we would make the image borders seamlessly tileable. But you can see some dominant reflections on the window which causes an negative pattern effect if we use this texture many times on a 3d building. Therefore we go on with an abstraction of the photo texture. We only want to work out the primary structure of the office front by selecting only small parts and stretch them over the complete image.
For this purpose we select an area of nearly 1 px width and the maximum height. Now create a new lay via copying this area.
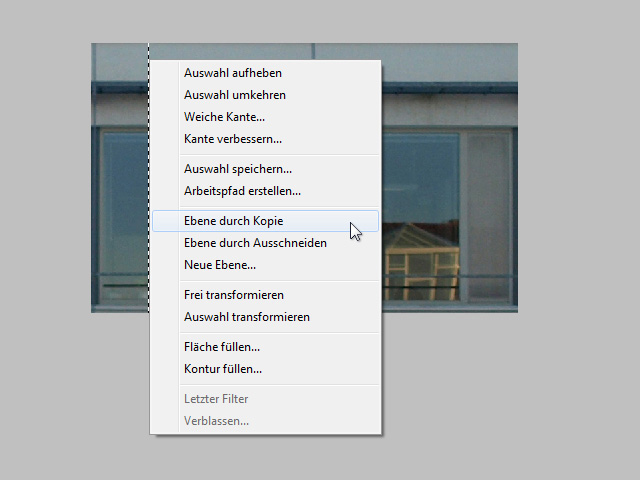
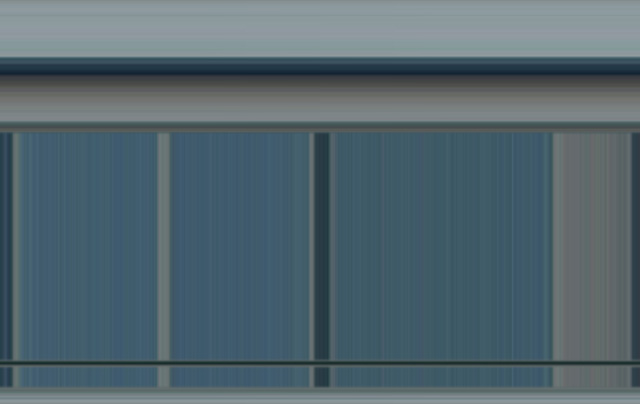
Then transform the area (Cmd+T) horizontally over the complete image. With this method we abstracted the look of the texture on the one hand and by the way this image is already seamlessly tileable in X-dimension. The new layer now nearly looks like this:
-
-

Horizontally transformed selection of the texture
-

Step 3: Repeating the transformation for the Y-dimension of the Texture
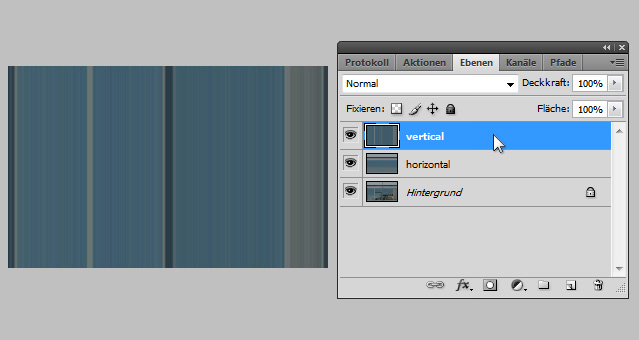
Now we repeat the last step for the vertical direction. Select a area of 1px height and over the maximum width of the image, copy it into a new layer and stretch it in Y-dimension over the image.
-

Vertical transformation of selection of 1px height
Step 4: Combination of vertical and horizontal structure
The next step is to combine the relevant areas of both vertical and horizontal structure. Therefore select from the layer with the horizontal structure the upper and lower horizontal grey concrete elements and the metal railing with the Marquee Tool (M).
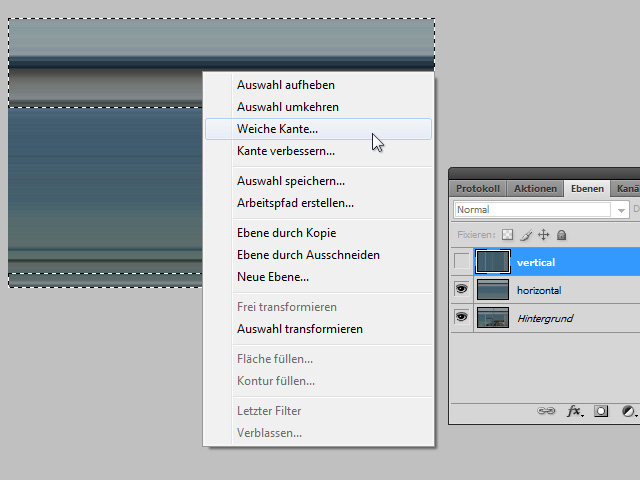
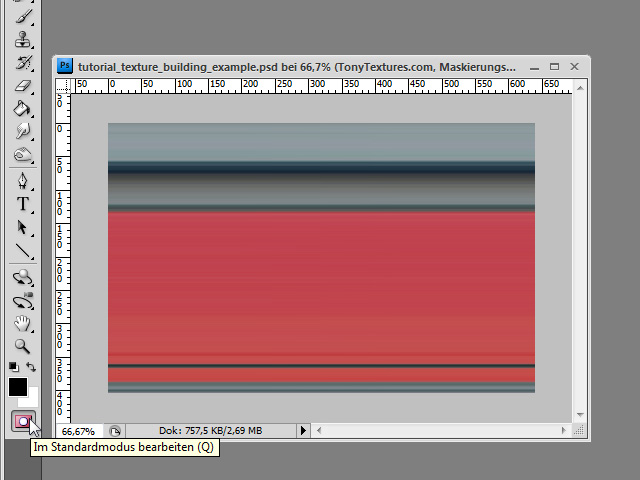
Now we smooth the edges with a right click in the image. Here you will find the Feather option. I prefered for my texture a radius of nearly 2 px. Please note: The higher the value the smoother the selection. To find a good radius you can control your selection in the Quick Mask Mode (Shortcut Q)
Select the layer with the vertical structure and delet the selected area or use a layer mask to make the selected area invisible. Now the texture already have the characteristic look of the original photo and looks like this:
-
-
Texture after combinating both layer
-

Acutally we already could use the texture – we only need to make the upper and lower areas seamlessly tileable. By horizontally transforming a small area of only 1px whidth we automatically created a tileable image in x-dimension.
Step 5: Make the image seamlessly tileable in vertical direction
To make the texture also in y-dimension seamlessly tileable, we select a small area in the upper part of the image, and merge a mirrored copy of it with the background.
Therefore select a area over the complete whidt of the image and of nearly 10px height. Smooth the selection by using feather with a 3px radius. Make sure that the layer with the horizontal structure is selected and copy the selection to a new layer. Now mirror the layer vertically (Cmd+T and right mouse click) and move it completely down to the buttom of the image. Now you can opionally merge this layer with the layer beneath (horizontally structure layer) with Cmd+E.
The result honestly looks not really different but now your texture is completely seamlessly tileable in x- and y-dimension.
-
Using a mirrored copy of an upper part of the image to get a seamless tileable texture
Step 6: Adding more details
If you like you can now additionaly put some work on the details. For example I added a horizontally bar to the window in the middle with the same technique by copying and scaling a 1px area.
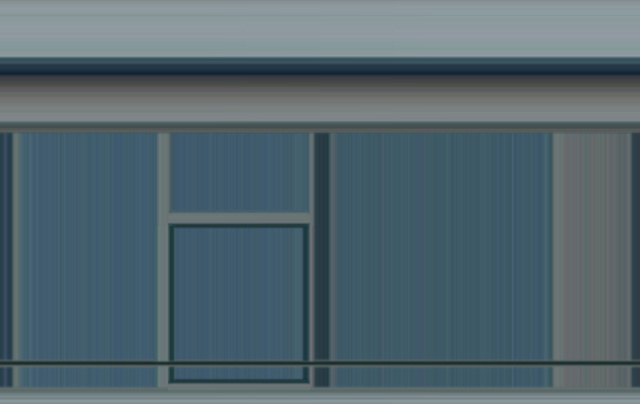
The small window has a darker border. So I copy and paste a small part of it each for the vertical and the horizontal structure like in the steps before. Now it looks like this:
-
-
Adding mor elements to the window texture
-
Step 7: Reducing the stripe effect of the textures in Photoshop
Due to scaling of a small part of the image in one direction, characteristic stripes appear in the your texture. On the one hand the effect makes the texture look not that clean on the other hand the effect should not dominate the look. At least it is a matter of taste and can be changed from project to project. But from my experience the effect can be ignored especially if you use the texture for secondary buildings.
Nevertheless I decided for this tutorial to reduce the effect a little bit. Therefore I want to merge some of the vertical and horizontal stripes in the window glass and in addition make the concrete element on the right look more uniform.
Therefore I select the glass and use feather with a radius of 3 px.
-
-
Selection of the glass
-

Now select the layer with the vertical structure and use the eraser tool (Cmd+E) with a Master Diameter (brush size) of nearls 65 px and opacity of 15% (set these values in the toolbar) to slowly delete some parts of the vertical structure. Now your horizontal structure will step by step become more visible.
Next we want to optimise the look of the concrete element on the right. Select the area with the Rectangular Marquee Tool (Cmd+M) and use feather with a radius of 1 px. Create a new layer (Cmd+Shift+N) and fill the selction with a grey of your choice. Afterwards reduce the opacity of the layer to nearly 50% to show some structure and details.
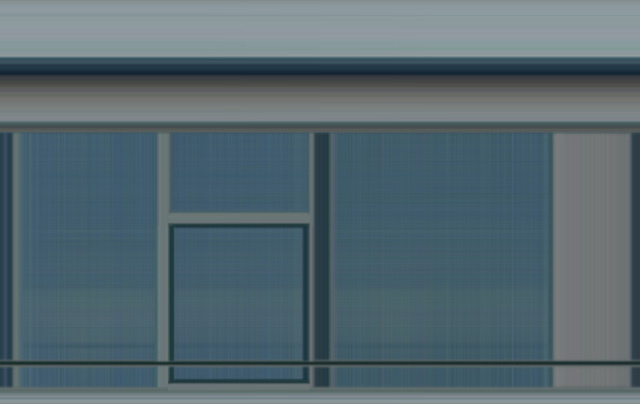
Meanwhile your texture looks like this and is perfect for your needs.
I think this approach is very good to create some useful textures whithin a short period of time. Especially if you want to keep the characteristic look of buildings.
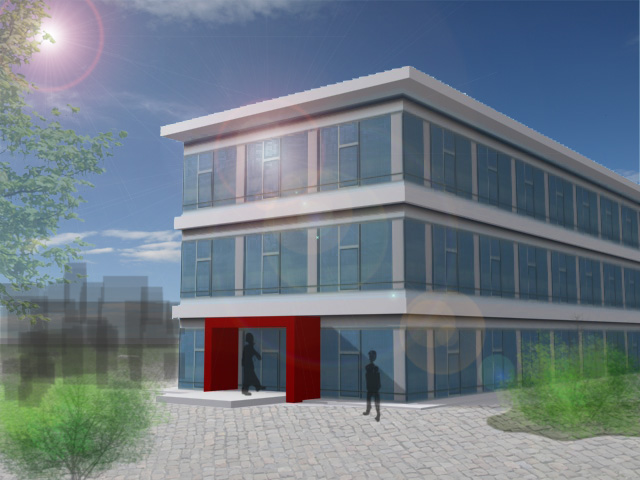
And this is what it could look like if you use the texture in a quick and dirty example scenery:
-
-

Final building texture – example of use
-
You can download the complete Photoshop fild (.psd) of this tutorial here for free to make it more easy to go through the steps:
Download free Photoshop Tutorial psd file here
You can use the texture for your private and commercial projects, but note that shareing is not allowed. If you like it please recommend this tutorial to your friends or link to us.
What do you think of it? Did you try it or have any suggestions for this method. Drop a line in the comment field!

Leave a Reply