Being able to create a good looking reflection in water is a basic skill, not just in the field of architectural visualization. Although it is possible to create and render reflections in water in the 3D program, it’s often quicker to create them in Photoshop. Creating a convincing mirrored reflection on any water surface is the topic of this Photoshop tutorial.
Architectural rendering as the starting image for the tutorial
For this Photoshop tutorial we will be using the following rendering as an example. It shows a typical rendered architectural scene that should be mirrored in a water surface in the foreground. The background was rendered red, which due to its high contrast can be selected easily so as to display the water surface later on.
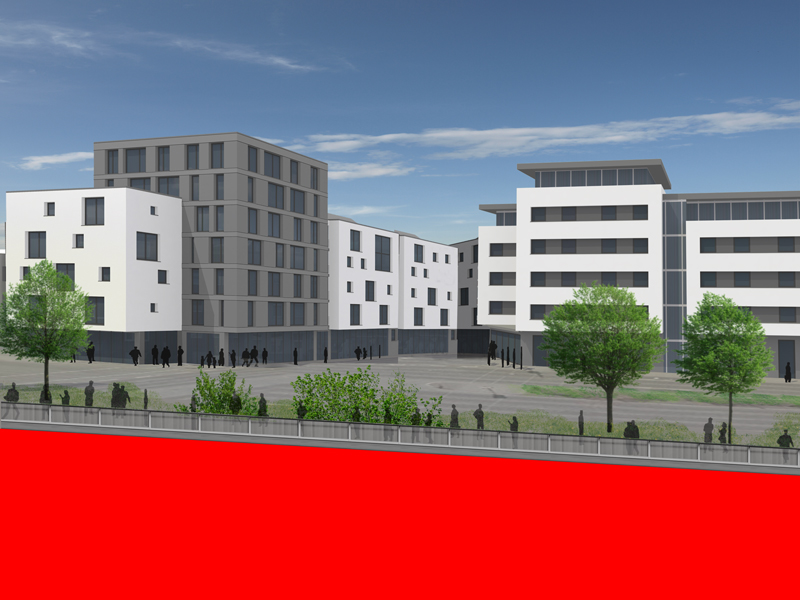
To begin with, select the whole area of the image which should be mirrored in water later on. The layer containing the output image must be selected. Now copy the area using CTRL+C and paste it with CTRL+V into a new layer above the old layer. Select the red area with the Magic Wand tool and delete it with the DEL key. If a red border still remains then go back and increase the tolerance in the settings at the top of the screen.
Mirror and align the image selection
The contents of this layer will become the mirrored water surface, which therefore needs to be flipped vertically (Edit/Transform/Flip Vertical). If we now drag the contents of the layer down and align it, it should end up looking like this:
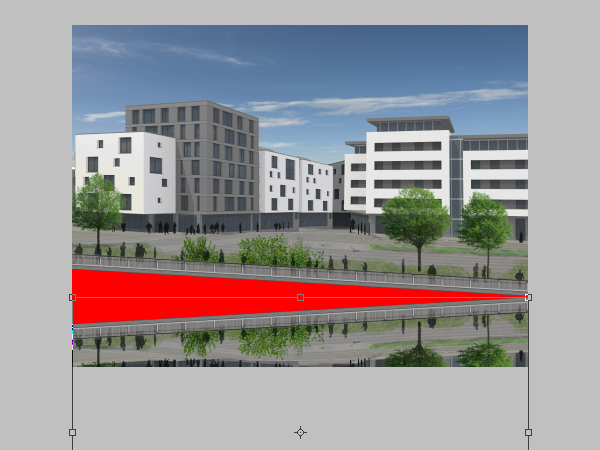
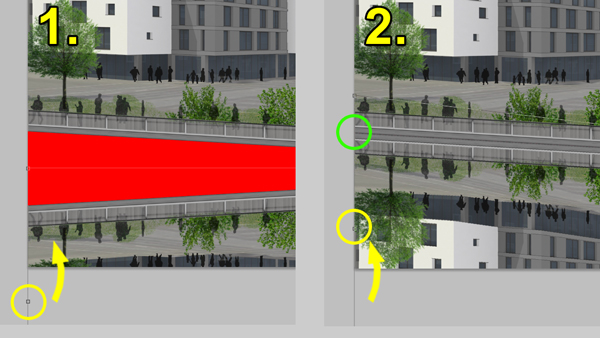
Now you should zoom quite far in order to place the elements precisely on the edge of where the reflection should be. Activate the Move tool with (V) and move the parts of the image together roughly. You can move the last pixels easier using the arrow keys.

Now the right hand corner fits. To get the left hand corner to align perfectly as well, first go into the Transform Mode with CTRL+T. Now grab the handle in the middle of the left hand adjustment lines, press CTRL+SHIFT (constricting the movement to either only the horizontal or the vertical axis) and drag the handle so that it too is exactly on the edge of where the reflection should start.
The whole image now looks like this:
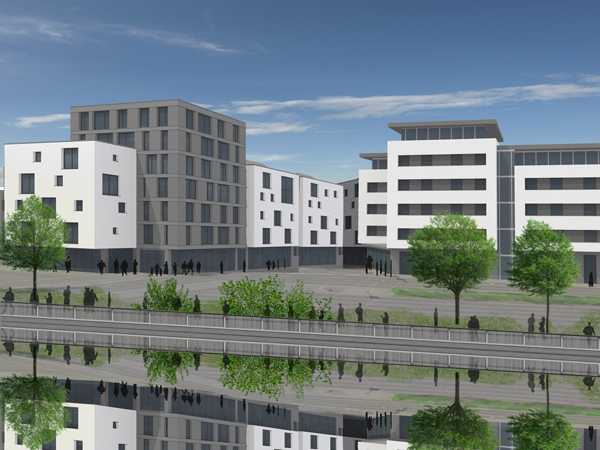
Method of generating a wave effect in Photoshop
In the next step we will emulate the effect of a typical water surface which will be applied to the mirrored lower layer. The water surface in question is meant to be a type of canal and therefore still and quiet. Although it is a quiet bit of water, small wavelets should nevertheless be incorporated into the image.
A quick note on the methology: First we will produce a black and white image which displays information of the height of the waves in perspective, called a displacement map. By applying this to the lower part of the image using the Distortion filter the parts of the other image will also be manipulated due to the grayscale of the displacement map.
Displacement map for the Displace filter
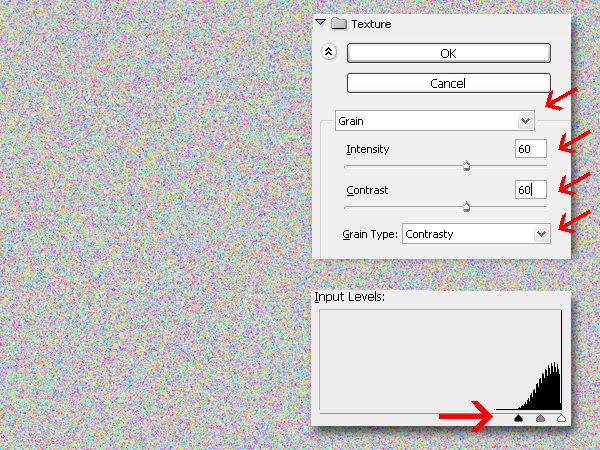
To do this step we first open a new image which can be smaller (eg half as big as the working image). In order to produce a random structure we will begin ba applying the Texture Grain effect. Make sure the selected layer is filled with white and apply the filter using the following settings as a guidance:
- Intensity: 60
- Contrast: 60
- Grain type: Contrasty
When you apply the filter you wont notice anything to begin with becuase the effect is quite subtile. Using the Levels settings (CTRL+L) you can increase the contrast quite a bit by moving the small black triangle near the left hand border of the histogram to the right until it is near the beginning of the “mountains” that are visible.
After this, we select all (CTRL+A) and transform the area perspectively by pulling the lower part of the image apart using the handles. It can be really quite wide so the effect is visible. In my example I did this step twice. Now you can notice the difference in colour from the Texture Grain filter, which is, however, irrelevant for us and not a problem. I nevertheless removed the saturation using CTRL+U.
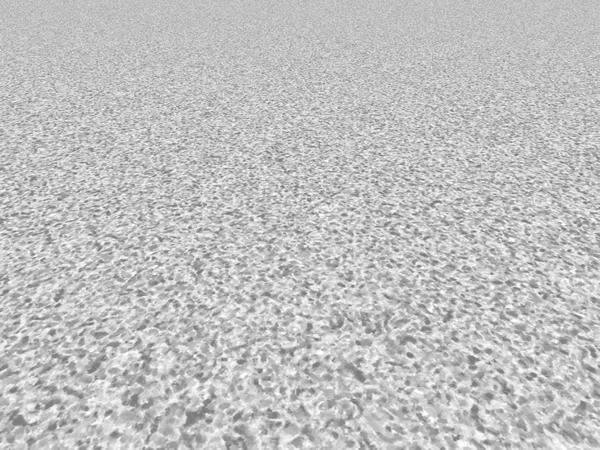
Now we already have quite a good looking distortion which roughly fits the scene due to the distortion. To create a better water effect add a second layer and apply a Fibre filter to it (Filter/Render/Fibre). To begin with try it with the standard settings. However, the fibres are set to be vertical so select all again, rotate everything 90° and scale it to the width of the image using CTRL+T so that it is now orientated horizontally. Finally, scale this effect perspectively so that it matches the first.
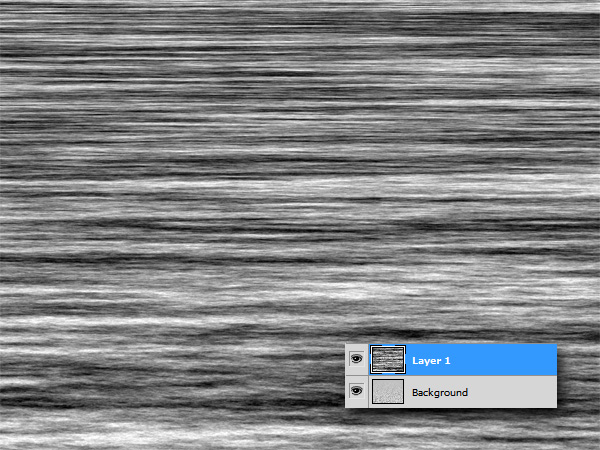
Next, we want to mix both layers and in preparartion for this, need to reduce the opacity of the top layer to roughly 25%. The effect then looks quite usable.
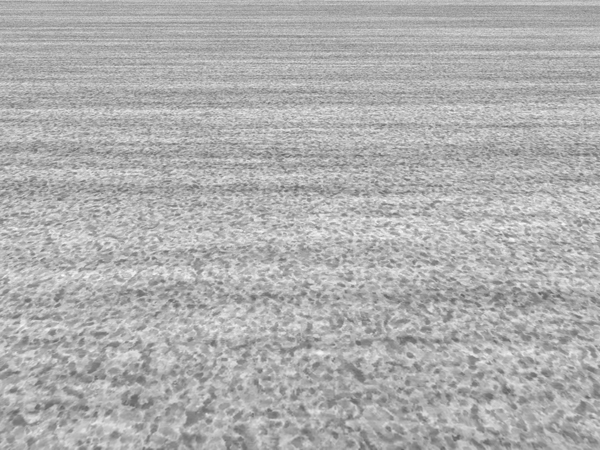
Reuse the displacement map over and over
The nice thing about this is that the displacement map you just created can be used again and again! Therefore it should be saved in a specially designated texture library so that next time creating water reflections in Photoshop will be even quicker!
Not quite happy with the displacement map? Clicking on the folowing link will download the Photoshop file of the displacemnet map that I made, which you can use in your architectural visualisations. It also includes both the layers so you can change the transparency and other settings to suit your needs.
Water Displacement Map For Photoshop – Free Download
Now comes the big moment. You can either use the displacement map you made or my version of it. First select the contents of the image and then, using the Rectangular Select tool (M) roughly select the area that later on will display the water. Then apply the following settings in the Displace filter (Filter/Distort/Displace):
– Scale Horizintal: 100
– Scale Vertical: 20
– Select “Scale to Selection“
– Select “Repeat Edge Pixels”
You can experiment with these values a bit. If the effect should be more linear, then set the value higher in the setting “Scale Horizontal”, although my value is already quite high, but just play with it…
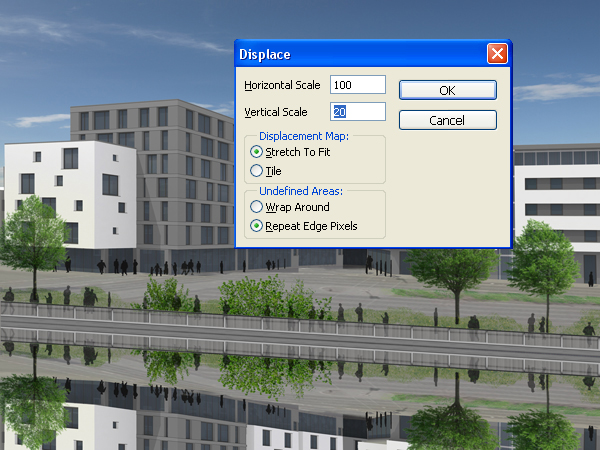
Accept by pressing OK and a dialogue box will appear offering with the option to choose a file. Choose the Photoshop file of the displacement map and the result should look something like this:
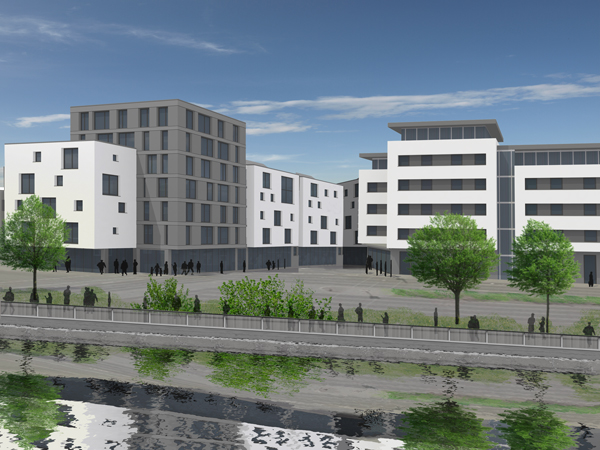
Gentle reduction of the reflection in the foreground using a layer mask
This is all going in the right direction. Let’s continue with the fine tuning. To begin with, the intensity of the reflection should decrease towards the front. To do this we create a layer mask over the most recently created layer with the mirroring part of the image. An alpha mask ist basically a layer itself with Grayscale information that is attached to a normal Phostoshop layer. Whst’s special about this is that black dictates areas that should be transparent through the mask to the attached layer whilst white masked areas become opaque – not transparent. By creating a black-white transition in the layer mask you thus create a transition from transparent to opaque on the main layer. In our case we reduce the transparency of the mirroring part of the image in the foreground using a soft transition.
So let’s start: First, mark the layer with the mirrored image and create a layer mask (on the lower toolbar of the Layers window (see screenshot below). Then select the newly created layer mask (the small white box next to the preview image of the layer in the Layers window) select the Transition tool (G) and make a black-white transition from bottom left to top right (stopping at the edge of the water) by pulling the tool across the image. Make sure the foreground colour is dark but not quite black and that the background colour is white. The transition should run roughly at right angles to the edge of the water. Then it should look something like this:
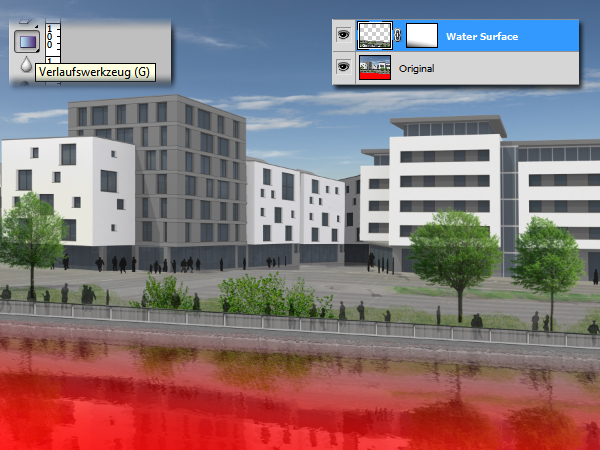
You may need a few attempts, which isn’t a bad thing. You should experiment a bit and observe the different results. By the way, you can draw directly onto the layer mask using a soft brush meaning you have more control over more complicated transitions.
The background is still red – the high contrast colour from the rendering. Now it is time to fill this area with a dark blue, making sure the original image layer is activated.

That looks quite usable, doesn’t it? The only thing I don’t quite like is that the transition from the water surface to the real waters edge (the bank) isn’t really noticeable. I can remedy this quickly by just reducing the brightness of the layer with the mirrored water surface. To do this simply press CTRL+U and pull the controller for the brightness down a bit, in my case to the value of –35.
Now it looks good, doesn’t it?
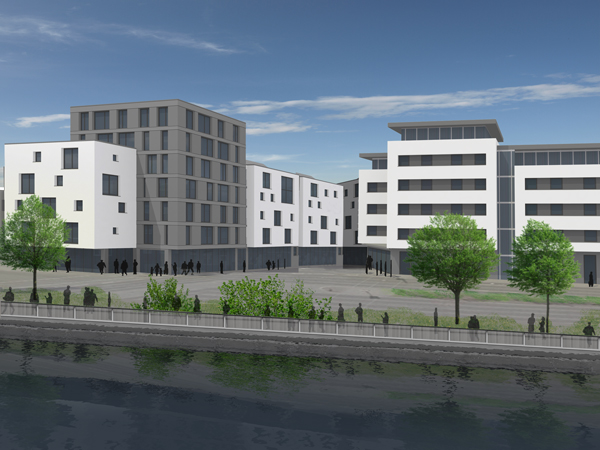
You can always reuse the displacement map in Photoshop, as I mentioned earlier. Do experiment with other variations of the map if you want to create a different water effect.
You can also test with some water photo textures which you can transform and use as additional overlay layer as well. If you want to test it make sure to check out our Free Water Texture Gallery with water textures you can use for free for private AND your commercial projects!
If you liked the tutorial I would be more than happy if you leave a comment with some feedback. Thank you!
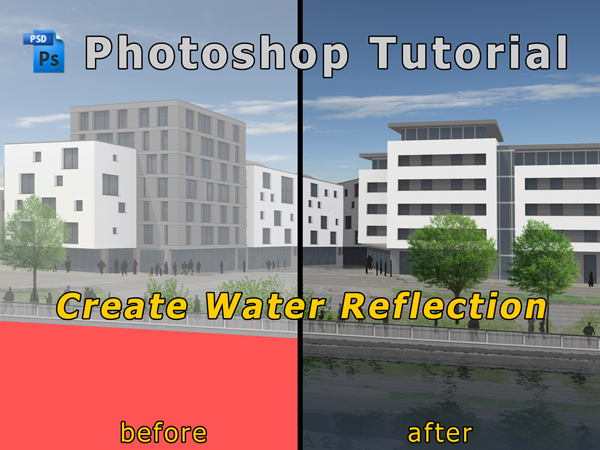


[…] a displacement map (Photoshop) of a water surface? In the Photoshop Tutorial: Create Water Reflection for Architectural Illustration you can follow in detail how to create a reflecting water surface in Photoshop quickly. For many […]