Blender is a popular tool for architects and 3D visualizers as well. It is free to use and has powerful features to create compelling animations, visual effects, and (interesting for us 🙂 architectural visualization! Blender is truely the first place to go when you are looking for the most powerful tool which is free to use.
Using 2D Architectural Entourage in Blender
In creating these 3D architectural scenes, the use of entourage elements plays a big role in conveying realistic images quickly. The use of 2D cutout tree and plant entourage is usually done through post-production in Photoshop, but they can just as easily be used in the native Blender environment as well. Using these cutout images have some advantages over using 3D models in Blender – fast rendering time, easier handling in the model, and just as realistic results.
Admittedly, 3D plants are better in some regards such as their use in video animations and their independence from view perspectives, often times I find it more convenient to use cutout entourage elements in my 3D models. This is especially true when a snapshot of the design should be presented in the course of the project.
I’ve stumbled upon a video tutorial that gives a step-by-step run through of using 2D cutouts in the native Blender model workspace. The focus of the tutorial is not producing high-level architectural visualization, but rather techniques and tips on creating fairly simple models.
I’ve also taken the liberty to describe the steps based on the video here in this article, just in case you rather prefer reading.
Adding a Cutout Tree to your 3D Model
- Start with your base architectural setup. Keep it as simple as your needs will allow to make rendering times as short as possible. Make sure Ambient Occlusion is ticked on.
- Add a plane to the center of the scene and on a second layer. Enter edit mode and rotate the plane 90 degrees, with the plane parallel to your desired view plane. Rotating it in Edit Mode makes it so that the plane’s axis is still aligned to the world’s axis.
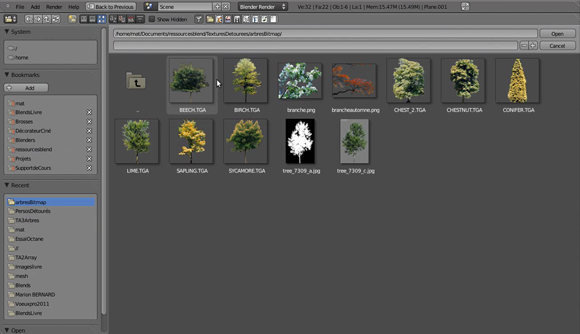
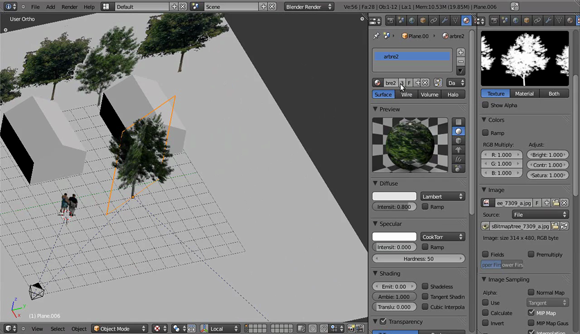
- Make a new material with a name and texture of your choice. Make the texture type “Image or Movie”. You can use .png, .TGA, or .jpg. For transparency with .jpg images, you’ll have to have two copies of the desired texture – the base image and its alpha channel (a black and white image showing its transparency).
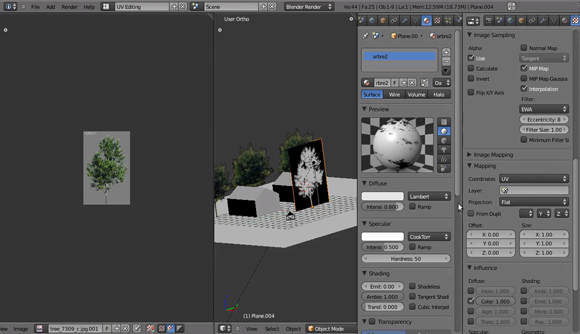
- After picking your image, be sure to tick the “Show Alpha” box of the texture to make sure transparency shows through, set Coordinate to “UV” under Mapping,
- From the default screen, switch to UV Editing. Enter edit mode, Unwrap the plane, and be sure to select the image you want to use as entourage. Taylor Blender to use the alpha channel of the image by ticking the “Alpha” box in the Influence attributes of the Texture panel. Make sure the “Use” box is ticked under Alpha in the Image sampling part of the panel. Finally, in the material panel, set the Alpha to 0.000 and check the Transparency box.
- You’ll notice that when you render, although the image shows up, its shadow is still in the shape of the square plane you had created. To circumvent this, select the Base Plane and any other materials with the tree’s shadows on them and under their corresponding Material panels, check “Receive Trans” under the Shadow drop down options.
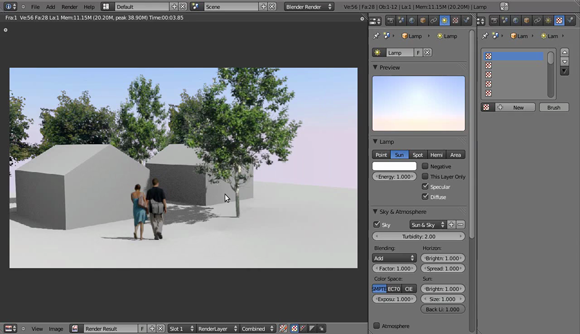
- With the image all set up, all that’s left is rescaling, relocating and multiplying the entourage any way you see fit.
- A quick tip for rescaling the object without having to move it back into place every time is to reset the origin of the plane containing the entourage. Go into edit mode, start a vertex and select the two bottom corners of the plane. Press Shift + S and select “Cursor to Selected”. Exit Edit mode and set Origin to 3D Cursor, the hotkeys of that command being Shift+Ctrl+Alt+C.
- Using jpeg images has an extra step since transparency is not innate in jpg file types. It involves importing its corresponding alpha channel image (if the it does not have one, you could post-edit one by defining the edges of the entourage with a photo-editing software and setting the outside black and the inside white) the same way you would the other images except you untick the “Color” box under the Influence drop down in the Texture panel. Be sure to uncheck “Alpha Channel” of the texture since, again, the jpeg does not have an Alpha Channel innately.
- For repeating images, be sure to keep them just slightly different in sizes to make sure the end product looks realistic. Scale, mirror, or tweak them just a bit.
Adding People Cutouts
- Open up User Preferences from the File menu (Ctrl + Alt + U). Under the Add-Ons panel, pick Import-Export and tick one the “Import Images as Planes” add-on.
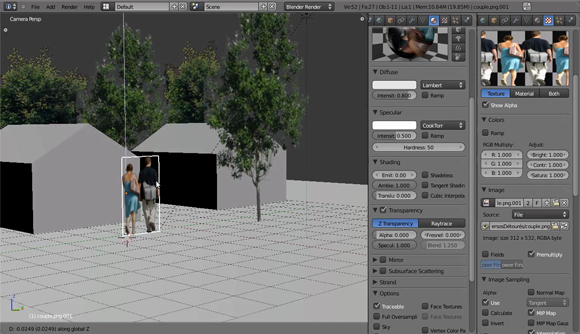
- Pick your newly enabled add-on by going to File>Import>Images as Planes. Search for your desired png file containing the people you want to use as entourage.
- You’ll see the add-on created a plane with your selected image on it as a UV-mapped material. Rename it to whatever you wish.
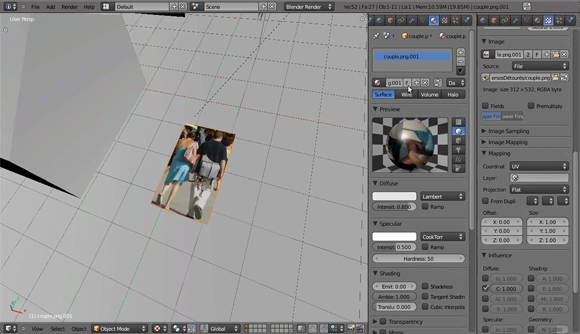
- By default, it doesn’t choose the alpha of the image. Under the Texture panel, tick on “Show Alpha”. Then go to Image Sampling and tick “Use” under the Alpha options. Finally, tick the “Al:1.000” box in the Influence>Diffuse sub menu.
- Like with the trees, don’t forget to tick “Transparency” under the material properties and set Alpha to 0.000.
- Rotate and readjust the position of the entourage plane.
- At this point, you can choose to render the image already but more often than not, you will notice that the render of the people entourage will have messy and unsightly edges. To fix this, tick the “Premultiply” option under Image in the Texture panel to have some anti-aliasing done to the png file. You’ll see the preview of the rendered image up top to confirm the effect of this.
- You can Import the image as Planes (under the Import panel in the File drop down menu) for easy retrieval of this entourage image.
Entourage Should Face the 3D Camera
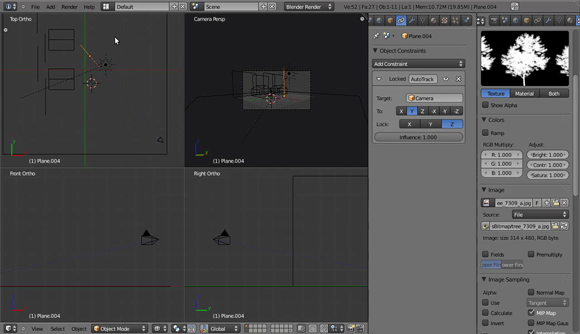
- On Z-view, select the plane/entourage that you want to edit as well as the Camera. Press Ctrl + T and select “Lock Track Constraint”.
- Select the Plane and under the Constraint panel in it Properties, you will notice a new constraint named “AutoTrack”. Add a Constraint and choose “Locked Track”; be sure to choose the Z axis as the axis to be locked and the Target to be “Camera”. On the “To” option, pick the axis that runs perpendicular to the entourage plane; in most cases it will be the X axis.
- Another option would be to copy the Rotation of the Camera. Choose the plane you wish to constrain and Add Constraint>”Copy Rotation”. Choose the Camera as the Target object. Turn off all rotation axes save for the Z axis.
- Save for really close shots of the renders, these two options of locking the plane to the camera will have very little difference. However, use your own discretion when deciding which method to use.
How 2D PNG Cutouts Create Realistic Shadows in Blender
- Sometimes shadows are hard to capture with 2D entourage. Certain angles make it so that shadows are really narrow due to the image being essentially a flat surface and the sun sometimes casting light parallel to the surface. To solve that, we have to “Copy Rotation” once more.
- Select the entourage you wish to create shadow for and make a duplicate of it. Superimpose it on the original entourage element and add a “Copy Rotation” constraint. Set the target object to “Lamp” or the sun, in most cases, and turn off all rotation axes save for the Z-axis. On the Z view and in Edit mode, rotate the new shadow entourage element 90 degrees.
- Since we only want that new element to cast shadows and not be rendered, make a copy of the material of the entourage and set it so that it doesn’t render. In its material properties under Shadow, tick on “Cast Only”.
- So as to prevent the shadow of the second “shadow” entourage from affecting the shades of the first original entourage, click on the first image and set it to “Shadeless” under the Shading drop-down in its Materials properties.

thank you for this tutorial.
i had a problem when i was trying to fill a scene with trees with a 10 years old pc. i hope i can learn this tutorial of yours and apply it.