So, do you want to create shadows in Photoshop for your next architectural presentation? Let’s start stating some keypoints:
It is different to create shadows for cutout objects (persons, trees, cars) than to create shadows for buildings. Also it is different to create atmospherical shadows (like the blurred shadow of a non-visible tree in the foreground of the rendering) than the previous ones I mentioned. Why? Well maybe they differ just a bit in the process, but the effect to achieve is different.
Btw: As you might constantly looking to find more high quality cutout graphics and textures for architecture visualization you should check out our “Free Download” category – you will find several professional graphics here that you can use for free – even for commercial projects!
Also notice there is a huge gap into just creating shadows than creating realistic shadows. Anyone can add shadows, but making them look as if they were rendered is a whole new world. In this article I want explain my workflow when it comes to this typical photoshop task for architects.
Why create shadows in Photoshop and not in 3D?
Let’s imagine you are not good at rendering, or that you don’t have a powerful PC. Also your lighting techniques may not be that good, but you get your way wonderfully with Photoshop. There you get a reason to know how to create shadows in Photoshop.
But mostly the reason is because when working in ArchViz, 90% of the time you add elements to your rendered scenes in Photoshop. Trees, people (almost 95% of the time; the 5% could be if you actually like 3D people, which isn’t my case really…), some scenery elements like publicity ads or flags that you didn’t find a proper 3d model for render. Then if you don’t know how to cast shadows properly in Photoshop, all that amazing job you been doing goes to garbage.
The sooner the accept it, the better you will be at the ArchViz world: you can spend 6+ hours of rendering, but without 2+ hours of well-done post processing in Photoshop, your images won’t be contest-quality.
Adding shadows to cutout people
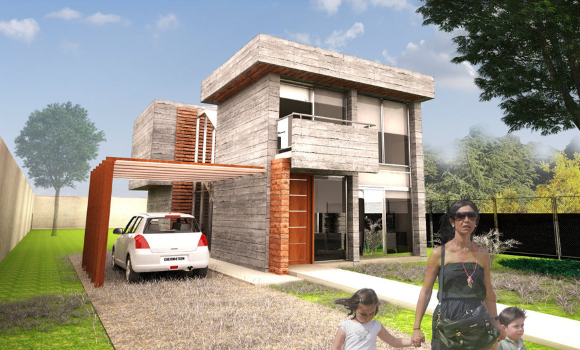
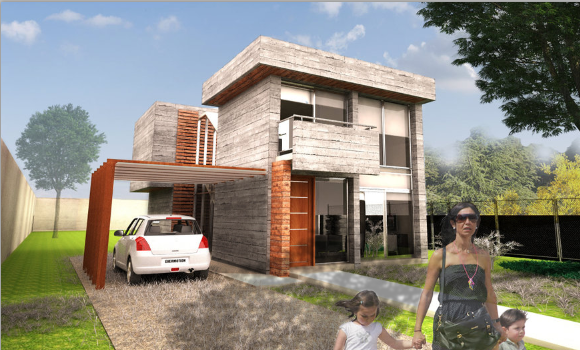
I am going to start with this conceptual scene I made for a university project of mine.
See? No post processing in which regards to adding cutouts, just a few post production adjustments with Levels and Curves (notice that there is no background since it is a PNG image)
And suddenly I decided that for better result in this concept I may need to add some people at the scene for reinforcing the scale idea of my building.
So then starting from a cutout png people file, I select it and drag to my scene. Adjust size and position inside the scene.
From this point, I made some adjustments at levels and curves, for better visualization of the scene, as well as reducing a little bit the opacity of the cutout, in order to not give it that much importance.
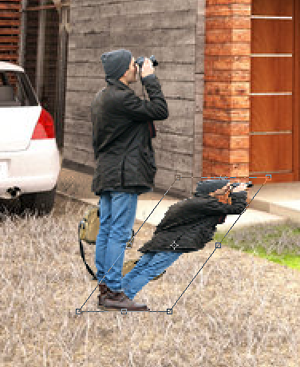
CTRL+J for duplicating our cutout layer, and then I make active the original layer. CTL+T for transform, and when the free-transform box shows up, drag from the upper-middle anchor point whilst holding CTRL in order to bring the shadow down and position it nearby its final position.
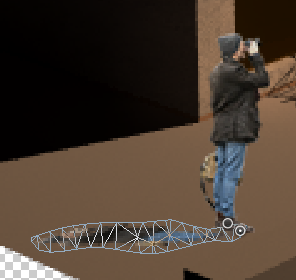
We can then go to Edit→Puppet Warp (only works for CS5 or superior, for older versions please use Perspective Warp) for moving the shadow to its proper position.
When you click near its feet, you create new anchor points. Create two near its feet, and while holding ALT, rotate the shadow to match the other shadow’s direction.
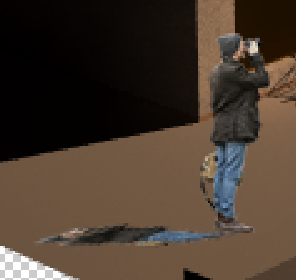
Now it’s time to make it look like a real shadow. First lock the Transparent Pixels and now change for the Gradient Tool. Make sure its modes goes from black to white. Drag a line along the shadow centreline and create it until a bit larger area.
Change the Layer Blending mode to Multiply and then you have a shadow that looks good enough, although not realistic.
Blurring the shadows will give us that realistic feel that changes everything. Maybe with this example you won’t notice too much given the angle of the shadow and its scale, but with more role-taking cutouts it makes the difference.
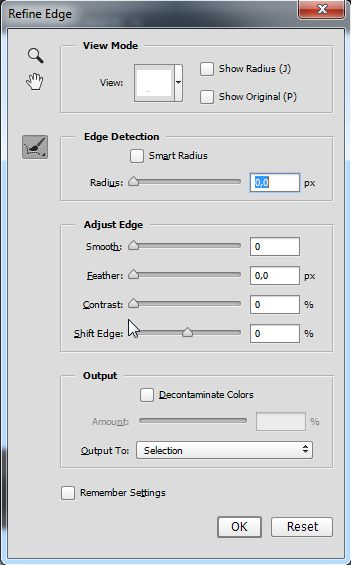
Go to Filters→Blur→Gaussian Blur and apply a blur of 2-3 pixels top. That will give a general blurry appearance to the shadow; but the key effect comes here. Select some pixels at the upper part of the shadow with the marquee tool. Hit Refine Edge and add some Feather value.
Then we go again to a Gaussian Blur but with a much bigger value (say 30-40). That will add a realistic vanishing effect of the shadow that reminds us of the way our rendering engine handles the shadows.

This procedure is valid for every cutout object, being those objects cars, people, pets, vegetation, etc.
Building Shadows and how to create them
Imagine you had one of the simplest mistakes people tend to do: you forgot to add a groundplane to your model before rendering. Or you actually did it on purpose because you wanted to photomerge your scene into a photograph you took.
Your rendered scene will probably have casted shadows on walls that may even look realistic. But how do you manage with the floor stuff? Hand creating shadows, in my opinion, is not an option as you will most likely make a mistake (with hand created shadows I refer to sketching lines and joining them to create shadows (unless you have the experience of a drawing teacher, you will end up failing).
So the best way is to actually guess how shadows may react to small patches of area and cast it over there.
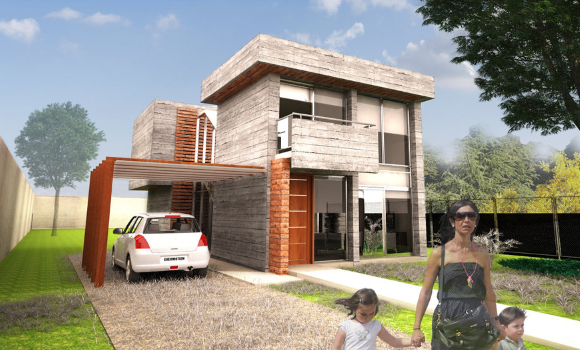
For this case, I will take an already processed scene, to show what you could do if you already merged down your layers.
What we need to keep in mind is where do we want the shadows to be casted, and also, how strong are they going to be. So, we pick the Polygonal Lasso Tool and select areas where we want shadows to be casted. In my case I want to give the shadows on the left side of the image more power.
Try to work with small areas, this way you can fix them or revert changes easily. Even more if you are adding more than one shadow layer to a particular area.
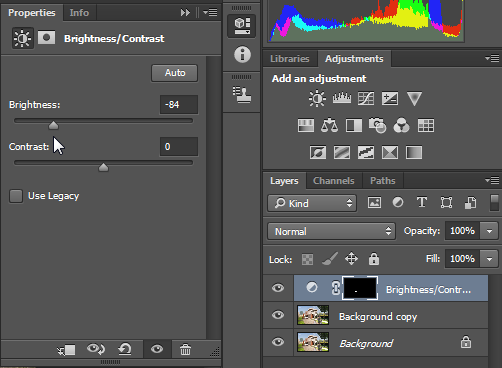
After selecting the part we want to apply shadows, click Brightness/Contrast adjustment, and reduce the Brightness amount for the selected areas. In that way, you will notice how the area starts to look like if there was a shadow on it.
As you can see, it is a non-destructive method in comparison to painting over the areas where you want the shadows to be casted. If you decide that the shadows don’t apply to your scene it’s just deleting the Brightness/Contrast layer and everything goes back to normal.
Also it is important to remember the rules for shadow creation:
- Shadows over grass tend to look a bit blurry, given the effect of grass leaves scattered in all directions
- Shadows over concrete/pavement are solid, geometrical ones. They can be affected by the texture if it has too much bump.
- Shadows casted at one building from another one are actually darker than shadows casted to the floor.
- Side of building shadows are lighter than one building from another shadows.
Blurry shadow of a tree in the foreground
Next I want to talk about “atmospherical shadows” – I mean the shadows casted by non-seen elements at the scene.
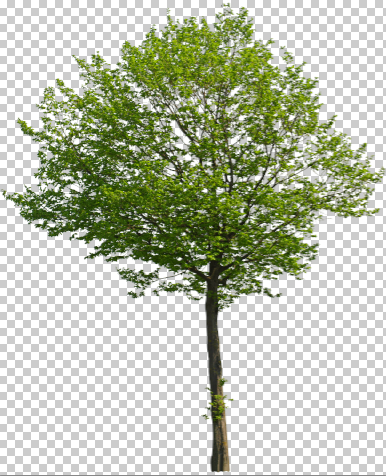
In my case I want to show you this for a blurry tree shadow that is casted on the foreground of our scenery. Therefore I picked first a high quality cutout tree from our “CutoutTreeV01” collection:
If you need a nice cutout tree for this exercise you can grab the “OpenArchiVIZpack” for free here.
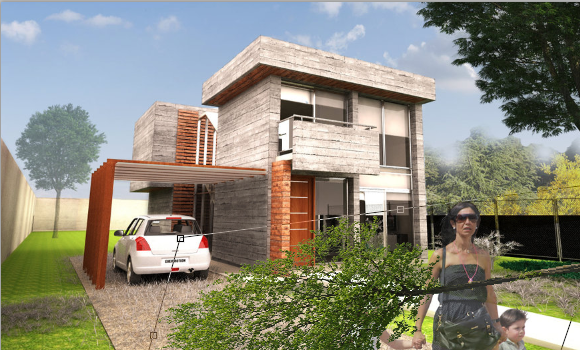
Next I import the cutout tree image to my scenery and reduce the size significantly so that it more or less fits to my image:
As the shadow should be casted by the tree in the right part of the image I have to transform my imported tree so that it more or less looks like a potential shadow of that tree:
Now we will transform it into a shadow. Therefore I go through following steps:
- Reduce the brightness completely (tree will be black afterwards)
- Reduce layer opacity to ~50%
- Delete the part of the persons as the tree shadow is behind them
- Use the Gaussian Blur
Now the result looks like this:
I think you get the idea how it works…
Shadow is casted on ground AND wall
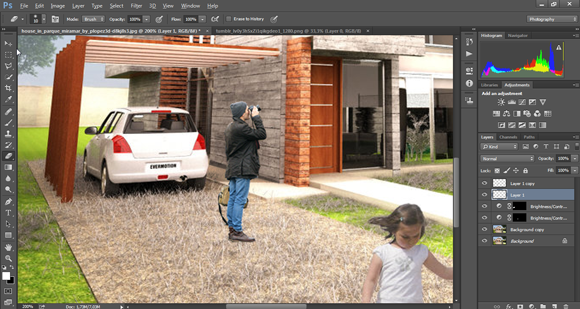
In some cases the shadow object is not “simply” on the ground but will also be casted on a wall for example. In my example I put a person next to the wall like this:
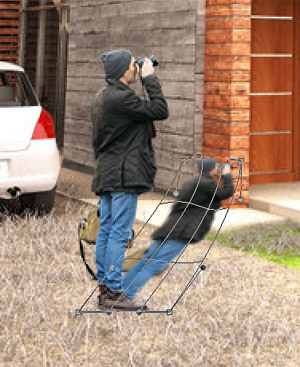
For this shadow we start with the known steps and use the puppet wrap again…
(Notice that the shadow is not casted in the right direction, I am just doing it for showing the effect)
The idea is to give the shadow that kind of effect as if it is “climbing to the wall” (sort of saying it…), or in other words, as if we were breaking it in order to achieve the most similar angle to 90 degrees.
Perhaps in this example it may not look that good as I would have to deform the shadow a lot to get the effect, but you can see it overall.
Shadows are part of architecture renderings
What kind of shadows you want to apply will only depend of two things: your scene, and what you baked as a render.
If the render has enough “substance”, then you will only apply cutout shadows. But then if you have to add many changes to the scenery, whichever reason you have to do it, then you ought to create more complex shadows.
Perhaps in most cases, since you already render the sky or apply a texture in Photoshop you think it’s perfect, Atmospherical Haze won’t be an issue; although experience taught me to be prepared for every kind of scenarios that may arise while working.
In the end, the more demanding judge to please is yourself and how comfortable you feel with the work you are delivering.








This’s an amazing tutorial. This can help us a lot. thanks for this informative article.