
This time we like to share with you a beginners tutorial from Megan about merging a sketch effect with your architecture rendering of an interior scenery. Enjoy it!
With growing impact of technology architectural renderings have become increasingly digital. This transition has been positive as it can save time and provide an increasingly realistic view of a final product. With all of the benefits of digital rendering, hand rendering is becoming a lost art.
While it will probably never be practical again to spend hours elbow deep in paint or markers. Bringing a touch of your own hand back into an image can add depth and interest and help indicate to your client that this is a representation and not the final product. I am here to show you how to quickly bring a hand drawn element back into your work without sacrificing time.
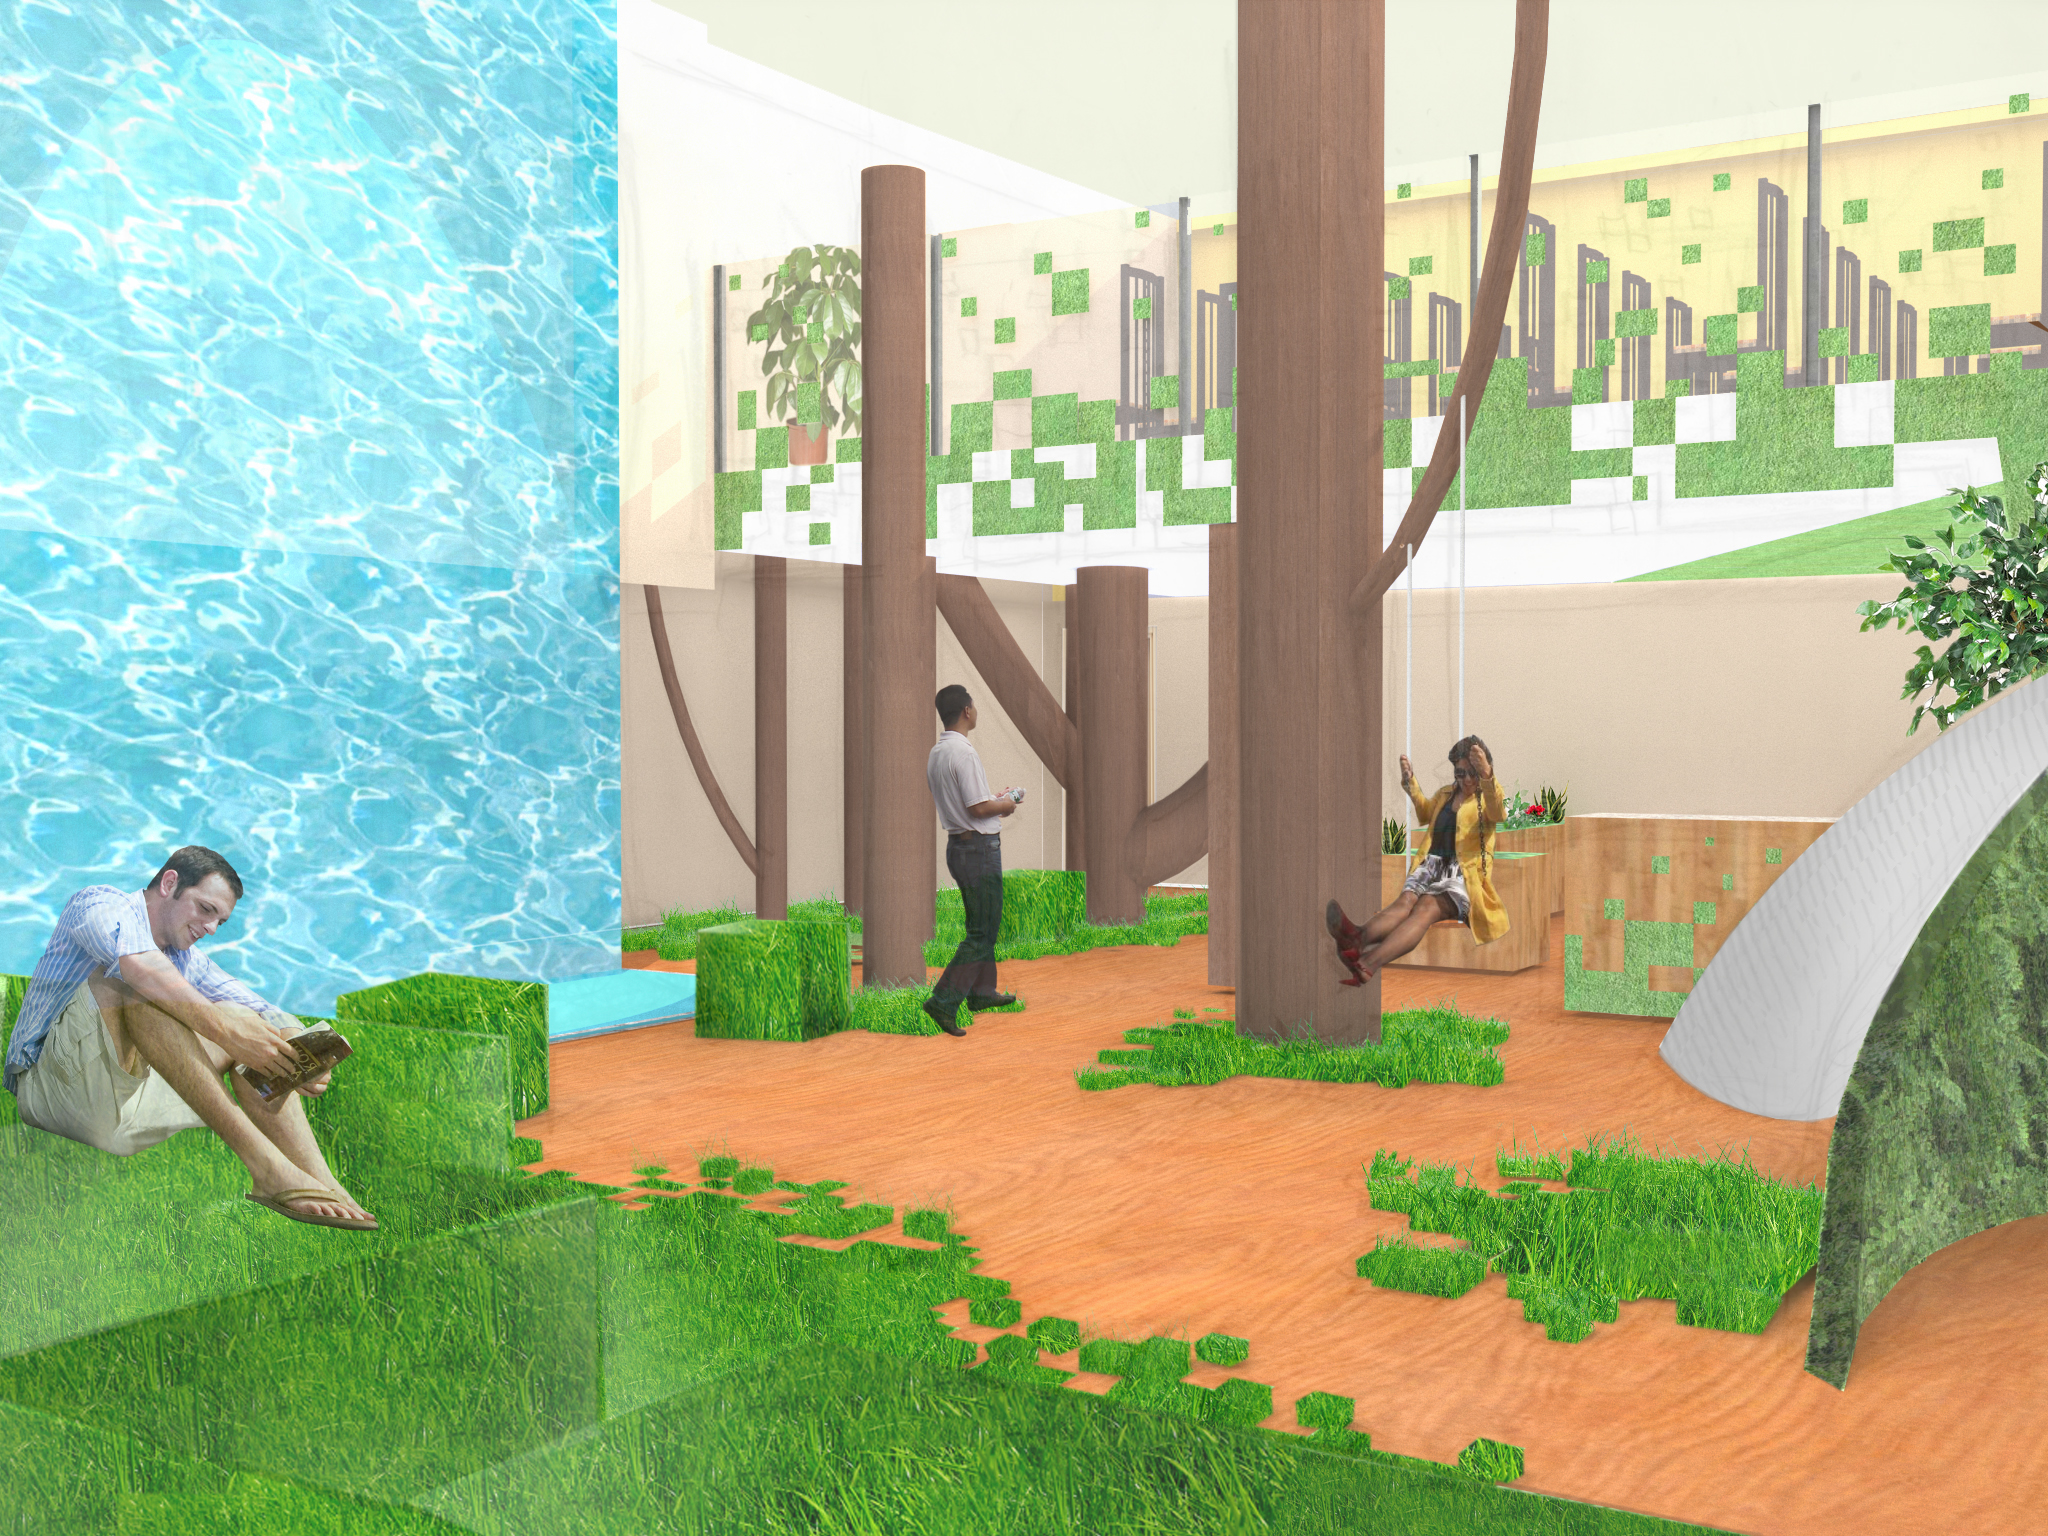
Get your architecture rendering ready
First you will need to create a base rendering, for mine I used Google SketchUp in combination with the rendering program V-Ray and then edited it in Photoshop. However you can use any program to get to this stage. From here we will add your hand drawn element. Treat this as if your rendering were finished so if you want to add any scale figures, details or textures in Photoshop do it now before you print your rendering, that way they can also be enhanced by the hand sketching!
Sketch overtop
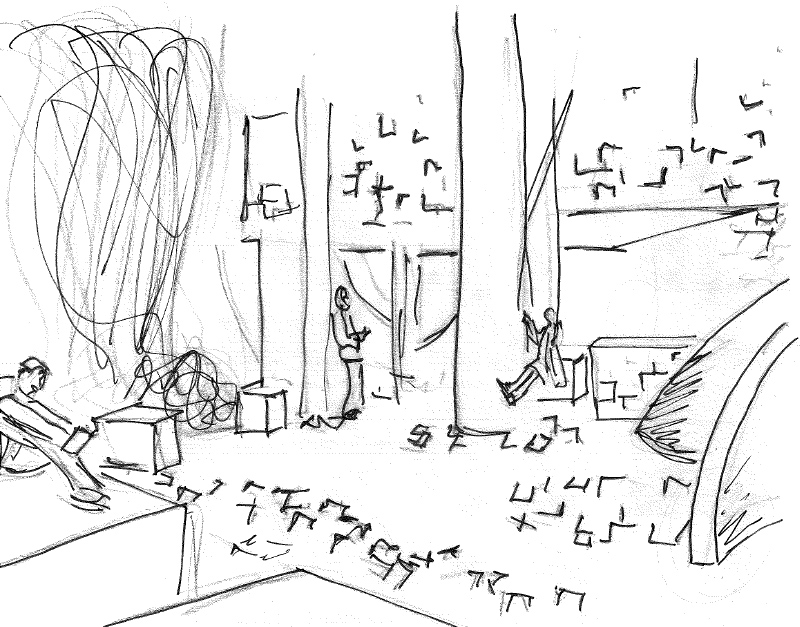
In order to bring a hand drawn quality to your renderings you must first get them out of the computer. This print does not have to be large or high quality, a standard A4 sheet of paper will do. You can use either a pencil or felt tip, just make sure if your using pencil that you push hard enough so the lines are clear and dark. Here’s the fun part once it’s printed you can grab your trace and start sketching.
Loosely trace over your rendering, here is your chance to add your own personal style. Don’t try and make it look perfect. The goal here is to add a sketchy quality to your rendering so keep loose and enjoy the imperfections. Look for areas of the drawing that look too pristine and sketch over them. You should focus on what the important characteristics of the building are and use this as an opportunity to emphasize certain elements while adding texture and style.
Import the hand sketch into Photoshop
Once you are satisfied with your drawing you will need to scan it to take it back into the digital realm, I scanned mine at 300 Dpi. Once you have your rough sketch on the computer you will need to open it up in Photoshop. Don’t open it directly into your existing rendering as it will need to be edited on it’s own first. You can do this several ways but the easiest is to locate your file on your computer, right click on it select open with and then click Photoshop. If your file was a PDF, like mine after you scanned it will prompt you with a dialogue box…

…this is normal, just click okay. Once you have your sketch open you will need to unlock the existing layer it is on. You can do this by dragging the lock located next to the layer to the garbage symbol below it

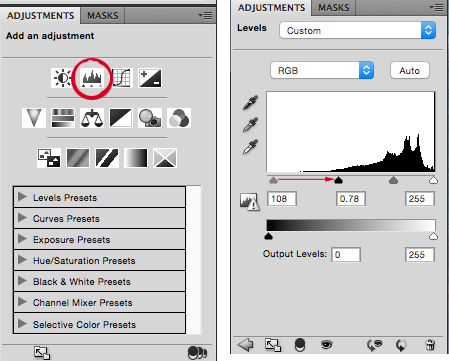
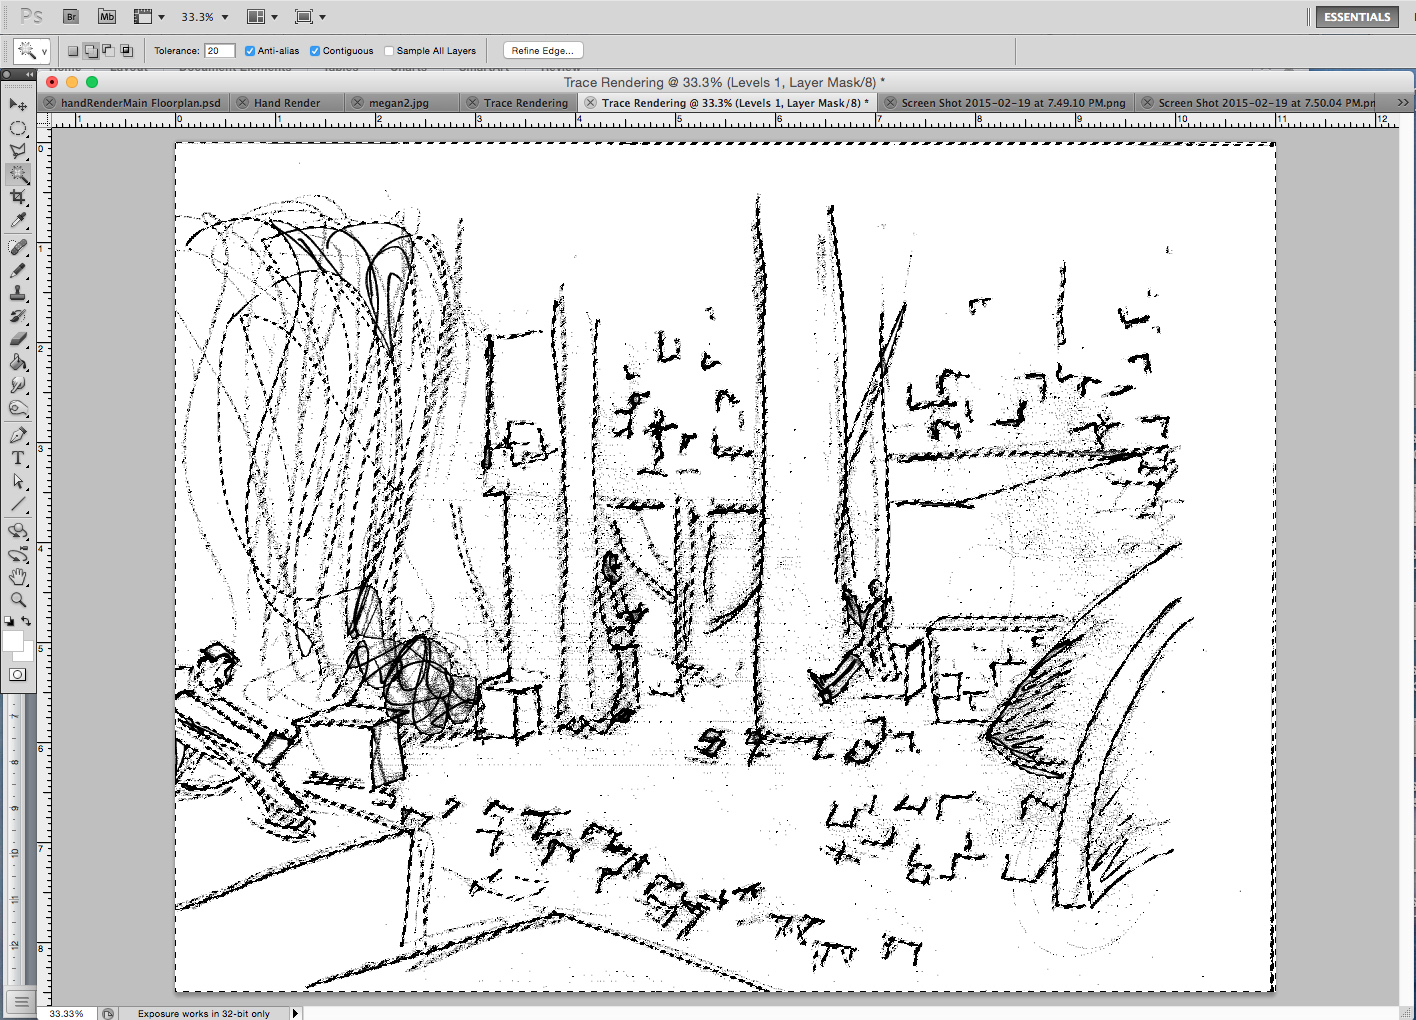
Adjust the levels of the hand sketch
You will want to adjust your levels so that there is the maximum contrast between your trace and pencil. This is will make it easier for the magic wand select the areas you want to get rid of. You will do this by going to the right hand portion of your screen under adjustments. Then select levels now drag your left curser that affects the lightest tones in your photo over to the right until it is at the edge of the curve above. This will turn your pencil lines as dark as possible without making the trace too dark so that the computer can still distinguish them.
Merging the layers of your illustration
Once you have adjusted the levels on your drawing it will have created a new layer, it is important to flatten these two layers before we continue. You can do this by going to the layer tab on your screen right clicking on any of the layers you have and select merge visible.
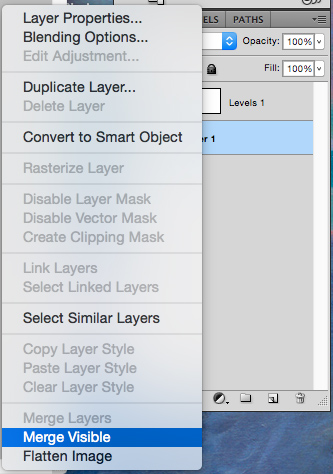
Like the name says this command will flatten any visible layers, since you only have two layers in this drawing and you would like to merge them together, go ahead and press the button. However, be careful if you are to use this feature in the future and you do not wish to merge all of your layers. Make sure that you click the eye button next to any layers you do not wish to merge, making them invisible, before continuing.
Delete the trace
Now we must get rid of all of the background trace texture before we can bring the sketch over top of our rendering. Make sure your layer is still unlocked, if isn’t then when we delete the trace paper Photoshop will replace it with a white background and we will still not be able to add it to our rendering. Click on the magic wand tool …
…and then click anywhere on the trace paper in your drawing, finally press delete. You should begin to see a grey-checkered background behind your pencil sketch. You may also want to change the tolerance of your magic wand; currently mine is set at 20.
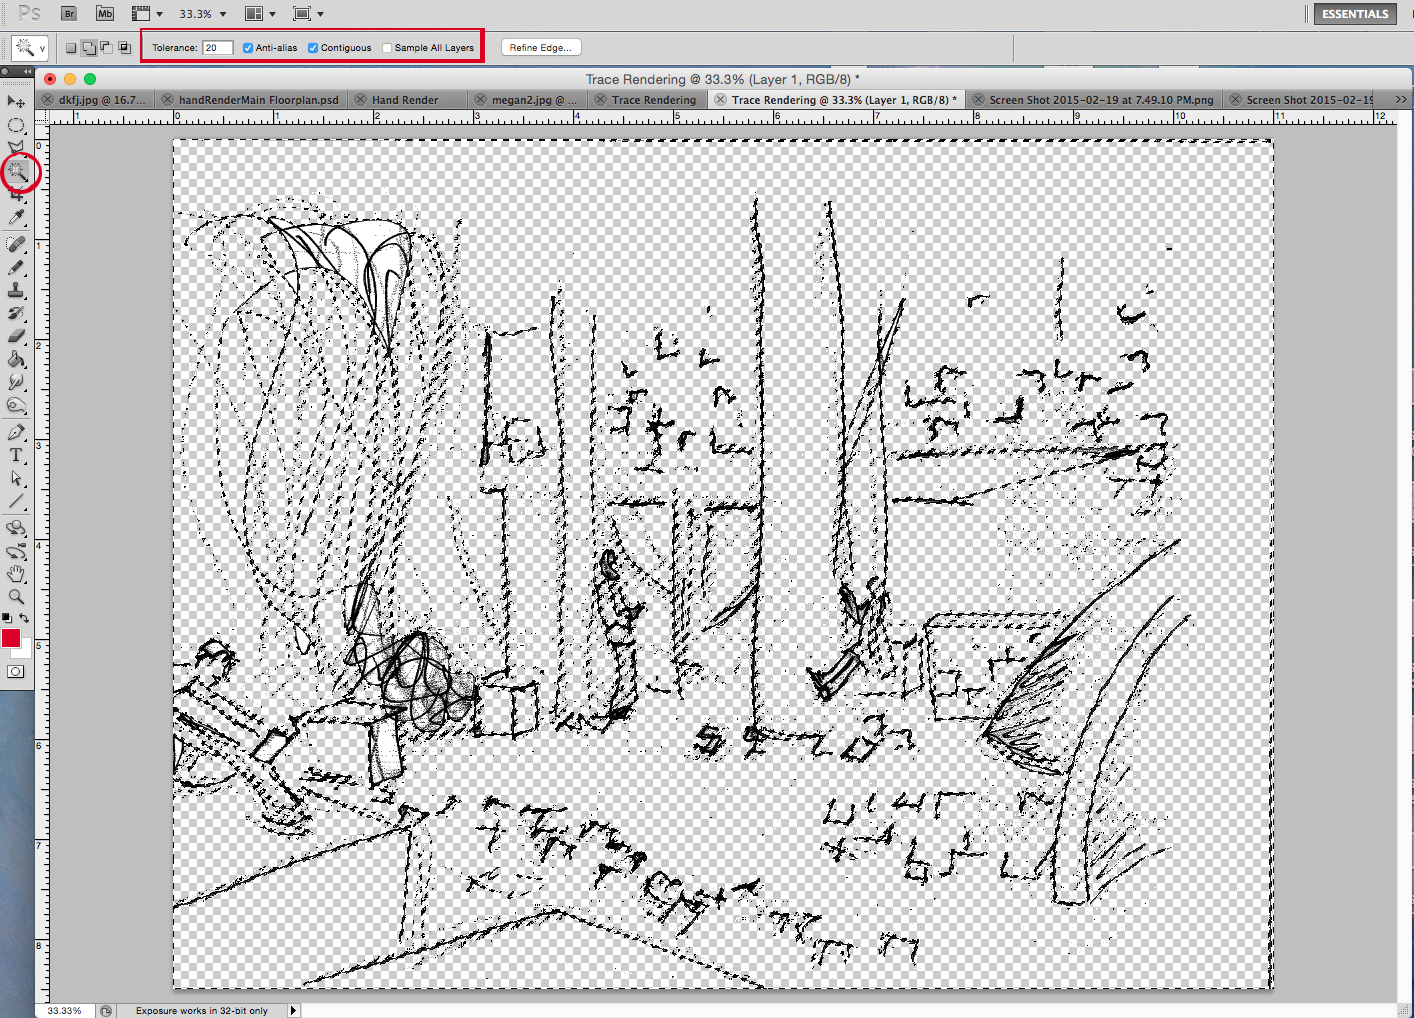
Raising the tolerance tells Photoshop that you want to pick a wider range of tones, so it will collect darker areas of trace. Continue to use the magic wand by clicking on all of the trace paper colored areas of your drawing until you only see your sketched lines.
Bring it overtop of your rendering
Once you have deleted all of the trace it is time to bring your sketch into your rendering. You can do this in two different ways.
- You can highlight your entire sketched image with the rectangular marquee tool and press command c to copy your image, then open up the file you want to place it in and press command v to paste it into that file.
- You can click the move tool grabbing your image and drag it into the new file by moving the arrow up to the top of the screen then hovering over the tab you would like to bring it into. This will then open up that file taking the hand sketch with it.
Scale your sketch
You may need to scale the image now, as scanning it will likely have altered the size of your sketch compared to the original rendering. Make sure that you are on the correct layer; you may want to name it to keep things straight. You can rename your layer by double clicking on the layers name, for example layer 25 a text box should appear and then you can simply type in the desired name. To resize the image press command T allowing you to transform the layer. You should only need to scale the image, as everything should already be proportionate. Grab one of the rectangular corner toggles, pressing shift to ensure that everything stays proportionate.
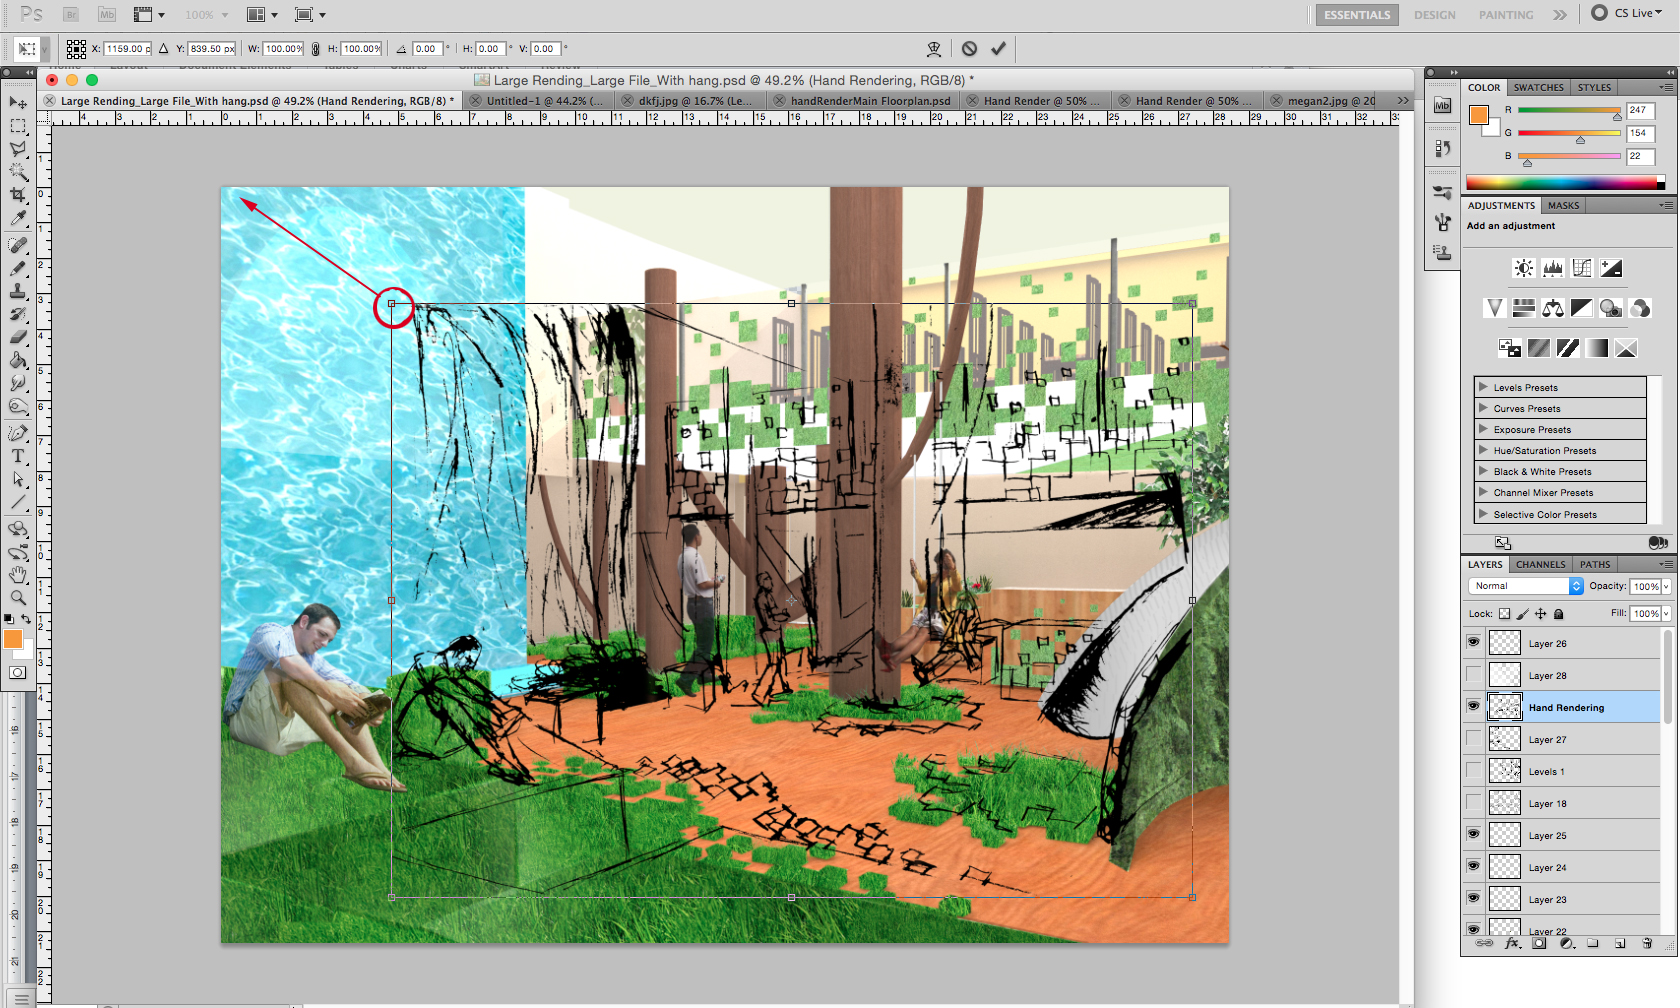
Once you have the drawing appropriately sized and the sketch lines up with the rendering underneath then apply the transformation. If something is not perfectly overlapping where you thought it would don’t worry, this may even add to the appeal of the hand drawn layer.
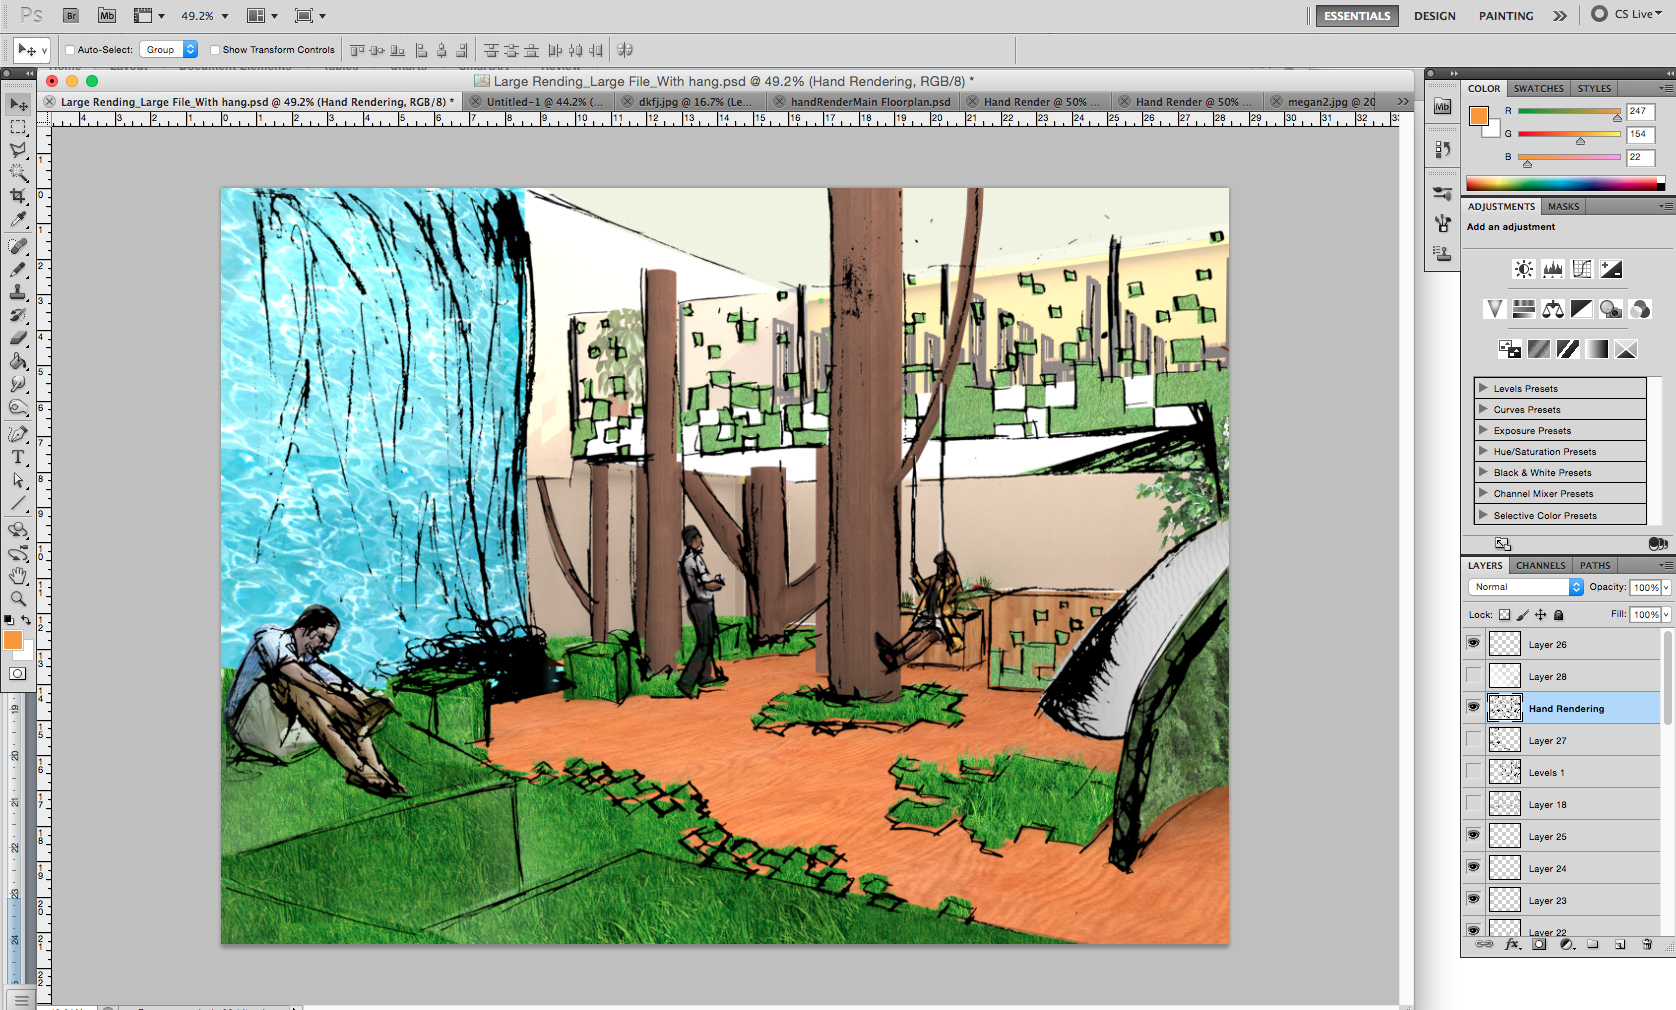
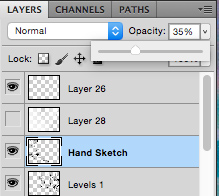
Make it opaque
The dark pencil lines are probably looking a little harsh on your drawing right now, but that’s an easy fix all you need to do is turn down the opacity. Go back to your layers and select the layer with your sketch on it, if it is selected it should appear blue. Above your layers there should be an opacity button; turn down the opacity until you have the desired effect. Mine is set at 35%, but yours might be different depending on the desired intensity and how dark your lines were after you used the levels tool in the original sketch file.
You’re done!
Now you’re done all you need to do is flatten your image to make it smaller for printing or using in other programs. To do this simply go to the top left hand corner of the screen and select file > save as then a dialogue box should appear click where it says Photoshop and change the file type to either a Jpeg or Tiff. This will reduce the file size and speed up using or printing this file in the future. There you have it a quick way to add in a hand drawn appeal to any rendering!


Leave a Reply