Basic Tips to Render your Architectural Scenery with ARCHICAD
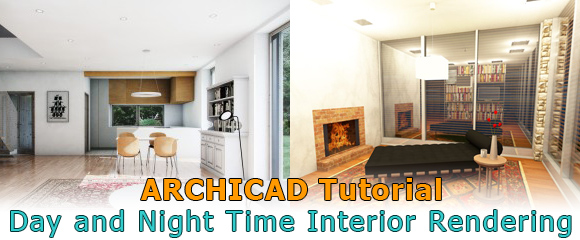
In this archicad tutorial we want to take a look at the 3D modelling and rendering software by Graphisoft and which settings can be used to create architecture visualization of a day and a night time interior scenery.
We are using the latest versions (18 or 19) of ARCHICAD for rendering here. These versions are not so complicated to use, even if you are not skilled BIM modeler, and have a settings tool which is easy to use and modify.
Firstly, it is important to speak about some general rules, which are not directly connected to the direct render setting, but still make a huge impact on the final product.
Therefore, here are some basic tips before starting with the render settings:
- Think about the scene – This may sound naive, but this first step has a huge impact on your future work. You have to think about what you want to show and present. Analyze the nature of the materials you are going to use – rendering machines are trying to simulate reality, accordingly they are imitating their presence in certain situation. Reconsider things like reflection, patterns of the surfaces, density, transparency etc. in order to set your scene smartly.
- Choosing of colors – Sometimes, the wrong colors can make our work seem incomplete or sometimes the hours and hours of working are just invisible. Choose colors and materials wisely, so anyone can distinguish the ambient of the interior. Your rendering should transport your idea and not confuse.
- Regard all the lights in the scene – There is a huge difference between doing a daylight render and the night time one. However, you should always bear in mind that playing with lights (whether natural or artificial) is actually what makes a great render differ from the one which is not so good. Skills to do this in the ARCHICAD will be explained in a more detailed way later in this tutorial.
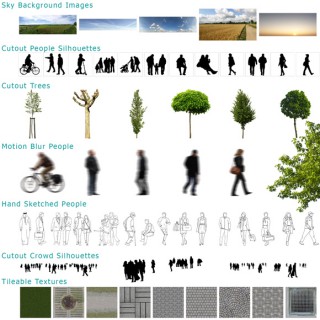
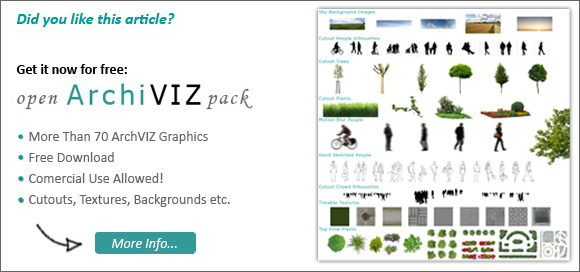
- Use external materials, textures and objects – It is important to say that ARCHICAD is a BIM software, which purpose is to make architectural projects which are ready to be built, not primarily to make beautiful architecture visualization. Undoubtedly, this is an amazing software where you are able to make a great interior scene to present your design and creativity, but if you really want something stunning you should use some tricks – external resources for materials, textures and objects. If you need to grow your library we recommend you to check out our free “OpenArchiVIZpack” and grab a nice collection of 60 cutout trees, plants and persons as well as tileable textures and sky background images for your next architecture visualization project You can use the graphics for your private as well as for your commercial projects! So now excuse to be not prepared for the next rendering job 😉
Free Download of the “OpenArchiVIZpack”:
Now, we are coming straight to the point, how to make a stunning interior architectural rendering. Firstly, we are going to speak about daylight renders and the right setting of the sun, and afterwards, a bit complicated but more than interesting – night scenes.
ARCHICAD Rendering Settings for Interior Daylight Scene
Things you have to set up at first:
- Firstly, set up the scene – choose the elements of the design, objects and add whatever you consider as essential part of the scene.
- Put the right camera angle, which will show all the relevant information and hide any potential weaknesses of the project. Remember, in this particular case (interior), your task is to concentrate on the certain ambient not on the whole. This is really important, because it will save you some time.
- Using CineRender in ARCHICAD is not so complicated – you just need to do the “settings job” properly.
Using CineRender in ARCHICAD: Sun Lightning Settings
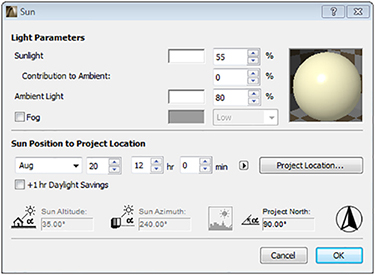
Sun is the most important aspect of the daylight render since natural light spaces are the ones that are to most appealing and outstanding. Setting the Sun in the CineRender has few basic steps – you can use the settings we show here but we recommend to play around with the settings as well.
Find the settings via View > 3D View Options > 3D Projection Settings and click the More Sun… button.
Changing the percent of the Sunlight, and Sun position to Project Location will make changes to your model noticeably – and it is up to you to make the ambient you would like to get.
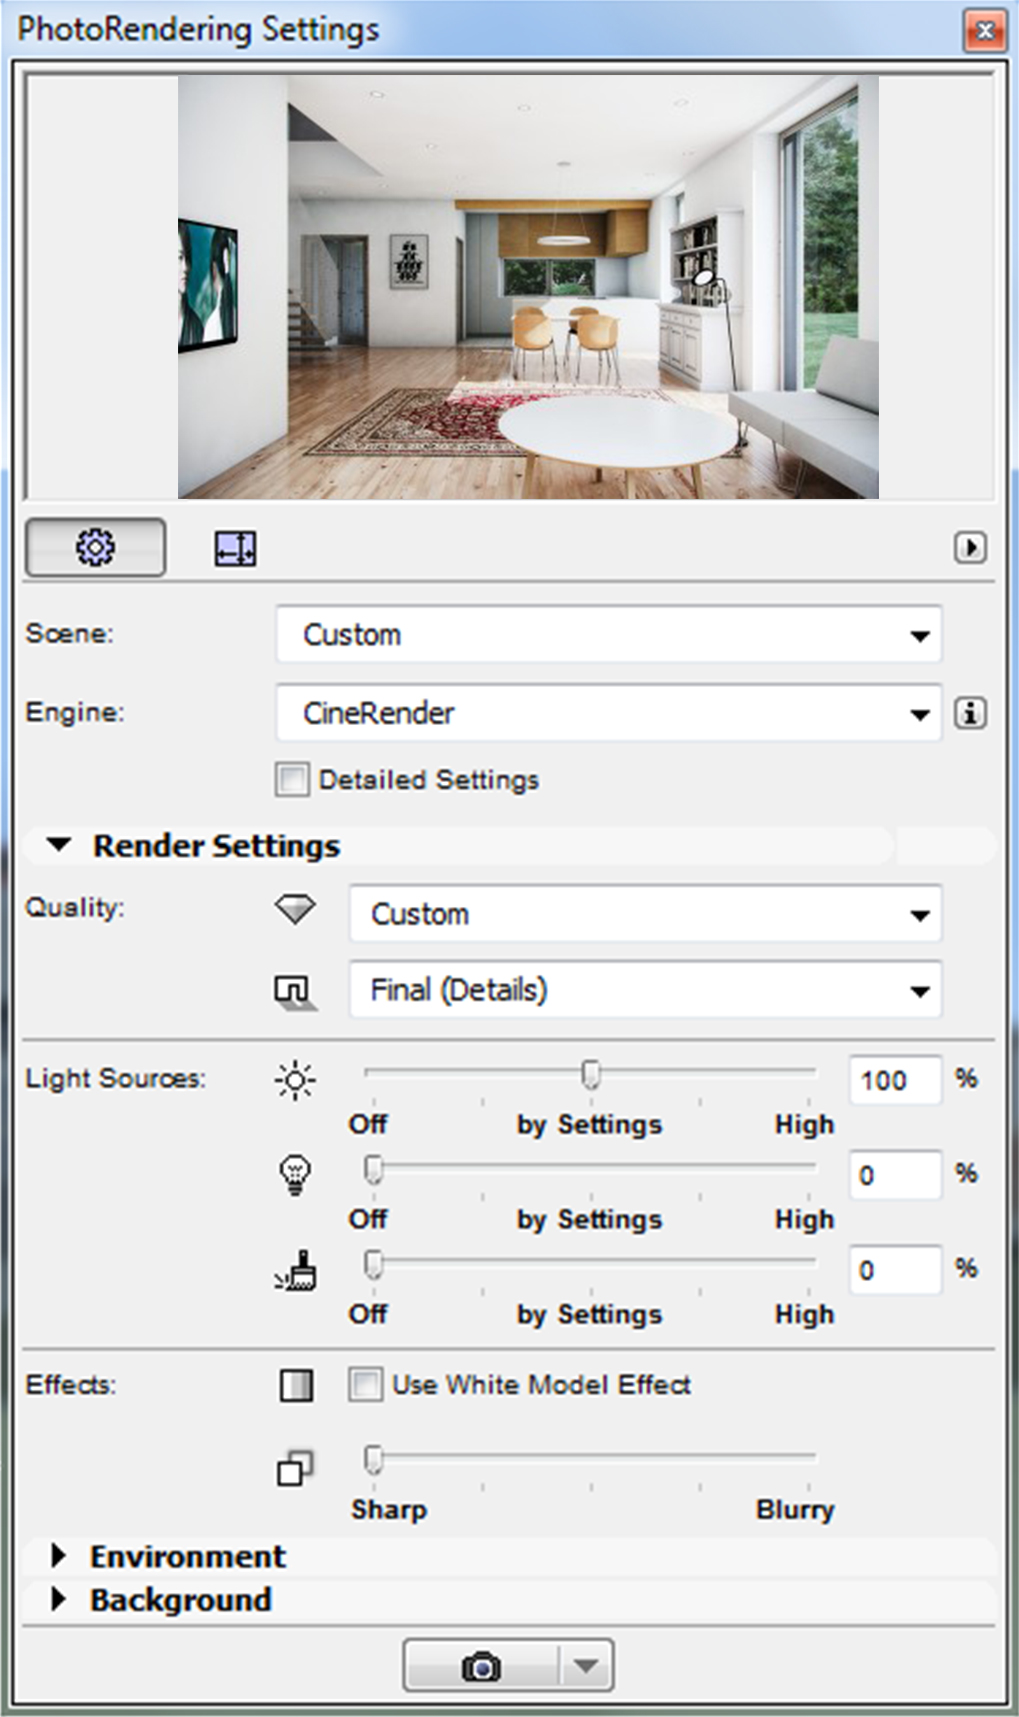
To set up your render, you need to do it the Render Settings Window.
The Document > Creative imaging > Photo renderer settings dialog box, and there are offered some rendering engines in order to fulfil everyone’s needs.
Here you should choose CineRender for rendering engine. There are other render engines, but CineRender presents one with the best performances. Surely, this will not work well enough if other is not adjusted well.
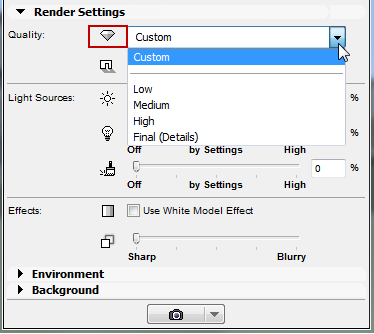
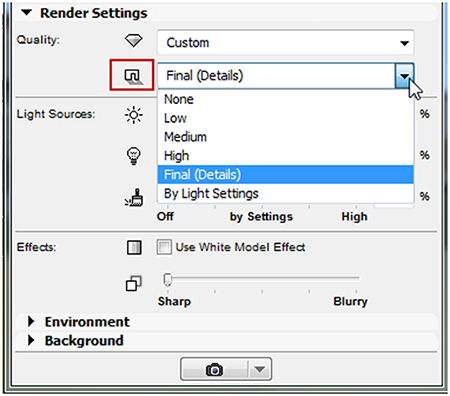
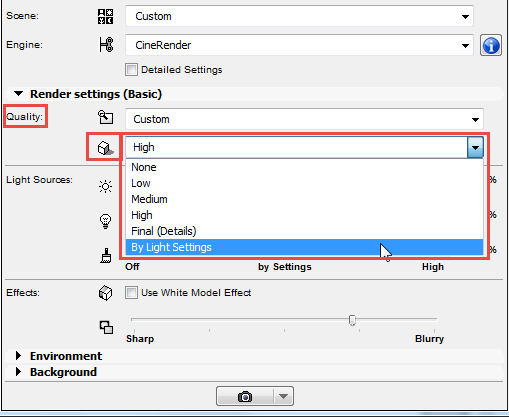
Here is Quality Settings which should be set to final in order to make a great render without lot of post production afterwards. Of course it makes sense for quick renderingtest to work with a lower rendering quality first – but we direclty shoot for the best in this tutorial 😉
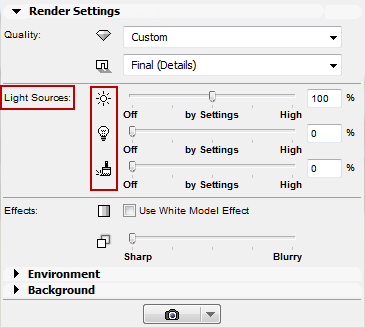
- Sun Intensity
- Lamp Intensity
- Illuminating surfaces
Here you can define the percentage shares of each lightning type in your scenery.
If there is enough openings on the elevations and enough of natural light getting inside, there 100% of the Sun Intensity would be acceptable. If still there is not enough light in the room, it is possible to set more than 100% of the light.
If needed you can add the Lamp Intensity as well to highlight certain spots in the room.
By entering the Environment tab, it is possible to choose the sky you want to. Still there is a few possibilities, so you can load some other textures by clicking the Background tab. If you do not have a proper sky for architectural visualization at hand check out the sky folder our 4000 free textures gallery – you will find lots of photos that can be used as nice background images.
How to Set Up a Night Time ARCHICAD Rendering
Doing a night time render could be a little bit tricky – but setting up lamps and limp intensity properly is the hardest part of job. But we will show you how to find the right settings here.
There are various type of lamps which can be chosen, not as an element of interior design, but to highlight some spots of the space, to make them look “mysterious”, a bit darken, or completely bright. Playing with lights is essential, but still an interesting part of the job.
In correspondence, here is an important note in order to understand how artificial light system works in this software: Rendering will use the lamp intensity exactly as the intensity of lamp objects placed in the model. Therefore, the lamp in the 3D model is not just a part of the interior – it will also add light to the 3D scene!
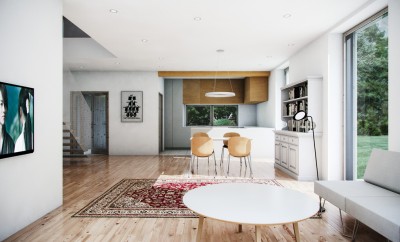
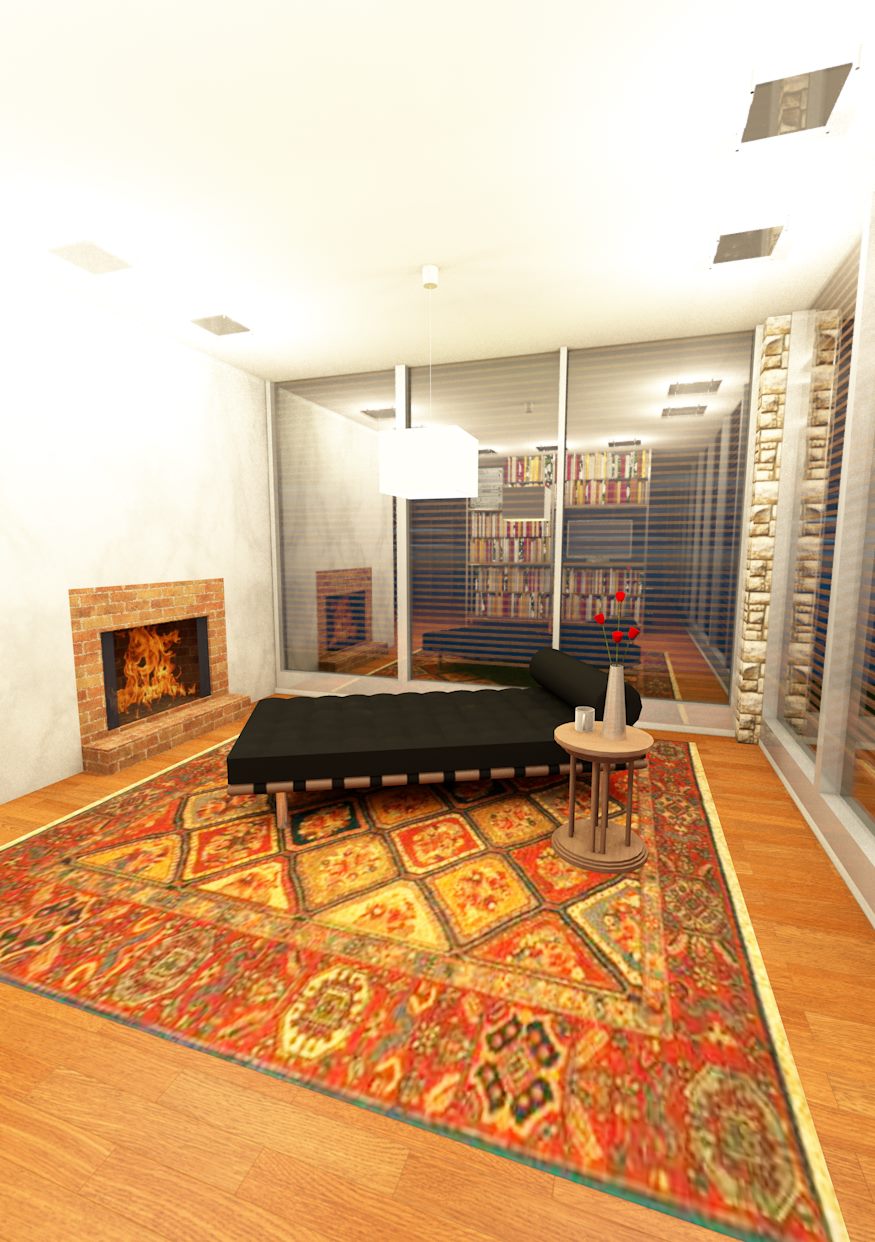
This is the example of the interior rendering in ARCHICAD, by using CineRender as a render engine – without any post production in Photoshop etc. Surely, there are many thing that could be added in this scene but it gives a good impression I think.
How to set up lights for a night time scene
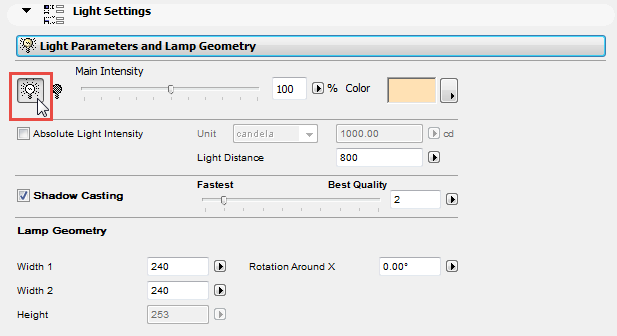
Lights should be set while making a model, and setting of the night scene depends of the physical sky and time of the day, which can be set at the rendering settings tab. In a lamp default settings of ARCHICAD, there is a Light Parameters and Lamp Geometry where all the basics values for the artificial lightening in the interior spaces should be set.
Main Intensity is 100 % by default, but is can be changed due to the need and to the type of the interior. This is important in order to control the intensity of the light in the room – not every part of the room should be enlighten.
Color of the light is also one of the interesting performances. Use it to define the overall color of the atmosphere which is impacted by the materials (e.g. wood) used in your interior design.
Quality should always be set as High, although it takes some time to render the scenes (especially if there are some surfaces with reflection. This could be controlled in CineRender section settings.
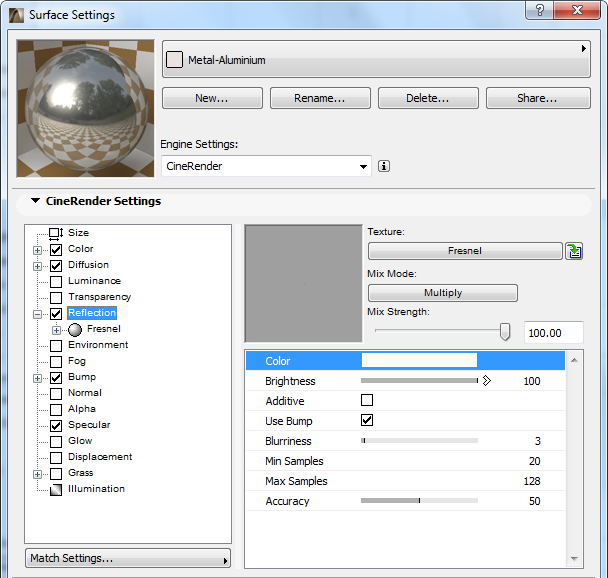
- Next we go via Options > Element Atributes > Surface settings and select the Cine Render as an Engine
After that we adjust the Surface Settings and check Reflection.
This rendering example gives you a proper impression what you can achieve with the CineRender after you apply the techniques learned in this ARCHICAD tutorial for rendering an interior scene:
To Conclude this Rendering ARCHICAD Tutorial…
With this quick run through ARCHICAD tutorial we wanted to touch some basic settings to achieve a proper rendering quality quite quickly with ARCHICAD and the CineRender engine. Hope you enjoyed the insights!
It’s been very helpful, thanks alot.